Did you know that Juliet tomatoes are one of the most popular tomato varieties among gardeners? These delicious tomatoes are cherished for their intense flavor and vigorous growth. Whether you’re a seasoned gardener or just starting out, I have some essential tips to help you grow a bountiful harvest of luscious Juliet tomatoes. From understanding the ideal growing conditions to care and maintenance, this article will guide you every step of the way.
Key Takeaways:
- Juliet tomatoes are a popular variety known for their delicious flavor and robust growth.
- Provide the right growing conditions by planting them in full sun and well-draining soil.
- Start Juliet tomato seeds indoors 6-8 weeks before the last frost date to get a head start.
- Transplant the seedlings outdoors once the danger of frost has passed and the soil temperature reaches 60°F consistently.
- Support the plants with tomato cages or stakes and prune them for optimal fruit production.
Understanding the Growing Conditions for Juliet Tomatoes
Juliet tomatoes are a delightful variety that thrives in the right growing conditions. To ensure optimal growth and a bountiful harvest, it’s essential to provide the right environment for these indeterminate tomatoes.
“The success of growing Juliet tomatoes lies in understanding their specific needs.”
Sunlight
Juliet tomatoes flourish when exposed to abundant sunlight. Choose a sunny location in your garden that receives at least 6-8 hours of direct sunlight each day. This will give the tomatoes the energy they need for robust growth and plentiful fruit production.
Soil
A well-draining soil is crucial for the health and productivity of Juliet tomatoes. They prefer soil that is rich in organic matter, as it provides the essential nutrients necessary for their growth. Before planting, amend the soil with compost or well-rotted manure to enrich it and create the ideal growing conditions.
Spacing
Proper spacing is essential for Juliet tomatoes as it facilitates airflow and helps prevent the spread of diseases. Space the plants 24-30 inches apart in rows that are 36 inches apart. This spacing allows each plant to have enough room to grow and ensures adequate air circulation around the foliage.
With the right growing conditions, including ample sunlight, well-draining soil, and proper spacing, Juliet tomatoes will thrive and reward you with a delicious and abundant harvest.
Starting Juliet Tomato Seeds Indoors
If you want to get a head start on your Juliet tomato plants, starting the seeds indoors is the way to go. By starting seeds indoors, you can give your plants a longer growing season and ensure they are strong and healthy when it’s time to transplant them into the garden.
To start Juliet tomato seeds indoors, follow these steps:
- Choose a sterile seed mix: Select a high-quality seed starting mix that is specifically formulated for seed germination. This will provide the ideal conditions for the seeds to sprout.
- Plant the seeds: Sow the Juliet tomato seeds according to the package instructions. Make sure to plant them at the recommended depth and spacing.
- Provide bottom heat: To promote germination, place the seed tray or pots on a seedling heat mat. The gentle heat will help the seeds sprout faster.
- Water lightly: Moisten the seed starting mix with a misting spray bottle or a gentle shower of water. Avoid overwatering, as it can lead to fungal diseases.
- Find the right location: Place the seed tray or pots in a well-lit area where they will receive bright, indirect sunlight. A south-facing window or artificial grow lights are ideal.
- Maintain temperature and humidity: Juliet tomato seeds germinate best at temperatures between 60-75°F. Keep the seedlings away from cold drafts and maintain a humid environment by covering the tray with a plastic dome or using a humidity dome.
- Fertilize lightly: Once the seedlings have developed their first set of true leaves, you can start fertilizing them with a diluted organic fertilizer. Follow the package instructions for proper dosage.
- Gradually increase pot size: As the seedlings grow, they will outgrow their seed trays. Gradually transplant them into larger pots, allowing their roots to spread and develop fully.
Before transplanting the seedlings outdoors, they need to be hardened off. This means gradually exposing them to outdoor conditions over the course of a week. Start by placing them outside for a few hours each day, gradually increasing the time until they are spending the entire day outdoors. This will acclimate the seedlings to the outdoor environment and prevent transplant shock.
Starting Juliet tomato seeds indoors is a rewarding and effective way to kickstart your tomato garden. It allows you to control the growing conditions and ensure the plants get off to a strong start. So, grab your seed trays and get ready for an abundant harvest of delicious Juliet tomatoes!
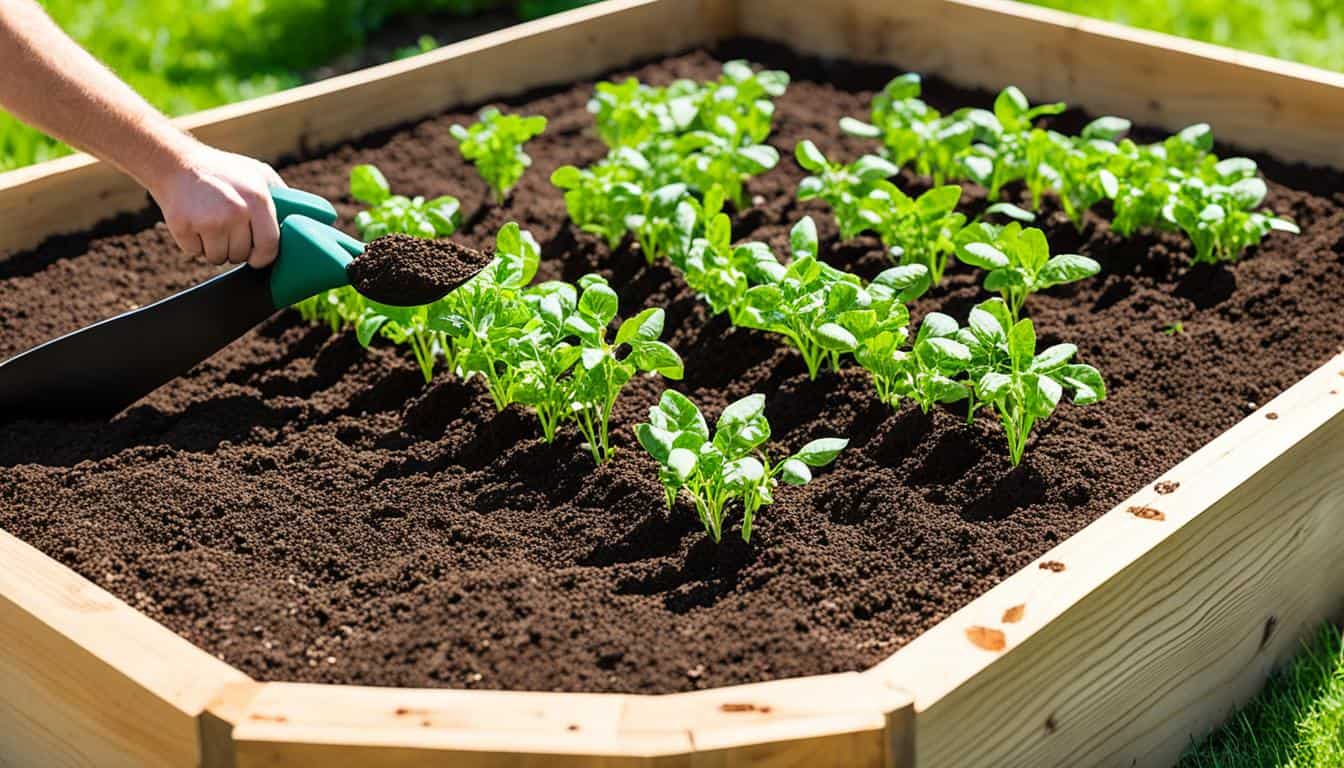
Transplanting Juliet Tomato Seedlings

Once the danger of frost has passed and the soil temperature consistently reaches 60°F, it is time to transplant the Juliet tomato seedlings into the garden. Here are the essential steps to ensure a successful transplant:
- Dig a hole slightly larger than the root ball of the seedling.
- Place the seedling in the hole, burying it up to the first set of leaves.
- Gently firm the soil around the seedling to provide stability.
- Water the transplanted seedling thoroughly to help it settle in its new location.
Transplanting tomato seedlings is a critical step in tomato plant care. Burying the seedling deep encourages the growth of additional roots along the stem, resulting in a stronger and healthier plant. Ensure that the soil is well-draining to prevent waterlogging, as excessive moisture can lead to root rot. The transplanted seedlings may experience some transplant shock initially, but with proper care and nurturing, they will quickly adapt to their new home.
Why Burying Seedlings is Beneficial
Burying seedlings up to the first set of leaves improves root development. As the buried stem comes into contact with soil, it forms roots, providing the plant with a stronger foundation to absorb water and nutrients. This burying technique is particularly effective for indeterminate tomato varieties like Juliet tomatoes, as it promotes robust growth and enhances the plant’s overall vigor.
Supporting and Pruning Juliet Tomato Plants
Juliet tomato plants have a tendency to grow large and heavy, so providing proper support is crucial for their successful cultivation. By using tomato cages or tying the plants loosely to sturdy stakes with soft cloth, you can prevent the plants from flopping over and ensure that the fruit stays off the ground. This helps prevent damage to the fruit and reduces the risk of rot or disease.
Pruning is also essential for maintaining the health and productivity of Juliet tomato plants. One important aspect of pruning is removing the suckers, which are the 45-degree shoots that emerge between the stem and a larger shoot. By removing these suckers, you promote better air circulation within the plant, reduce the risk of overcrowding, and prevent the plant from becoming too top-heavy.
Another pruning technique is to remove some leaves from the lower part of the plant. This helps improve airflow and reduces the likelihood of diseases such as fungal infections. However, it is important not to remove too many leaves, as they play a vital role in photosynthesis and energy production for the plant.
Overall, providing support and pruning Juliet tomato plants are crucial steps in tomato plant care. They help promote plant health, increase fruit production, and prevent common issues such as fruit rot and disease. By following these tomato gardening tips, you can ensure that your Juliet tomatoes thrive and yield a bountiful harvest.
Practical Tips for Supporting and Pruning Juliet Tomato Plants:
- Use tomato cages or sturdy stakes with soft cloth to provide support for the plants.
- Secure the plants gently to prevent damage.
- Remove the suckers to promote air circulation and prevent the plant from becoming top-heavy.
- Prune some leaves from the lower part of the plant to improve airflow and reduce disease risk.
- Be cautious not to remove too many leaves, as they are essential for plant growth.
| Benefits of Supporting and Pruning Juliet Tomato Plants: | Key Points |
|---|---|
| Prevents plants from flopping over and ensures fruit stays off the ground | Improves fruit quality and reduces the risk of rot or disease |
| Promotes air circulation within the plant | Reduces the risk of overcrowding and fungal infections |
| Increases fruit production | Results in higher yields and a more abundant harvest |
| Improves overall plant health | Helps the plant stay vigorous and resist common issues |
Watering and Fertilizing Juliet Tomato Plants

Consistent and adequate watering is crucial for the health and vitality of your Juliet tomato plants. By providing the right amount of water and essential nutrients, you can ensure vigorous growth and a bountiful harvest. Here are some essential tips for watering and fertilizing your Juliet tomatoes:
Watering Tips
- Water deeply: When watering your Juliet tomato plants, make sure to thoroughly soak the soil. This helps ensure that the water reaches the root zone, where it is needed the most.
- Avoid overwatering: While it’s important to keep the soil consistently moist, overwatering can lead to waterlogged roots and diseases. Allow the top inch of soil to dry out slightly between waterings.
- Avoid overhead watering: Wetting the leaves of tomato plants can promote fungal diseases. Instead, water the soil at the base of the plants, directing the water to the root zone.
- Mulch to retain moisture: Applying a layer of straw or wood chips around the plants helps retain moisture in the soil and reduces the need for frequent watering.
Fertilizing Tips
Fertilizing your Juliet tomatoes regularly is essential to provide them with the necessary nutrients for healthy growth and optimal fruit production. Here are some key points to keep in mind:
- Choose a balanced organic fertilizer: Opt for a fertilizer that is specifically formulated for tomatoes or vegetables. Look for a balanced ratio of nitrogen, phosphorus, and potassium (N-P-K).
- Follow the instructions: Read and follow the package instructions for the recommended amount and frequency of application. Applying too much fertilizer can lead to nutrient imbalances and potential plant damage.
- Apply fertilizer at the right time: Start fertilizing your Juliet tomatoes when they have established a strong root system and started producing fruit. Repeat the application every 4-6 weeks throughout the growing season.
- Avoid excessive nitrogen: While nitrogen is important for leafy growth, too much nitrogen can result in excessive foliage at the expense of fruit production. Make sure the fertilizer you choose has a balanced nutrient profile.
By following these watering and fertilizing tips, you can ensure that your Juliet tomato plants receive the proper care and attention they need to thrive. Remember to monitor your plants regularly and make adjustments as needed based on their specific growing conditions. Happy tomato gardening!
Dealing with Common Tomato Pests and Diseases

As you care for your Juliet tomato plants, it’s important to be aware of common pests and diseases that can affect their health. By monitoring your plants regularly and taking appropriate measures, you can protect them and ensure a successful harvest. Here are some tips for dealing with common tomato pests and diseases:
1. Pests
Common pests that can target your Juliet tomato plants include aphids, tomato hornworms, and whiteflies. These pests can cause damage to the foliage and fruits of your plants. To control pests, consider using organic insecticides or opt for handpicking. Regularly inspect your plants and take immediate action if you notice any signs of pest infestation. Remember, early intervention is key to preventing further damage.
2. Diseases
Tomatoes, including Juliet tomatoes, are susceptible to diseases such as blight and fungal infections. To prevent these diseases, make sure to avoid overhead watering, as wet leaves can create a conducive environment for fungal growth. Instead, water at the base of the plants to minimize the risk of splashing water onto the foliage. Adequate airflow is also crucial for disease prevention, so ensure proper spacing between your plants and consider pruning to improve air circulation.
3. Crop Rotation
Implementing crop rotation practices can help reduce the risk of disease in your tomato plants. Avoid planting tomatoes in the same spot for consecutive years to prevent the buildup of soil-borne diseases. Rotate your tomato plants with other non-related crops to break the disease cycle and maintain soil health.
4. Prompt Action
If you notice any signs of disease or infestation, it’s important to take prompt action. Remove affected leaves or fruits to prevent the spread of disease. Consider consulting local gardening resources or experts for specific recommendations tailored to your region and growing conditions.
In summary, to ensure the health of your Juliet tomato plants, keep a close eye on pests and diseases. Take proactive measures to control pests, provide optimal growing conditions, and promptly address any signs of disease or infestation. By diligently caring for your tomato plants, you’ll enjoy a robust and fruitful harvest.
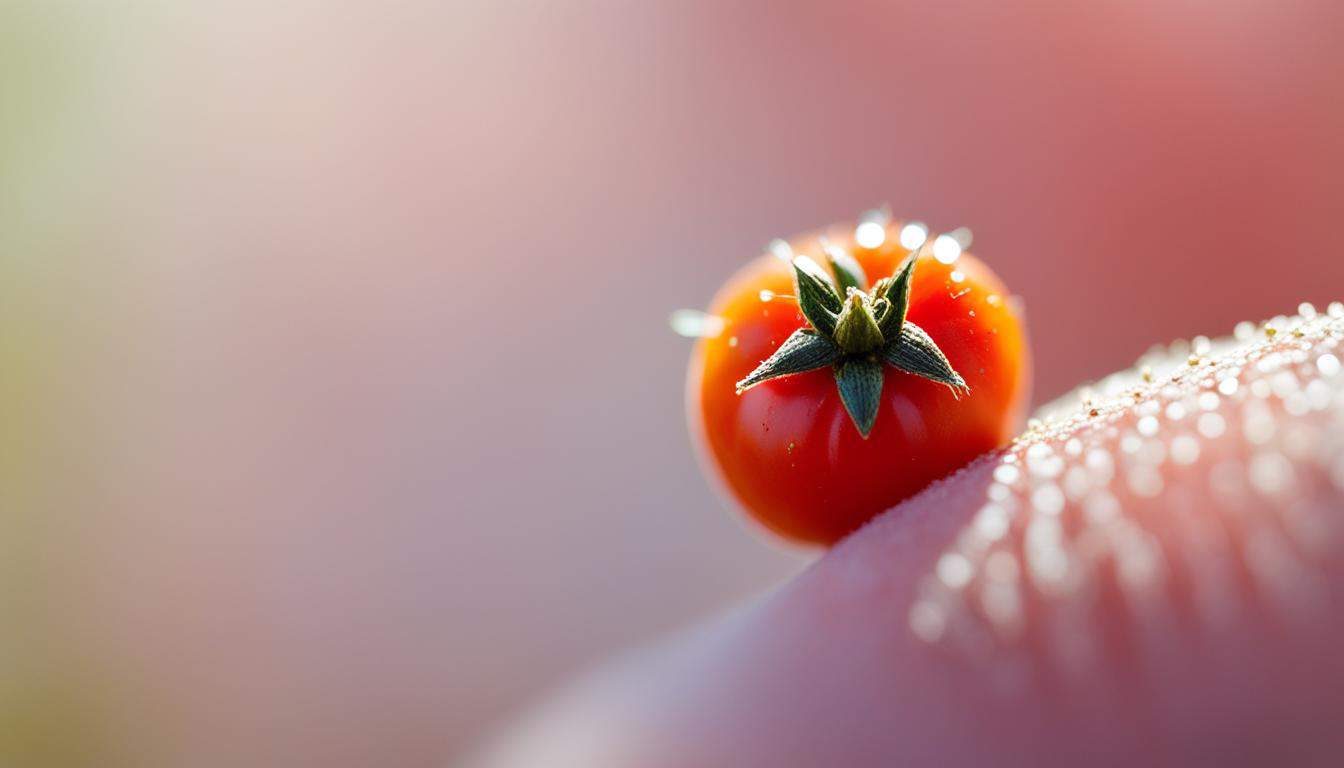
Harvesting Juliet Tomatoes

Once your Juliet tomatoes have reached the perfect stage of ripeness, it’s time to harvest them and enjoy the flavorful fruits of your labor. Here are some tomato gardening tips on how to properly harvest your Juliet tomatoes for optimal taste and quality.
- Wait until the tomatoes are firm, fully colored, and have a glossy appearance. This indicates that they are ripe and ready to be picked.
- To harvest the tomatoes, gently twist or cut the fruit from the stem using a sharp pair of scissors or pruning shears. Be careful not to damage the other fruits or the plant while doing so.
- It’s important to harvest your Juliet tomatoes regularly to encourage new fruit production. This ensures a continuous supply of fresh and delicious tomatoes throughout the growing season.
Juliet tomatoes are incredibly versatile and can be enjoyed in a variety of ways. They are perfect for adding to salads, sandwiches, or salsas to add a burst of flavor. You can also use them to make delicious pasta sauces or roast them alongside other vegetables for a tasty side dish. The possibilities are endless!
Harvesting Tips:
When harvesting Juliet tomatoes, it’s important to handle them with care to avoid bruising or damaging the delicate fruits. Using a sharp pair of scissors or pruning shears will help ensure clean cuts and minimize any potential harm to the plant.
Now that you know how to harvest Juliet tomatoes, you can enjoy the delicious taste of these flavorful salad tomatoes in a wide range of dishes. Harvest with care and savor the rewards of your tomato gardening efforts.
Storing and Preserving Juliet Tomatoes

If you have an abundance of Juliet tomatoes, you can store them for a longer period of time by preserving them. One method is to freeze the tomatoes by washing them, removing the core, and placing them in a freezer bag. Another option is to make tomato sauce or salsa and can them for later use. Properly preserved Juliet tomatoes can be enjoyed throughout the year, allowing you to savor their delicious flavor even after the growing season is over.
Freezing tomatoes is a simple and convenient way to preserve their freshness. Follow these steps to freeze Juliet tomatoes:
- Wash the tomatoes thoroughly to remove any dirt or debris.
- Remove the core of each tomato using a sharp knife or tomato corer.
- Place the cored tomatoes in a freezer bag, leaving some space for expansion.
- Seal the bag tightly and label it with the date.
- Store the frozen tomatoes in the freezer for up to 8-12 months.
To make tomato sauce or salsa, consider the following steps:
- Wash and core the Juliet tomatoes, then blanch them in boiling water for a few minutes until the skins start to loosen.
- Transfer the tomatoes to an ice water bath to cool them down and make peeling easier.
- Remove the skins and chop the tomatoes into desired sizes.
- For tomato sauce, cook the chopped tomatoes with onions, garlic, herbs, and spices until thick and flavorful. Use a blender or immersion blender to achieve a smooth consistency.
- For salsa, combine the chopped tomatoes with onions, peppers, cilantro, lime juice, and spices. Adjust the ingredients according to your taste preferences.
- Pour the tomato sauce or salsa into sterilized jars, leaving some headspace, and process them in a water bath canner according to the recommended times for your altitude.
- Allow the jars to cool, check the seals, and store them in a cool, dark place for long-term preservation.
By preserving Juliet tomatoes, you can enjoy their vibrant flavor and juiciness even when they are out of season. Whether you choose to freeze them for later use or make delicious sauces and salsas, these preservation methods will help you extend the enjoyment of your homegrown tomatoes.
| Preservation Method | Pros | Cons |
|---|---|---|
| Freezing | – Convenient and simple – Retains fresh taste and texture – Ready to use for various recipes |
– Texture may become softer after thawing – Limited storage length |
| Canning tomato sauce or salsa | – Long-lasting preservation – Versatile for future culinary creations – Homemade taste and quality |
– Requires proper equipment and technique – Cooking time may be lengthy |
Preserving Juliet tomatoes ensures a delightful taste experience even when they’re not in season. Whether you freeze them or make flavorful sauces, you can enjoy the vibrant flavors of these salad tomatoes throughout the year.
Companion Planting for Juliet Tomatoes
Companion planting is a gardening technique that involves growing compatible plants together to benefit each other. It’s a clever way to naturally enhance the health and productivity of your garden. When it comes to growing Juliet tomatoes, there is one perfect companion plant that stands out: basil.
Basil is not only a delicious herb that adds flavor to a variety of dishes, but it also has amazing benefits for tomato plants. The strong scent of basil is believed to repel certain pests that may attack tomato plants, such as aphids and tomato hornworms. By interplanting basil with Juliet tomatoes, you can create a mutually beneficial environment that helps protect your tomatoes from these pests.
Basil also provides some beneficial shade for the tomato plants, helping to regulate the soil temperature and prevent excessive evaporation. By planting basil between the tomato plants, you can maximize the use of space in your garden and create a visually appealing arrangement.
Moreover, the combination of fresh tomatoes and basil is perfect for culinary delights. The aromatic flavor of basil complements the juicy sweetness of Juliet tomatoes, making them a match made in heaven for salads, pasta sauces, bruschetta, and more. Harvesting your own Juliet tomatoes and fresh basil from the garden will elevate your culinary creations to a whole new level.
Troubleshooting Common Issues with Juliet Tomatoes
While growing Juliet tomatoes can be a rewarding experience, it’s important to address any issues that may arise to ensure a successful harvest. Here are some common problems you may encounter and how to troubleshoot them:
Yellowing Leaves
If you notice that the leaves of your Juliet tomato plants are turning yellow, it may indicate nutrient deficiencies or overwatering. To address this issue, adjust your fertilization practices and watering routine accordingly. Consider using a balanced organic fertilizer to provide the necessary nutrients for healthy plant growth. Additionally, ensure that you are not overwatering the plants, as excessive moisture can lead to yellowing leaves. Monitor the soil moisture levels and water the plants only when needed.
Fruit Cracks and Splits
Cracks or splits in the fruit can occur due to irregular watering or excessive rainfall. To prevent this issue, maintain consistent moisture levels in the soil. Water the plants deeply and evenly, ensuring that the soil is thoroughly soaked but not waterlogged. Avoid sudden fluctuations in soil moisture by watering regularly and providing adequate drainage. Using mulch around the plants can help regulate soil moisture and prevent extreme fluctuations.
Other Problems
If you encounter any other issues with your Juliet tomato plants, it’s always helpful to consult local gardening resources or experts for personalized advice. Every garden is unique, and specific growing conditions can play a role in the success of your tomato plants. They can provide guidance tailored to your specific situation and help you troubleshoot any problems you may be facing.
Remember, with proper tomato plant care and timely attention to any issues that arise, you can ensure the health and productivity of your Juliet tomato plants. Happy gardening!
Conclusion
Growing Juliet tomatoes can be a satisfying and enjoyable gardening experience. By providing the right growing conditions, proper care, and timely maintenance, you can cultivate a bountiful harvest of luscious and flavorful Juliet tomatoes.
Remember to select a sunny spot in your garden and ensure the soil is well-draining and rich in organic matter. Starting Juliet tomato seeds indoors and transplanting the seedlings at the right time will give them a head start. Supporting and pruning the plants will help them grow strong and produce abundant fruit.
Watering consistently and fertilizing regularly will ensure healthy growth, while paying attention to common pests and diseases will help protect your plants. Harvesting the ripe tomatoes and preserving them for later use will allow you to enjoy their taste even after the growing season ends.
Get creative in the kitchen with various recipes using your homegrown Juliet tomatoes. From fresh salads to savory sauces, these versatile tomatoes will add a burst of flavor to your culinary creations. So, roll up your sleeves, put on your gardening gloves, and start growing your own Juliet tomatoes. Happy gardening and happy tomato growing!


Leave a Reply