Did you know that pumpkins are not only a beloved symbol of fall but also one of the fastest-growing plants in the world? In just a matter of weeks, these humble seeds can transform into sprawling vines that yield bountiful harvests of vibrant pumpkins. Whether you’re a novice gardener or a seasoned green thumb, growing your own pumpkin plants can be a rewarding and educational experience.
When it comes to pumpkin cultivation, there are numerous tips and insights to ensure success. From choosing the right seed varieties to implementing proper care and nutrition, every step of the journey plays a crucial role in witnessing the beauty and abundance of pumpkin plants.
Key Takeaways:
- Plant pumpkins between Memorial Day and the Fourth of July for optimal growth.
- Consider a variety of pumpkin seeds, such as Giant, Fantasy, Miniature, Pie, Porch, and White pumpkins, for different purposes.
- Decide between direct seeding or starting seeds indoors for the best results.
- Prepare the soil with the right pH level (between 5.8 and 6.4) for optimal pumpkin growth.
- Water the plants regularly, take measures to control pests and diseases, and encourage pollination for robust fruit development.
The Best Time to Plant Pumpkins
According to agricultural and horticulture specialists, the best time to plant pumpkins is between Memorial Day and the Fourth of July. This period, also known as the pumpkin planting season, provides an ideal window for optimum growth and development of pumpkin plants. By planting during this time, you can ensure that your pumpkins have enough time to mature before the fall season arrives.
Memorial Day and the Fourth of July are significant dates on the calendar, representing the transition from spring to summer. The warmer weather, longer daylight hours, and increased sunshine during this time create favorable conditions for pumpkin growth. The summer season is also a great opportunity for novice gardeners and families to engage in gardening activities together.
By planting pumpkins during this timeframe, you can take advantage of the longer days and warmer temperatures to promote healthy growth and maximize your chances of a successful harvest. Additionally, planting during the summer allows you to enjoy the beauty of pumpkins as they grow and flourish throughout the season.
So, mark your calendars and get ready to plant your pumpkins between Memorial Day and the Fourth of July. It’s the ideal pumpkin planting time that ensures you’ll have a bountiful harvest and vibrant pumpkins to enjoy in the fall.
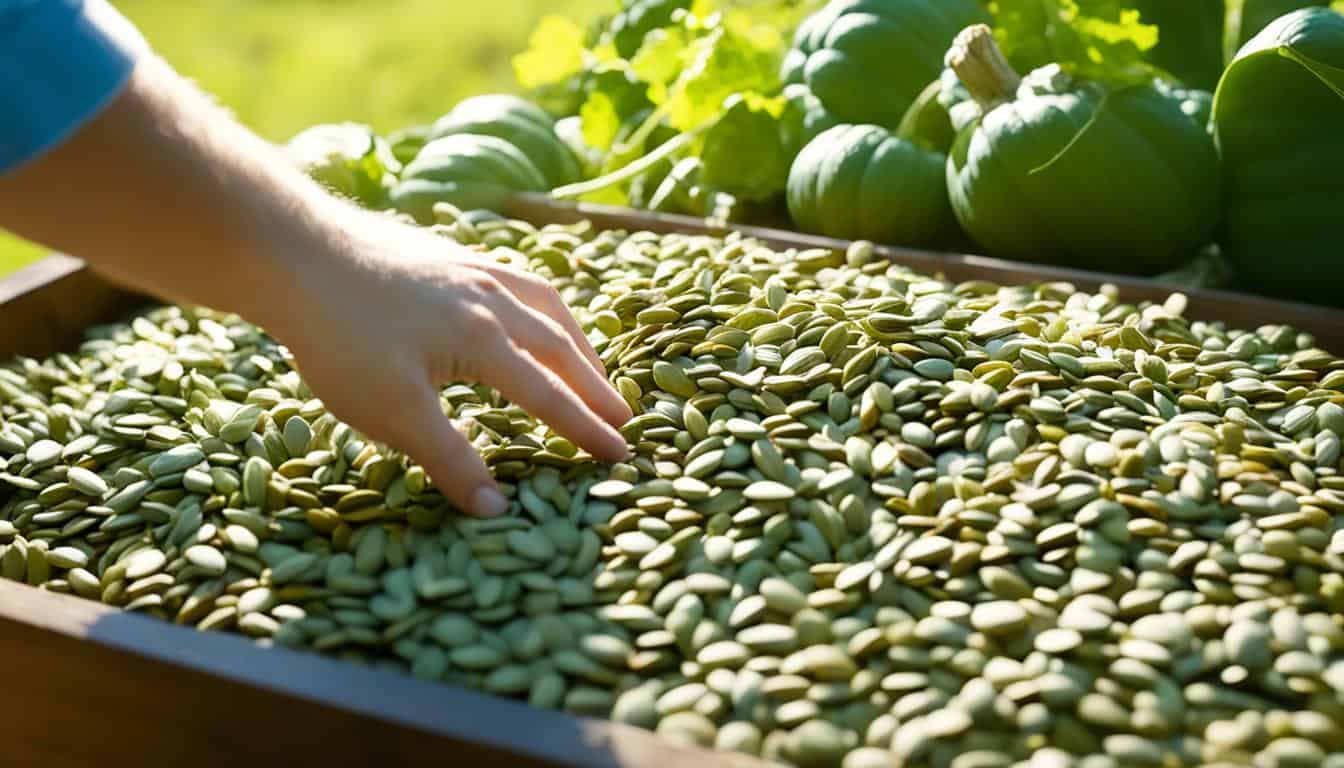
Choosing the Right Pumpkin Seed Variety
When it comes to growing pumpkins, choosing the right seed variety is essential for a successful harvest. Here are some popular options to consider:
- Giant Pumpkins: These pumpkins can grow to weigh 50 to 100 pounds, making them perfect for children to climb on and create lasting memories.
- Fantasy Pumpkins: Add a whimsical touch to your front porch with varieties like the Cinderella pumpkin, known for its unique shape and enchanting appearance.
- Miniature Pumpkins: If you’re looking for tiny pumpkins that fit in the palm of your hand, consider varieties like Jack-Be-Little. These adorable pumpkins are not only great for decorations but also make lovely table centerpieces.
- Pie Pumpkins: For those who love baking delicious pies, opt for varieties like Small Sugar Pie or Green-Striped Cushaw. These seeds produce pumpkins with a higher sugar content, perfect for creating mouthwatering desserts.
- Porch Pumpkins: Carving jack-o’-lanterns is a Halloween tradition, and varieties like Howden or Connecticut Field seeds are ideal for this purpose. Their large size and sturdy flesh make them easy to carve, resulting in stunning jack-o’-lanterns.
- White Pumpkins: For a unique twist on the traditional orange pumpkin, consider growing varieties like Polar Bear. These white pumpkins add an elegant touch to any autumn display and can be painted or carved for a customized look.
Choosing the right pumpkin seed variety allows you to explore different sizes, shapes, and colors, adding diversity and charm to your pumpkin patch.
Remember to select seeds that align with your desired purpose, whether it’s baking pies, carving jack-o’-lanterns, or simply enjoying the vibrant colors of different pumpkin varieties.
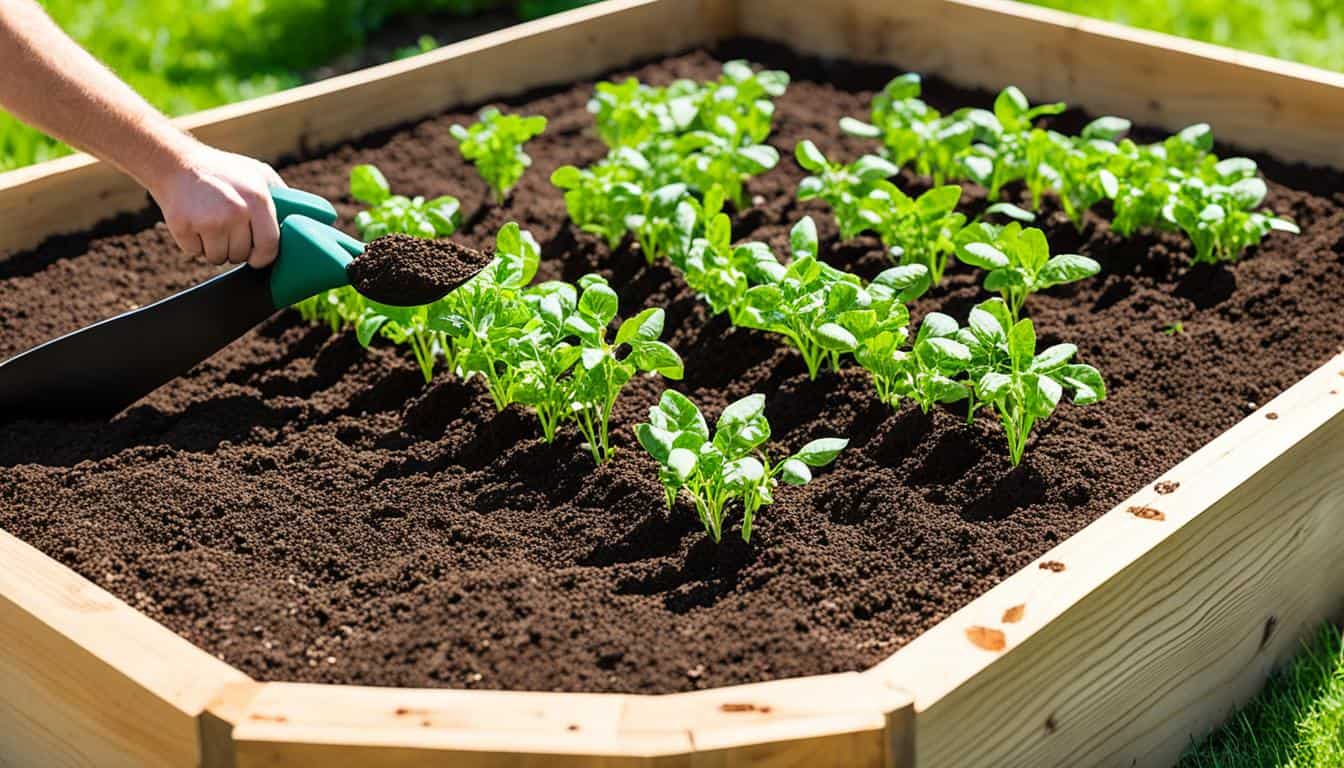
Planting Methods for Pumpkin Seeds
When it comes to planting pumpkin seeds, there are two main methods to consider: direct seeding and indoor seed starting. Each method has its advantages and considerations, so let’s explore the options.
Direct Seed Planting
Direct seeding involves planting the pumpkin seeds directly into the ground where you want them to grow. This method is suitable for gardeners with sufficient space and a longer growing season. Here’s how to do it:
- Choose a sunny location in your garden with well-drained soil.
- After the danger of frost has passed, sow the pumpkin seeds at a depth of 1 to 2 inches, following the recommended spacing for the specific variety.
- Water the seeds thoroughly after planting to encourage germination.
- Keep the soil consistently moist until the seedlings emerge.
- Once the seedlings are established, thin them out, leaving the strongest plants spaced according to the variety’s requirements.
Indoor Seed Starting
If you want to get a head start on the growing season or live in a region with a shorter season, indoor seed starting is a great option. Follow these steps to start your pumpkin seeds indoors:
- About three weeks before the last frost date, plant the pumpkin seeds in biodegradable pots filled with seed-starting mix.
- Place the pots in a warm and well-lit area, such as a sunny windowsill or under grow lights.
- Keep the soil consistently moist but not waterlogged.
- Once the danger of frost has passed and the seedlings have grown for about two weeks, they can be transplanted outdoors.
- Choose a sunny location in your garden and carefully transplant the seedlings, taking care not to disturb the roots.
Regardless of the method you choose, it’s important to prepare the seedbed properly and provide adequate spacing between the seeds or seedlings. Pumpkin vines can grow extensively, so allowing enough room for them to spread is crucial for optimal growth and development.
For a visual representation of the differences between direct seed planting and indoor seed starting, refer to the table below:
| Direct Seed Planting | Indoor Seed Starting |
|---|---|
| Seeds planted directly into the ground. | Seeds started in pots indoors. |
| Suitable for gardeners with ample space and a longer growing season. | Ideal for gardeners with a shorter growing season or who want an early start. |
| Plant seeds at the recommended depth and spacing. | Transplant seedlings outdoors after the danger of frost has passed. |
| Requires consistent watering and soil moisture for germination. | Seedlings need warmth, light, and consistent moisture to grow indoors. |
| Seedlings can be thinned out once established. | Carefully transplant seedlings outdoors, taking care not to disturb the roots. |
By understanding the differences between direct seed planting and indoor seed starting, you can choose the best method that suits your gardening needs and preferences. Whichever method you choose, take care to provide the necessary conditions and care for your pumpkin seeds or seedlings to thrive.
Soil Preparation for Pumpkins

Pumpkins require specific soil conditions for optimal growth. Understanding and preparing the soil in your pumpkin patch is essential to ensure a successful harvest. In this section, I will guide you through the important steps of soil preparation for pumpkins, including testing the soil pH, adding lime if necessary, and preparing the pumpkin seed bed.
Testing the Soil pH
Before planting pumpkins, it’s crucial to test the soil pH. Pumpkins prefer a slightly acidic to neutral soil pH ranging from 5.8 to 6.4. To determine the pH level, you can use a soil testing kit or have your soil tested by a professional laboratory. This will help you understand if your soil falls within the suitable range for growing pumpkins.
Adding Lime to Adjust Soil pH
If the soil pH is too low (acidic), you may need to add lime to raise it to the optimal range for pumpkin growth. Lime helps neutralize the acidity, making the soil more alkaline. However, it’s important to follow the recommendations from your soil test results to determine the right amount of lime to add. This will ensure that you don’t overcorrect the pH and cause imbalances in the soil.
Preparing the Pumpkin Seed Bed
Once you have tested and adjusted the soil pH if necessary, it’s time to prepare the pumpkin seed bed. Start by tilling the garden using a disc harrow or a rotating tiller. This will help break up the soil, remove any weeds or debris, and create a loose and well-aerated seed bed.
When planting pumpkin seeds, make sure to adhere to the recommended planting depth. Generally, pumpkin seeds should be planted at a depth of ¾ to 1¼ inches. Ensure proper coverage with soil to protect the seeds and promote germination.
Water the pumpkin patch regularly to keep the soil consistently moist. This will facilitate the germination of the seeds and support healthy growth. Avoid overwatering, as excessive moisture can lead to rot and other issues.
Watering and Nutrition for Pumpkin Plants

Pumpkins require consistent moisture to thrive. If it hasn’t rained in a while, it is important to irrigate the pumpkin patch with one inch of water per week. Water deeply, especially during fruit set, and avoid watering foliage and fruit on sunny days to prevent rot and disease.
Additionally, pumpkins are heavy feeders and need adequate nutrition for optimal growth. Fertilize the plants with a high-nitrogen formula before the vines start to run to promote leaf and vine growth. Switch to a high-phosphorus formula before the blooming period to support root growth, flowering, and fruit set. After fruit set, supplement plant feeding with potassium to further promote fruit growth and health.
Fertilizer Application Recommendations for Pumpkins
| Fertilizer Type | Application Time | Application Rate |
|---|---|---|
| High-Nitrogen Formula | Before vines start to run | Follow manufacturer’s instructions |
| High-Phosphorus Formula | Before blooming period | Follow manufacturer’s instructions |
| Potassium Supplement | After fruit set | Follow manufacturer’s instructions |
By adequately watering and providing proper nutrition to your pumpkin plants, you can ensure their health and promote successful fruit development. Remember to monitor soil moisture, avoid watering foliage on sunny days, and fertilize at the right stages for optimal results.
Pest and Disease Management for Pumpkin Plants

Pumpkin plants are not immune to pesky pests and troublesome diseases. It’s important to be vigilant and take proactive measures to protect your plants and ensure a successful harvest. Two common threats that pumpkin plants face are cucumber beetles and fungal diseases such as powdery mildew and downy mildew.
Pesky Pests: Cucumber Beetles
Cucumber beetles can wreak havoc on your precious pumpkin plants. These striped or spotted pests can chew on leaves, stems, and even flowers, hindering the growth and productivity of your plants. Regular scouting and monitoring for cucumber beetles is crucial in preventing infestations.
One natural technique to control cucumber beetles is to implement a method called “trap cropping.” By planting trap crops such as radishes or nasturtiums near your pumpkin plants, you can draw the beetles away from your valuable pumpkins and redirect their attention elsewhere.
Fungal Foes: Powdery Mildew and Downy Mildew
Fungal diseases like powdery mildew and downy mildew can quickly damage pumpkin plants, especially in the early to middle of July. Powdery mildew appears as a white, powdery substance on the leaves, while downy mildew manifests as yellow or brown patches with a downy texture.
Regular monitoring of your pumpkin plants can help you detect and address these fungal diseases promptly. To prevent powdery mildew and downy mildew, it’s important to avoid overhead watering, as wet foliage creates an ideal environment for fungal growth. Instead, water at the base of the plants to keep the leaves dry.
Pumpkin Disease Prevention
In addition to monitoring and addressing specific pests and diseases, several general prevention measures can help protect your pumpkin plants. Good air circulation is essential, so avoid overcrowding your plants and prune any overcrowded or diseased foliage. Implementing organic fungicides can also provide an extra layer of protection against fungal diseases.
Remember, prevention is key when it comes to pest and disease management. By being proactive and implementing these preventive measures, you can give your pumpkin plants the best chance to thrive and produce a bountiful harvest.
Pollination and Fruit Development for Pumpkin Plants

Pollination is a critical stage in the growth of pumpkin plants. Once the flowers on the pumpkin plant bloom, it is essential to avoid spraying insecticides in the patch to allow bees to pollinate the fruit. Bees play a vital role in the successful development of pumpkin fruits.
After pollination, it is crucial to keep the plants well-irrigated to support the growth of the developing fruit. Adequate water and nutrition are essential for the healthy and robust development of pumpkin fruits.
“Bees are nature’s little helpers when it comes to pumpkin pollination. By not harming them with insecticides, we give them the opportunity to do their job and ensure a bountiful harvest of pumpkins.”
In addition to pollination, proper care is required during fruit development. Pruning the vines can help concentrate the plant’s energy on fewer fruits, resulting in more attractive and well-formed pumpkins. Repositioning fruits can also ensure optimal fruit shape and growth.
| Tip | Description |
|---|---|
| 1 | Avoid insecticides to allow bees to pollinate the fruit |
| 2 | Keep the plants well-irrigated for fruit development |
| 3 | Prune vines to redirect plant energy to fewer fruits |
| 4 | Reposition fruits for optimal shape and growth |
By taking these post-pollination care measures, you can ensure the successful development and quality of your pumpkin fruits.
Harvesting and Caring for Pumpkins

Harvesting pumpkins at the right time ensures optimal ripeness and storage longevity. To determine when to harvest your pumpkins, look for the following signs of ripeness:
- The pumpkin has turned a deep, vibrant orange color.
- The stem, or peduncle, has darkened and dried out.
- The rind feels hard when thumped with your finger.
When harvesting, it’s important to handle the pumpkins carefully to avoid bruising, as damaged pumpkins can rot quickly. Use a sharp knife or pruners to cut the stems, leaving at least 3 to 4 inches attached to the fruit. This helps prevent rot and maintains the pumpkin’s freshness.
After harvesting, it’s beneficial to cure your pumpkins for about 10 days in a sunny spot. This process toughens the skin, extends the storage life, and intensifies the flavor. Ensure there is good air circulation during curing to prevent mold formation.
Once the pumpkins have been cured, it’s time to store them. Find a cool, dry location where temperatures range between 50 to 55°F (10 to 13°C). Proper storage conditions are crucial for maintaining the longevity and quality of your pumpkins.
| Harvesting and Caring for Pumpkins Tips |
|---|
| Harvest pumpkins when the rind is hard and fully orange. |
| Cut the stems carefully, leaving a 3 to 4-inch length. |
| Cure freshly harvested pumpkins for about 10 days. |
| Store pumpkins in a cool, dry location with temperatures around 50 to 55°F (10 to 13°C). |
Tips for Growing Giant Pumpkins
Growing giant pumpkins can be an exciting endeavor, especially if you want to see the impressive sizes they can achieve. To successfully grow giant pumpkins, here are some helpful tips:
- Choose the Right Variety: Dill’s Atlantic Giant is a popular variety known for its massive size, making it perfect for growing giant pumpkins.
- Start Indoors: Begin by starting the seedlings indoors. This allows you to control the growing conditions and gives the seedlings a head start.
- Thinning Seedlings: Once the seedlings have sprouted, thin them to the best 1 or 2 plants. This gives the remaining plants more space to grow and thrive.
- Feed Heavily: Giant pumpkins require a lot of nutrients to support their rapid growth. Feed them with a high-nitrogen formula to provide the necessary nutrition for robust plant development.
- Cultivate Shallowly: When cultivating the soil around the pumpkin plants, do so shallowly to avoid damaging the shallow root system.
- Pinch off Vine Ends: After a few pumpkins have formed, pinch off the ends of each vine. This redirects the plant’s energy towards fruit growth, allowing the pumpkins to reach their full potential.
- Prune the Vines: Regularly prune the vines by removing unnecessary secondary and tertiary fruit. This helps redistribute the plant’s energy to the remaining pumpkins, resulting in larger fruits.
- Proper Fruit Positioning: Position the pumpkins carefully to ensure they have ample space to grow. Avoid overcrowding, as it can hinder their size and shape.
By following these tips, providing ample space, proper nutrition, and careful fruit positioning, you’ll increase your chances of growing giant pumpkins that will amaze everyone.
Comparison of Giant Pumpkin Varieties
| Variety | Weight | Characteristics |
|---|---|---|
| Dill’s Atlantic Giant | Up to 2000 pounds | Massive size, ideal for giant pumpkin competitions |
| Prizewinner | Around 1000 pounds | Large size, uniform shape, good for exhibitions |
| Big Max | Around 100 pounds | Large size, bright orange color, great for carving |
| Atlantic Giant II | Up to 1500 pounds | Impressive size, high yield potential |
Recommended Pumpkin Varieties for Different Purposes
The variety of pumpkin you choose can determine its best use. When it comes to carving jack-o’-lanterns for Halloween, consider pumpkin varieties like Autumn Gold, Magic Lantern, and Merlin. These varieties have excellent carving qualities and are commonly used for creating spooky designs and decorations.
If you’re planning to bake pies, opt for pumpkin varieties with a higher sugar content and flavorful flesh. Recommended varieties for pies include Small Sugar Pie and Green-Striped Cushaw, which can add a delicious sweetness and depth of flavor to your homemade pumpkin pies.
For table decorations or creating tiny treats, mini pumpkins are perfect. Consider varieties like Jack Be Little and We-B-Little, which are small in size but big on cuteness. You can use these miniature pumpkins to add a decorative touch to your table or for creating delightful pumpkin-themed treats.
If you’re looking to add a splash of color and uniqueness to your fall decor, consider pumpkin varieties like Jarrahdale, Pepitas Pumpkin, and Super Moon. These varieties offer a wide range of skin colors, including striking blue-green tones and vibrant shades of orange and yellow.
When selecting a pumpkin variety, it’s important to consider your desired purpose. Whether you’re carving, baking, decorating, or simply enjoying the beauty of pumpkins, there’s a perfect variety out there for you.
Conclusion
Growing pumpkins can be a rewarding experience for gardeners of all levels. By following proper planting techniques, selecting the right seed variety, and providing adequate care and nutrition, you can enjoy a bountiful harvest of vibrant pumpkins.
Whether you’re growing pumpkins for carving, baking pies, or simply for decorative purposes, there are numerous varieties to suit your needs. From Giant pumpkins to Miniature pumpkins, each type offers its own unique characteristics and uses.
Remember to monitor for pests and diseases, such as cucumber beetles and powdery mildew, which can affect pumpkin plants. Encouraging pollination by avoiding insecticides during the blooming period is essential for fruit development and a successful harvest.
Harvest your pumpkins at the right time when the fruits turn orange, the stem darkens, and the rind feels hard. Proper handling and storage are crucial to prolonging their shelf life. Curing freshly harvested pumpkins in a sunny spot for about 10 days helps toughen the skin and intensify flavor.
With these tips and insights, you can create a vibrant and fruitful pumpkin garden. Whether you’re a novice gardener or an experienced enthusiast, the joy of growing pumpkins is unparalleled. So roll up your sleeves, get your hands dirty, and start growing your very own pumpkin plant!

Leave a Reply