Canned fruit is a versatile and convenient ingredient that can be used to create a wide variety of delicious recipes. Whether you’re craving a sweet dessert, a refreshing salad, or a flavorful side dish, there is a can fruit recipe for you. In this article, I will share easy and delicious can fruit recipes that are perfect for any occasion or craving.
Key Takeaways:
- Canned fruit is a versatile and convenient ingredient for creating delicious recipes.
- There are easy and delicious can fruit recipes for every occasion and craving.
- From desserts to salads, canned fruit can add flavor and convenience to your cooking.
- Try out these can fruit recipes and discover a world of flavor.
- Enjoy the convenience of using canned fruit all year round.
Tropical Fruit Medley: A Last-Minute Menu Addition
When it comes to last-minute menu additions, this tropical fruit medley is a true lifesaver. With just five simple ingredients, including canned pineapples and mandarin oranges, you can create a refreshing and exotic dish that will impress your guests.
This recipe is incredibly easy to make. Simply combine the canned fruit with fresh kiwi and banana slices, and toss them together in a large bowl. The vibrant colors and tropical flavors will instantly transport you to a sunny paradise.
Not only is this fruit medley delicious, but it also adds a beautiful pop of color to any table. The combination of golden pineapples, bright oranges, and green kiwis creates a visually stunning dish that will leave your guests in awe.
So the next time you find yourself in need of a last-minute menu addition, look no further than this tropical fruit medley. It’s quick, easy, and guaranteed to be a hit at any gathering.
Ingredients:
- 1 can of pineapples, drained
- 1 can of mandarin oranges, drained
- 2 kiwis, peeled and sliced
- 1 banana, sliced
- Fresh mint leaves for garnish (optional)
Instructions:
- In a large bowl, combine the drained pineapples, mandarin oranges, kiwis, and banana slices.
- Gently toss the fruit together until well mixed.
- Refrigerate for at least 30 minutes to allow the flavors to meld together.
- Garnish with fresh mint leaves, if desired, before serving.
Table: Nutritional Information
| Ingredients | Calories | Total Fat | Carbohydrates | Protein |
|---|---|---|---|---|
| 1 can of pineapples (drained) | 82 | 0.2g | 21g | 1g |
| 1 can of mandarin oranges (drained) | 110 | 0.3g | 26g | 2g |
| 2 kiwis (peeled and sliced) | 94 | 1g | 22g | 2g |
| 1 banana (sliced) | 105 | 0.4g | 27g | 1.3g |
Mini Cheesecakes: A Quick and Easy Dessert
If you’re in need of a quick and easy dessert that is sure to impress, look no further than these mini cheesecakes. Made with canned fruit and a few other simple ingredients, these individual cheesecakes are a sweet treat that you can enjoy all to yourself.
These mini cheesecakes are the perfect solution for when you’re short on time but still want a delicious dessert. With a buttery graham cracker crust and a creamy filling, they are sure to satisfy your sweet tooth. And the best part is, they can be customized with your favorite canned fruit topping, whether it be cherries, strawberries, or peaches.
To make these mini cheesecakes, start by mixing together crushed graham crackers, melted butter, and a touch of sugar. Press the mixture into the bottom of a muffin tin to create the crust. Next, beat together cream cheese, sugar, and vanilla extract until smooth. Spoon the cream cheese mixture on top of the crusts and bake in the oven until set. Once cooled, add a dollop of your favorite canned fruit topping and enjoy!
A Simple Recipe for Mini Cheesecakes:
- Preheat your oven to 325 degrees Fahrenheit.
- In a bowl, mix together 1 ½ cups of crushed graham crackers, 1/3 cup of melted butter, and 2 tablespoons of sugar.
- Press the mixture into the bottom of a muffin tin to create the crust.
- In a separate bowl, beat together 8 ounces of cream cheese, ½ cup of sugar, and 1 teaspoon of vanilla extract until smooth.
- Spoon the cream cheese mixture on top of the crusts.
- Bake in the oven for 15-18 minutes, or until the cheesecakes are set.
- Allow the cheesecakes to cool before adding a dollop of your favorite canned fruit topping.
A Delicious and Quick Dessert
“These mini cheesecakes are the perfect quick and easy dessert for any occasion. The combination of the creamy cheesecake filling and the sweet canned fruit topping is simply irresistible. Plus, with their individual portions, they make for a beautiful presentation. So go ahead, indulge in these mini delights!”
Table: Mini Cheesecakes Recipe
| Ingredients | Instructions |
|---|---|
| 1 ½ cups crushed graham crackers | Preheat your oven to 325 degrees Fahrenheit. |
| 1/3 cup melted butter | In a bowl, mix together crushed graham crackers, melted butter, and sugar. |
| 2 tablespoons sugar | Press the mixture into the bottom of a muffin tin to create the crust. |
| 8 ounces cream cheese | In a separate bowl, beat together cream cheese, sugar, and vanilla extract until smooth. |
| ½ cup sugar | Spoon the cream cheese mixture on top of the crusts. |
| 1 teaspoon vanilla extract | Bake in the oven for 15-18 minutes, or until the cheesecakes are set. |
Citrus-Almond Dessert: A Rustic and Flavorful Option

If you’re looking for a rustic and flavorful dessert, this citrus-almond dessert is the perfect choice. Made with cornmeal and infused with the bright flavors of citrus and almond, this dessert is a delightful combination of sweet and tangy.
With its rustic charm and unique taste, this dessert is sure to impress your guests. It’s a wonderful option for those who appreciate a homemade touch and a burst of refreshing flavors. Plus, it’s surprisingly easy to make!
Your taste buds will be treated to a symphony of flavors in every bite. The citrus notes add a bright and zesty element, while the almond undertones provide a subtle nuttiness. The combination is simply divine and will leave you craving more.
To make this dessert even more visually appealing, you can garnish it with slices of fresh citrus fruit or a sprinkle of toasted almonds. These little touches add an extra layer of elegance and make it a stunning centerpiece for any occasion.
Quinoa Salad: Fresh and Healthy for Any Occasion
Quinoa salad is a versatile and nutritious dish that can be enjoyed for lunch, dinner, or as a side. Packed with protein, fiber, and essential nutrients, it’s a healthy recipe that is easy to make and delicious to eat. Whether you’re looking for a light meal or a nutritious addition to your holiday spread, quinoa salad is a perfect choice.
To make a basic quinoa salad, start by cooking quinoa according to package instructions. Once cooled, combine it with an array of fresh vegetables like tomatoes, cucumbers, bell peppers, and red onions. For added flavor and texture, you can also include ingredients like feta cheese, olives, and fresh herbs. Toss everything together with a simple dressing made from lemon juice, olive oil, salt, and pepper. The result is a refreshing and satisfying salad that is bursting with flavor.
If you’re looking to add more protein to your quinoa salad, consider adding grilled chicken, shrimp, or tofu. You can also incorporate other nutritious ingredients like avocado, chickpeas, or roasted vegetables. The possibilities are endless when it comes to customizing your quinoa salad to suit your taste and dietary needs.
Not only is quinoa salad healthy and delicious, but it also offers a range of health benefits. Quinoa is a gluten-free grain that is rich in antioxidants and nutrients like magnesium, iron, and fiber. It is known to support heart health, aid in digestion, and provide long-lasting energy. By incorporating quinoa salad into your diet, you can enjoy a flavorful and satisfying meal while nourishing your body.
| Health Benefits of Quinoa Salad | Nutritional Profile of Quinoa |
|---|---|
| Supports heart health | High in protein |
| Aids in digestion | Rich in fiber |
| Provides long-lasting energy | Source of essential minerals |
Quinoa Salad Recipe
- Cook quinoa according to package instructions and let it cool.
- In a large bowl, combine cooked quinoa with diced tomatoes, cucumbers, bell peppers, and red onions.
- Add crumbled feta cheese, olives, and fresh herbs like parsley or mint.
- In a separate bowl, whisk together lemon juice, olive oil, salt, and pepper to make the dressing.
- Pour the dressing over the quinoa salad and toss to combine.
- Adjust seasoning to taste and refrigerate for at least 30 minutes to let the flavors meld together.
- Serve chilled and enjoy!
Quinoa salad is a delicious and nutritious dish that can be enjoyed by everyone. Its versatility allows for endless variations, making it a perfect choice for any occasion. Whether you’re looking for a healthy lunch, a side dish, or a potluck contribution, quinoa salad is sure to impress.
Pineapple Bundt Cake: A Twist on a Classic

If you’re looking for a dessert that is both delicious and nostalgic, look no further than this pineapple Bundt cake. With its moist texture, tropical flavor, and beautiful presentation, it’s a true classic that never goes out of style. Made with canned pineapple and a cake mix, this recipe is incredibly easy to make, making it a great option for both beginner bakers and experienced cooks.
This pineapple Bundt cake is bursting with the sweet and tangy flavors of pineapple, creating a refreshing and tropical taste that will transport you to a sunny beach paradise. The cake is moist and tender, thanks to the addition of crushed pineapple, which adds both flavor and moisture to the batter.
One of the great things about this pineapple Bundt cake is its versatility. It’s a dessert that can be enjoyed year-round, whether you’re serving it at a summer barbecue, a holiday gathering, or simply as a sweet treat for yourself. You can even dress it up with a simple glaze or a dusting of powdered sugar for an extra touch of elegance.
Variations and Serving Suggestions:
- Add a sprinkling of shredded coconut to the top of the cake before baking for an extra tropical touch.
- Top each slice of cake with a dollop of whipped cream and a cherry for a classic pineapple upside-down cake presentation.
- Add a drizzle of caramel sauce or a scoop of vanilla ice cream to each slice for a decadent dessert.
In conclusion, this pineapple Bundt cake is a delightful twist on a classic dessert. With its tropical flavors and easy preparation, it’s a recipe that is sure to please both the young and the young at heart. So go ahead, grab a slice, and savor the taste of this timeless treat.
Raspberry Vinaigrette: A Sweet and Tangy Dressing
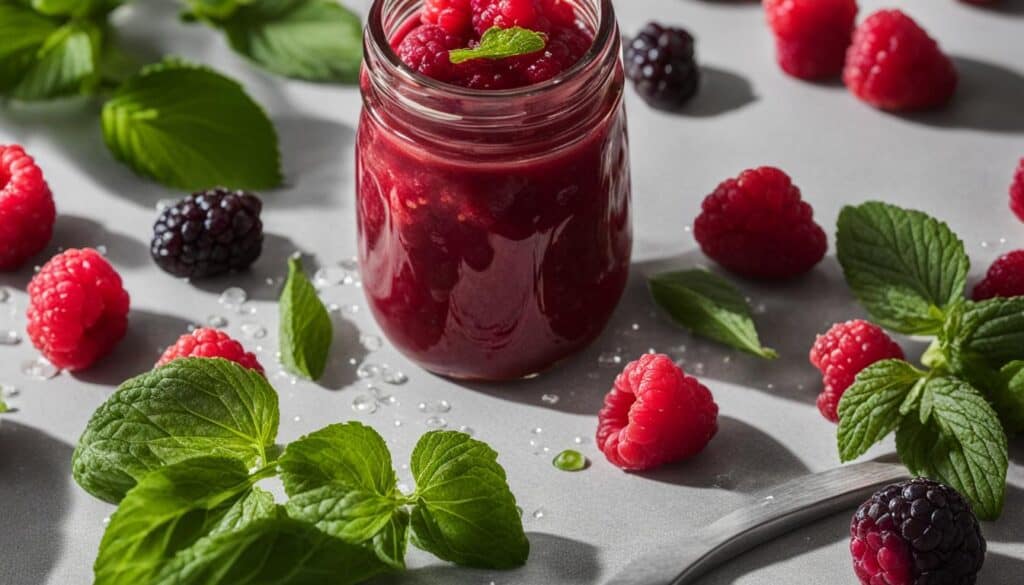
When it comes to adding a burst of flavor to salads, there’s nothing quite like a homemade raspberry vinaigrette. Made with fresh or canned raspberries, this sweet and tangy dressing is the perfect complement to a variety of greens and other salad ingredients. It’s quick and easy to make, and the vibrant pink color adds a beautiful touch to any salad.
To create this delightful dressing, start by combining fresh or canned raspberries, olive oil, vinegar, honey, and a pinch of salt in a blender or food processor. Blend until smooth and creamy, then taste and adjust the sweetness or tartness as desired. If you prefer a smoother texture, you can strain the dressing to remove any seeds. Store the vinaigrette in a sealed container in the refrigerator for up to a week.
One of the things I love about raspberry vinaigrette is its versatility. Not only does it make a fantastic dressing for salads, but it can also be used as a marinade for grilled chicken or as a dip for fresh vegetables. The sweet and tangy flavors pair well with a variety of ingredients, making it a must-have in any kitchen. So why not give it a try and add a touch of sweetness to your next meal?
Recipe:
| Ingredients: | Instructions: |
|---|---|
|
|
Microwave Berry Trifle: A Quick and Easy Dessert

When you’re in need of a quick and easy dessert that doesn’t compromise on flavor, look no further than this microwave berry trifle. With just a few simple ingredients and a microwave, you can create a deliciously sweet treat in a matter of minutes. It’s the perfect dessert to satisfy your cravings or to impress guests at a last-minute gathering.
To make this microwave berry trifle, you’ll need a microwave-safe bowl, a few slices of pound cake, your favorite berry pie filling, and some whipped cream. Start by layering the pound cake slices at the bottom of the bowl, followed by a generous spoonful of the berry pie filling. Repeat this layering process until the bowl is filled, ending with a dollop of whipped cream on top.
Place the bowl in the microwave and heat on high for about 2 minutes, or until the trifle is warm and the flavors have melded together. Carefully remove the bowl from the microwave (it will be hot!) and let it cool for a few minutes before serving. The result is a deliciously gooey and fruity dessert that will have everyone asking for seconds.
A Quick and Easy Dessert in Minutes
This microwave berry trifle is not only quick and easy to make, but it also delivers on taste. The warm and gooey berry filling pairs perfectly with the soft pound cake, and the whipped cream adds a creamy and airy touch. It’s a dessert that is sure to impress, whether you’re serving it to guests or indulging in a sweet treat for yourself.
Variations and Additions
While this microwave berry trifle is delicious on its own, you can also get creative with variations and additions. Try swapping out the pound cake for angel food cake for a lighter option, or mix in some fresh berries for added freshness and texture. You can also drizzle some chocolate sauce or sprinkle crushed nuts on top for extra flavor and crunch. The possibilities are endless!
Sugar Cookie Peach Crumble: A Year-Round Delight
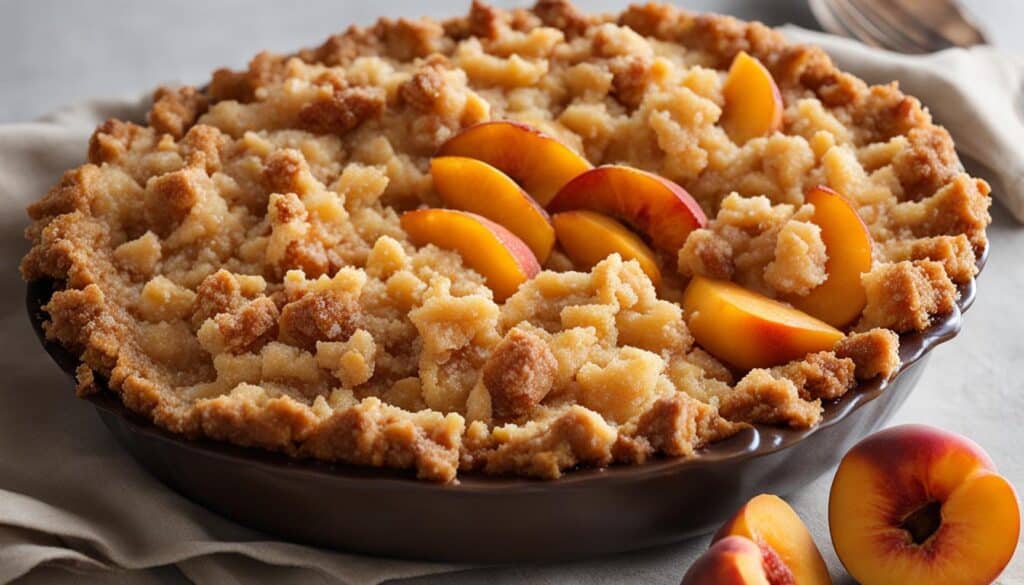
When it comes to desserts, nothing beats the classic combination of sweet and fruity flavors. That’s why this sugar cookie peach crumble is a year-round delight that will satisfy your cravings any time of the year. Made with canned peaches, this delicious dessert is quick and easy to prepare, guaranteeing you a warm and comforting treat in no time.
The beauty of this sugar cookie peach crumble lies in its simplicity. With just a few basic ingredients, you can create a dessert that is bursting with flavor. The canned peaches provide a juicy and tender texture, while the sugar cookie crumble adds a delightful crunch. It’s the perfect balance of sweetness and richness that will leave you wanting more.
To make this scrumptious sugar cookie peach crumble, simply layer the canned peaches in a baking dish and sprinkle the sugar cookie crumble on top. Pop it in the oven and let the magic happen as the peaches become caramelized and the crumble turns golden brown. Serve it warm with a scoop of vanilla ice cream for the ultimate indulgence.
A Complete Table
| Ingredients | Instructions |
|---|---|
|
|
With its delightful combination of flavors and textures, this sugar cookie peach crumble is a dessert that can be enjoyed year-round. Whether you’re hosting a dinner party or simply craving something sweet, this recipe will surely impress. So grab some canned peaches and get ready to indulge in this irresistible treat.
Orange Salad: A Sweet and Tangy Delight
If you’re looking for a refreshing and flavorful dish to add to your menu, this orange salad is the perfect choice. With its bright citrus flavors and a touch of sweetness, it is sure to delight your taste buds. Made with fresh oranges and a few simple ingredients, this salad is a quick and easy way to incorporate the goodness of citrus into your meal.
To make this orange salad, start by peeling and slicing fresh oranges into segments. Arrange the orange slices on a plate or in a bowl. For added texture and flavor, sprinkle some finely chopped mint leaves and a handful of toasted almonds on top. The mint adds a refreshing touch, while the almonds provide a satisfying crunch. Drizzle a light dressing made with honey and lime juice over the salad to bring out the natural sweetness of the oranges.
This orange salad is not only a delicious side dish, but it can also be a light and healthy dessert option. The combination of sweet and tangy flavors is a delightful treat for your taste buds. Serve it on its own or alongside grilled chicken or fish for a complete and balanced meal.
“The orange salad was a hit at my dinner party. The combination of fresh oranges, mint, and almonds was absolutely delightful. It added a burst of freshness to the meal and was the perfect way to end the evening.”
-Samantha, California
So the next time you’re looking for a citrusy and refreshing addition to your menu, give this orange salad a try. It’s a simple yet elegant dish that is sure to impress your guests and leave them craving more. Enjoy the vibrant flavors of the oranges and let this salad be the highlight of your meal.
Conclusion
Canned fruit is a versatile ingredient that can transform your recipes into delicious and easy-to-make dishes for any occasion. Whether you’re looking for a refreshing salad, a flavorful side dish, or a sweet dessert, incorporating canned fruit into your cooking is a game-changer.
From the quick and easy mini cheesecakes to the rustic and flavorful citrus-almond dessert, these can fruit recipes offer a wide range of options to satisfy any craving. The tropical fruit medley adds a burst of freshness to any menu, while the quinoa salad brings a healthy and nutty twist to your spread.
Try the pineapple Bundt cake for a delightful twist on a classic, or whip up the microwave berry trifle for a quick and easy dessert that will impress your guests. And don’t forget the sugar cookie peach crumble, a year-round delight that pairs perfectly with a scoop of ice cream.
So, why not add a pop of color and flavor to your dishes by incorporating canned fruit? These easy fruit recipes are not only delicious but also convenient, making them a go-to option for any cook. Get creative with your cooking and enjoy the convenience and flavor of canned fruit recipes today!
FAQ
What are can fruit recipes?
Can fruit recipes are recipes that use canned fruit as an ingredient to create delicious dishes.
Why use canned fruit in recipes?
Canned fruit is a versatile and convenient ingredient that can be easily incorporated into various recipes. It saves time and effort compared to using fresh fruit.
Where can I find canned fruit?
Canned fruit can be found in most grocery stores, usually in the canned food aisle.
Are canned fruits healthy?
While fresh fruit is generally considered healthier, canned fruit can still provide nutritional benefits. Just make sure to choose options with no added sugars or syrups.
Can I substitute fresh fruit for canned fruit in these recipes?
Yes, you can substitute fresh fruit for canned fruit in these recipes. Adjust the quantity and cooking time accordingly.
Can I freeze canned fruit?
Yes, you can freeze canned fruit for later use. Transfer it to an airtight container or freezer bag before freezing.
How long can I store canned fruit?
Canned fruit can be stored for a long time, typically up to one to two years. Check the expiration date on the can for specific guidelines.
Can I use different types of canned fruit in these recipes?
Absolutely! Feel free to experiment with different varieties of canned fruit to create your own unique flavors.
Are canned fruit recipes suitable for special dietary needs?
Many canned fruit recipes can be adjusted to accommodate special dietary needs. For example, you can use gluten-free cake mixes for gluten-free options.
Are there vegetarian or vegan options in these recipes?
Yes, several recipes can be easily adapted to vegetarian or vegan diets by using plant-based alternatives for dairy products.
Can children help with these recipes?
Absolutely! These recipes are simple and fun, making them perfect for getting children involved in the kitchen.


Leave a Reply