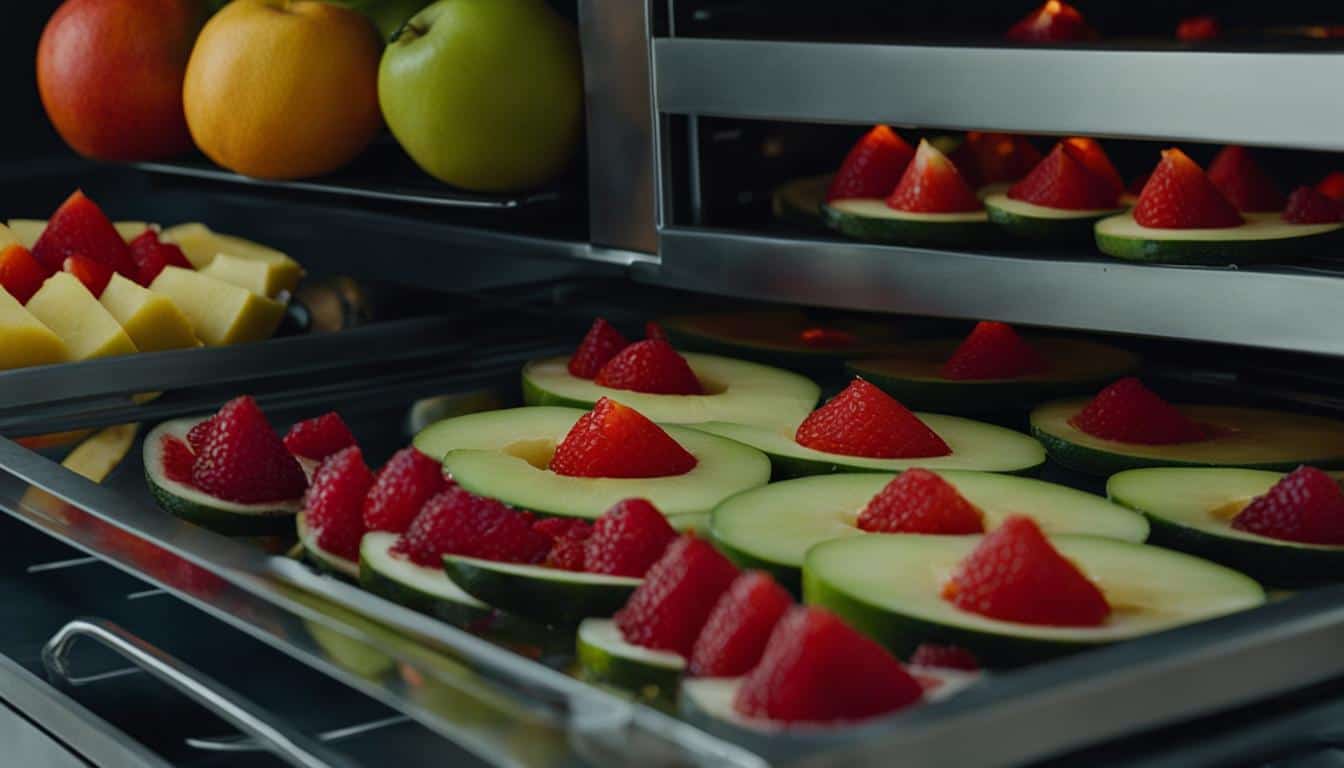
If you’ve ever wondered if it’s possible to dehydrate fruit in the oven, the answer is a resounding yes! Dehydrating fruit in the oven is a convenient and budget-friendly way to make delicious dried fruit snacks right in the comfort of your own kitchen. With the right temperature and techniques, you can transform fresh produce into tasty treats without the need for a specialized dehydrator. In this article, I will guide you through the process of oven-drying fruit and provide you with tips to ensure success.
Key Takeaways:
- Oven-drying fruit is a simple and cost-effective method to make dried fruit snacks at home.
- You can dehydrate a variety of fruits in the oven, including citrus fruits, apples, plums, bananas, apricots, and mangoes.
- Properly preparing the fruit, setting the oven temperature, and prepping the tray are important steps for successful oven-drying.
- During the drying process, it’s crucial to flip the fruit slices and rotate the tray to ensure even dehydration.
- Oven-dried fruit can be used as a garnish, in cocktails, desserts, or as a topping for granola, oatmeal, pancakes, or waffles.
Which Fruits Can be Dehydrated in the Oven?
You can dehydrate a variety of fruits in the oven. Citrus fruits like lemons, limes, and oranges are commonly dried in the oven and can be used in cocktails, desserts, or as a garnish. Other fruits like apples, plums, bananas, apricots, and mangoes can also be dried in the oven for snacking or adding to recipes. The size and thickness of the fruit slices will affect the drying time, with smaller fruits generally taking less time than larger fruits.
When dehydrating fruit in the oven, it’s important to slice them evenly to ensure consistent drying. By preparing a variety of fruits, you can create a delicious assortment of homemade dried fruit snacks.
Preparing the Fruit for Oven Drying
Before diving into the process of dehydrating fruit in the oven, it’s crucial to properly wash and prepare the fruit. This step ensures that you achieve the best results and enjoy delicious and evenly dried fruit.
For fruits with tougher skin, such as apples or plums, it’s recommended to peel them before slicing. This will help the drying process and improve the texture of the final product.
Next, use a mandoline or a sharp knife to slice the fruit into evenly-sized slices, approximately 1/4 inch thick. Uniformly sized slices will dry more evenly, preventing some pieces from becoming overly dry or others from retaining too much moisture.
While slicing the fruit, it’s important to remove any bruised, damaged, or overly ripe parts. These areas contain higher moisture content and can impact the overall quality and shelf life of the dried fruit, so it’s best to eliminate them.
By thoroughly preparing the fruit, you’ll ensure that it dries evenly and retains its flavor and appearance throughout the process.
Setting the Oven Temperature and Prepping the Tray
When it comes to oven drying fruit, the right temperature and proper preparation of the tray are essential for successful results. Follow these steps to ensure your fruit dehydrates evenly:
Setting the Temperature
To begin, preheat your oven to 200°F or the lowest temperature setting available. This low and steady heat will gently remove the moisture from the fruit while preserving its flavor and nutrients. If your oven has a convection setting, use it to stimulate even heat distribution and speed up the drying time.
Prepping the Tray
Next, it’s important to prepare the tray to prevent the fruit from sticking and ensure proper airflow. Line a baking sheet with parchment paper or use a wire rack to create a barrier between the fruit and the pan. This prevents the fruit from sticking and makes it easier to remove once it’s dried.
Make sure to leave enough space between the fruit slices on the tray for proper airflow. This allows the hot air to circulate and ensures that each piece of fruit dries consistently.
By setting the right oven temperature and prepping the tray correctly, you’ll be well on your way to creating delicious oven-dried fruit snacks in no time.

Drying the Fruit in the Oven
Now that you have prepared the fruit, it’s time to start the oven-drying process. Here are some tips to ensure successful dehydration:
1. Proper Placement
Place the prepared fruit slices on a parchment-lined tray or wire rack. Make sure to space them at least 1/2 inch apart to allow for proper airflow and even drying.
2. Bake at the Right Temperature
Preheat your oven to 200°F or the lowest temperature setting available. If your oven has a convection setting, use it to promote better air circulation and faster drying.
3. Flip and Rotate
For even drying, it’s recommended to flip the fruit slices and rotate the tray halfway through the drying process. This will ensure that all sides of the fruit are evenly exposed to the heat.
4. Watch Carefully
Keep a close eye on the fruit while it’s in the oven. The drying time can vary depending on the size and type of fruit. It’s important to remove the fruit from the oven when it is completely dried and no moisture remains.
Remember, under-dried fruit can be chewy or sticky, while over-dried fruit can become overly tough or brittle. Finding the right balance is key to achieving the perfect texture.

For a visual summary, here’s a table with recommended drying times for commonly dehydrated fruits:
| Fruit | Drying Time |
|---|---|
| Apples | 3-4 hours |
| Bananas | 4-6 hours |
| Oranges | 6-8 hours |
| Mangoes | 8-10 hours |
Keep in mind that these are general guidelines, and the drying time can vary based on factors such as fruit thickness, oven temperature accuracy, and personal preference for the level of dryness.
In the next section, we’ll explore the various creative ways you can use your oven-dried fruit. Get ready to be inspired by the versatility and flavor of these homemade treats!
Creative Ways to Use Oven-Dried Fruit
Oven-dried fruit is a versatile ingredient that can add a burst of flavor and texture to your dishes. From cocktails to desserts, there are many creative ways to incorporate oven-dried fruit into your recipes. Here are some delicious ideas to inspire you:
Garnish for Cocktails and Desserts
Add a touch of elegance to your cocktails and desserts by using oven-dried fruit as a garnish. Simply place a few dried fruit slices on the rim of cocktail glasses or float them in sparkling drinks for a vibrant and flavorful twist. For desserts, sprinkle some oven-dried fruit over cakes, pies, or ice cream for an irresistible combination of sweet and chewy.
Baking and Cooking Enhancements
Oven-dried fruit can take your baking and cooking to the next level. Blend dried citrus fruit such as oranges or lemons into a citrus sugar, which can be used to enhance the flavor of baked goods like cookies, muffins, and scones. You can also chop up oven-dried fruit and mix it into your favorite bread dough or pancake batter for a delightful surprise in every bite.
Toppings for Breakfast Favorites
Start your day on a delicious note by using oven-dried fruit as a topping for your favorite breakfast dishes. Sprinkle dried fruit over your morning bowl of granola or oatmeal for added sweetness and a satisfying chew. You can also incorporate dried fruit into your pancake or waffle batter for a burst of flavor in every stack.
A Nutritious Snack
Of course, you can always enjoy oven-dried fruit as a healthy and nutritious snack on its own. Keep a jar of assorted dried fruit slices handy for when you need a quick pick-me-up during the day. They are a convenient, portable, and naturally sweet alternative to sugary snacks.
Get creative and experiment with different recipes and combinations to find your favorite ways to use oven-dried fruit. The possibilities are endless!

| Recipe | Ingredients | Instructions |
|---|---|---|
| Oven-Dried Fruit Salad |
|
|
| Oven-Dried Fruit Granola Bars |
|
|
Storing and Preserving Oven-Dried Fruit
Properly storing oven-dried fruit is essential for maintaining its quality and extending its shelf life. By following a few simple steps, you can ensure that your dried fruit stays fresh and flavorful for as long as possible.
1. Choose Airtight Containers
Store your oven-dried fruit in airtight containers to prevent moisture absorption and keep out any contaminants. Mason jars or resealable plastic bags are great options for packaging your dried fruit. Make sure to remove as much air as possible from the containers before sealing them.
2. Refrigerate for Freshness
To maximize the freshness of oven-dried fruit, store it in the refrigerator. The cool temperature helps maintain the flavor and texture of the dried fruit while reducing the risk of mold or spoilage. Keeping the dried fruit in a cool, dark place, such as the refrigerator, will also help preserve its natural color.
3. Consume Within a Year
While oven-dried fruit can last for a relatively long time, it is best to consume it within a year for optimal flavor. Over time, the fruit can lose its taste and texture, so it’s a good idea to enjoy it while it is at its best. Keep track of the date when you dried the fruit to ensure that you consume it within a reasonable timeframe.
4. Check for Signs of Spoilage
Regularly inspect your stored oven-dried fruit for any signs of deterioration. Look for changes in color, texture, or the presence of mold. If you notice any of these signs, discard the affected fruit immediately to prevent contamination of the rest of the batch. It’s better to be safe than sorry when it comes to consuming dried fruit.

By following these storage guidelines, you can enjoy the delicious taste of your oven-dried fruit for an extended period. Whether you’re snacking on them directly or using them in recipes, properly stored dried fruit will add a burst of flavor and nutrition to your meals.
Comparison to Dehydrator Drying
While using a dehydrator is a popular method for drying fruit, oven drying offers a convenient alternative. Oven drying requires minimal equipment and can be done with common kitchen tools. However, dehydrators offer more precise temperature control and airflow, resulting in more consistent and efficient drying. It’s important to consider your needs and resources when deciding between oven drying and using a dehydrator.
Here is a comparison of the pros and cons of oven drying fruit:
| Dehydrator Drying | Oven Drying |
|---|---|
| Provides precise temperature control | Requires monitoring and adjustment of oven temperature |
| Offers consistent drying results | Drying results may vary based on oven temperature and airflow |
| Efficient use of energy | Might consume more energy due to longer drying times |
| Requires less frequent checking during the drying process | Needs periodic flipping of fruit slices and tray rotation for even drying |
| Suitable for larger quantities of fruit | Ideal for smaller batches of fruit |
| Can be more expensive | Cost-effective option |
Ultimately, the choice between dehydrator drying and oven drying depends on your specific needs, available resources, and personal preferences. If you have a dehydrator and prefer more precise drying control, it can be a great option. However, if you’re looking for a budget-friendly and accessible method, oven drying is a viable alternative.

Pros of Oven Drying Fruit:
- Minimal equipment required
- Accessible with common kitchen tools
- Cost-effective option
- Allows for experimentation with different fruit varieties
Cons of Oven Drying Fruit:
- Less precise temperature control
- Drying results may vary
- Prolonged drying times and energy consumption
- Requires periodic flipping of fruit slices and tray rotation
With oven drying, you can still achieve delicious dried fruit snacks without investing in a dedicated dehydrator. It’s a flexible and homemade approach that allows you to enjoy the flavors of dehydrated fruit using everyday kitchen equipment.
Tips for Success
To ensure successful oven drying, here are some tips I recommend:
Slice the fruit evenly and to the desired thickness. Consistent slicing ensures that the fruit dries uniformly and at the same rate.
Preheat the oven to the recommended temperature and use the convection setting if available. This helps to distribute the heat evenly and speeds up the drying process.
Use parchment paper or a wire rack to prevent the fruit from sticking to the pan. This will make it easier to remove the dried fruit once it’s done.
Flip the fruit slices and rotate the tray during the drying process for even drying. This ensures that all sides of the fruit are exposed to the heat, resulting in consistent drying.
Keep a close eye on the fruit and remove them from the oven when they are completely dried. Over-drying can result in a loss of flavor and texture.
Store the dried fruit in airtight containers in the refrigerator to maintain freshness. This helps to prolong the shelf life of the dried fruit and prevent moisture absorption.
By following these tips, you’ll be well-equipped to achieve successful oven drying and enjoy delicious homemade dried fruit!
Conclusion
After exploring the process of oven-drying fruit, it is clear that this method offers a convenient and accessible way to create homemade dried fruit snacks. By following the right techniques and temperature settings, you can enjoy the delicious flavor and texture of dried fruit without the need for a dehydrator. Whether you want to make oven-dried apples, apricots, or citrus slices, the possibilities are endless.
Experimenting with different fruits and recipes allows you to create unique and healthy snacks that suit your taste preferences. The simplicity of oven-drying fruit makes it a perfect activity for individuals of all skill levels. So, why not grab your favorite fruits and start oven drying to enjoy a nutritious and flavorful treat anytime?
| Fruit | Benefits |
|---|---|
| Apples | Rich in fiber and antioxidants |
| Apricots | High in vitamin A and a good source of potassium |
| Citrus (Oranges, Lemons, Limes) | Packed with vitamin C and refreshing flavor |
Embarking on the journey of homemade dried fruit in the oven not only provides you with a healthy and satisfying snack but also allows you to explore your culinary creativity. From using oven-dried fruits as garnishes to incorporating them into various dishes, the options are limitless.
“Oven-dried fruit is not only delicious but also a versatile ingredient that can elevate your favorite recipes.” – Chef Emily Thompson
Remember, proper storage is key to preserve the quality and shelf life of your oven-dried fruit. Store them in airtight containers in the refrigerator for long-lasting freshness. Regularly inspect the dried fruit for any signs of deterioration or mold and discard any that show spoilage.
In conclusion, oven-drying fruit provides a simple, cost-effective, and enjoyable way to create your own homemade dried fruit snacks. Say goodbye to store-bought alternatives filled with additives and preservatives and embrace the natural goodness of oven-dried fruits. Start your oven-drying adventure today and savor the delightful flavors of homemade dried fruits!
Additional Resources
If you’re interested in learning more about oven drying fruit and exploring different recipes and techniques, here are some additional resources to check out:
- “How to Dry Citrus in the Oven” by The Sweetest Graze
A comprehensive guide to drying citrus fruit in the oven, complete with step-by-step instructions and helpful tips. Learn how to transform lemons, limes, and oranges into flavorful and aromatic dried citrus slices. Link: Insert Link to the blog post
- “DIY Craisins, Raisins, and More” by Taste
Discover how to make your own dried cranberries, raisins, and other fruit varieties in the oven. This article provides creative recipes and techniques for drying different fruits, expanding your options for homemade snacks and culinary delights. Link: Insert Link to the article
- “Dried Fruits Make Healthy, Additive-Free Snacks” by The Fruit People
Learn about the health benefits of dried fruits and the advantages of making your own additive-free snacks at home. This informative article offers insights into the nutritional value of dried fruits and provides inspiration for incorporating them into your daily diet. Link: Insert Link to the article
Further Reading on Dehydrating Fruit in the Oven
If you’re looking for more in-depth information on dehydrating fruit in the oven, these resources can provide valuable guidance:
“The Art of Oven Drying: Preserving Fruit’s Natural Delights” – An extensive book that delves into the art and science of oven drying fruit, detailing various techniques, recipes, and troubleshooting tips. A must-read for anyone passionate about preserving fruit flavors through oven drying.
By exploring these resources, you’ll gain a deeper understanding of oven drying fruit and how to create delicious, homemade dried fruit snacks. Happy dehydrating!
Frequently Asked Questions (FAQs)
Here are some common questions and answers about dehydrating fruit in the oven:
1. Can I use any type of oven for drying fruit?
Yes, you can use any type of oven for drying fruit. Whether you have a gas or electric oven, the process for oven-drying fruit remains the same. Just make sure you can set the temperature low enough for drying, usually around 200°F or the lowest setting available.
2. How long does it take to dry fruit in the oven?
The drying time for fruit in the oven can vary depending on several factors, including the type and thickness of the fruit slices and the humidity of your kitchen. Generally, it takes about 3-6 hours to fully dehydrate fruit. Smaller and thinner slices will dry faster than larger and thicker ones.
3. Can I prevent the fruit from sticking to the pan?
Yes, there are a few ways to prevent the fruit from sticking to the pan. You can line the baking sheet with parchment paper or use a wire rack to create a non-stick surface. This will help the air circulate around the fruit slices and prevent them from sticking during the drying process.
4. How should I store oven-dried fruit?
To maintain the freshness of your oven-dried fruit, store them in airtight containers in the refrigerator. This will help prevent moisture absorption and keep the fruit dry and flavorful. Properly stored oven-dried fruit can last for up to a year, although dried citrus fruit can last even longer, sometimes several years.
FAQ
Can I dehydrate fruit in the oven?
Yes, you can dehydrate fruit in the oven. It is a simple and cost-effective way to make delicious dried fruit snacks at home.
Which fruits can be dehydrated in the oven?
You can dehydrate a variety of fruits in the oven. Some commonly dried fruits include citrus fruits like lemons, limes, and oranges, as well as apples, plums, bananas, apricots, and mangoes.
How do I prepare the fruit for oven drying?
Before drying the fruit in the oven, it’s important to wash and prepare it properly. For fruits with tougher skin, like apples or plums, peel them before slicing. Use a mandoline or a sharp knife to slice the fruit into evenly-sized slices, around 1/4 inch thick.
What temperature should I set my oven to for dehydrating fruit?
Preheat your oven to 200°F or the lowest temperature setting available. If your oven has a convection setting, use it, as it helps to evenly circulate the heat and speed up the drying process.
How do I prevent the fruit from sticking to the pan?
Line a baking sheet with parchment paper or use a wire rack to prevent the fruit from sticking to the pan. Make sure to leave enough space between the fruit slices for proper airflow.
How long does it take to dry fruit in the oven?
The drying time varies depending on the size and type of fruit. It can take anywhere from 3 to 6 hours. It’s recommended to flip the fruit slices and rotate the tray halfway through the drying process for even drying.
What can I do with oven-dried fruit?
Oven-dried fruit can be used in a variety of delicious ways. You can add them as a garnish to cocktails, desserts, or baked goods, blend them into a citrus sugar, or use them as a topping for granola, oatmeal, pancakes, or waffles.
How should I store and preserve oven-dried fruit?
Store the dried fruit in airtight containers in the refrigerator to keep them fresh and prevent moisture absorption. It’s best to consume the dried fruit within a year for optimal flavor. Check regularly for any signs of deterioration or mold, and discard any dried fruit that shows signs of spoilage.
What is the difference between dehydrator drying and oven drying fruit?
Dehydrators offer more precise temperature control and airflow, resulting in more consistent and efficient drying. Oven drying, on the other hand, is a convenient alternative that requires minimal equipment and can be done with common kitchen tools.
What are some tips for successful oven drying?
To ensure successful oven drying, slice the fruit evenly and to the desired thickness, preheat the oven to the recommended temperature, use parchment paper or a wire rack to prevent the fruit from sticking to the pan, flip the fruit slices and rotate the tray during the drying process for even drying, and keep a close eye on the fruit, removing them from the oven when completely dried.
Where can I find more information about oven drying fruit?
If you’re interested in learning more about oven drying fruit and exploring different recipes and techniques, here are some additional resources to check out:
What are some common questions about dehydrating fruit in the oven?
Here are some common questions about dehydrating fruit in the oven:
– How do I know when the fruit is completely dried?
– Can I use any type of baking sheet for drying fruit in the oven?
– Can I stack trays in the oven for more efficient drying?
– Can I season or flavor the fruit before drying it in the oven?
– Can I dehydrate frozen fruit in the oven?
If you have any other questions, feel free to reach out!

Leave a Reply