As an artist, there are few subjects as captivating as drawing fruit in a bowl. The combination of vibrant colors, unique shapes, and organic textures offers endless creative possibilities. In this guide, I will take you through the process of creating stunning fruit in a bowl drawings, providing you with the inspiration and techniques you need to bring your artistic vision to life.
Whether you’re a beginner looking to explore easy fruit drawing or an experienced artist seeking new fruit art ideas, this guide has something for everyone. From sketching techniques to shading methods, I will break down the process step by step, so you can create realistic and visually striking fruit compositions.
Key Takeaways:
- Explore the artistic beauty of drawing fruit in a bowl.
- Learn easy fruit drawing techniques to get started.
- Discover specific techniques for drawing apples, bananas, cherries, and grapes.
- Practice and improve your fruit drawing skills through regular repetition.
- Expand your horizons with other still life ideas beyond fruit.
Getting Started with Easy Fruit Drawing
When it comes to drawing fruit, starting with the basics is key to building your skills and confidence. Whether you’re a beginner or looking for inspiration to enhance your fruit drawing techniques, this section will guide you through the process of creating beautiful fruit sketches.
Understanding Shape, Shading, and Texture: The first step in creating realistic fruit drawings is to observe and understand the shape of different fruits. Pay attention to their curves, angles, and contours. Once you have a clear idea of the shape, focus on shading to add depth and dimension to your drawings. Experiment with different shading techniques, such as cross-hatching or blending, to achieve the desired effects. Lastly, don’t forget to add texture to your fruit drawings. Whether it’s the rough skin of a pineapple or the smooth surface of an orange, capturing the texture will bring your drawings to life.
Choosing the Right Materials and Setting Up: To create stunning fruit drawings, it’s important to have the right tools at your disposal. Invest in quality drawing pencils, erasers, and sketchbooks. Experiment with different pencil grades to achieve various tones and effects. Additionally, set up a designated drawing space where you can work comfortably and uninterrupted. Ensure good lighting and a clutter-free environment to enhance your focus and concentration.
So, grab your pencils and let your creativity flow as we journey through the world of fruit drawing!
Apple Drawing Technique
When it comes to creating realistic fruit in a bowl drawings, mastering the technique for drawing an apple is essential. The distinctive shape and color of an apple can add depth and visual interest to any still life composition. Follow these step-by-step instructions to bring your apple drawings to life.
Start by sketching the outline of the apple using light, curved lines. Pay attention to the proportions and shape, ensuring that it accurately represents an apple. Next, focus on adding shading to create the illusion of three-dimensionality. Use varying degrees of pressure on your pencil to achieve different tones, emphasizing the roundness and curvature of the apple.
For a more realistic effect, incorporate highlights and shadows. The highlight should appear on the side of the apple facing the light source, while the shadows should be on the opposite side. Gradually build up the shading and blending to achieve a smooth transition between light and dark areas. Finally, add details such as the stem and any imperfections on the apple’s surface.
| Materials: | Techniques: |
|---|---|
| Pencil | Sketching |
| Eraser | Shading |
| Blending stump | Highlight and shadow |
| Drawing paper | Detailing |
Drawing Tips:
- Study real apples and observe the way light interacts with their surface.
- Experiment with different shading techniques to achieve the desired texture.
- Don’t be afraid to make mistakes – practice is key to improving your skills.
Banana Drawing Technique

When it comes to hand-drawn fruit still life, bananas are a popular subject due to their unique shape and vibrant color. Mastering the art of drawing a banana requires attention to detail and understanding the subtle nuances of its form. In this section, I will guide you through the step-by-step process of capturing the essence of a banana on paper, from sketching to shading and adding those final touches.
Sketching the Banana
The first step in creating a realistic banana drawing is to sketch its shape and proportions. Start by lightly outlining the overall form of the banana using basic geometric shapes like ovals and curves. Pay attention to its curve and tapering ends, as these are essential characteristics that define the fruit. Remember, sketching is the foundation of your drawing, so take your time to get the shape just right.
Adding Depth with Shading
Once you have the outline of the banana, it’s time to bring it to life through shading. Observe the lighting on your reference image or real-life subject to understand where the shadows and highlights fall. Use a range of pencil shades, from light to dark, to create a three-dimensional effect. Start by applying a base layer of shading using light strokes and gradually build up the dark areas for added depth and realism. Don’t forget to pay attention to the subtle wrinkles and textures on the banana’s skin.
Final Touches and Details
To add those finishing touches to your hand-drawn banana still life, focus on refining the details. Use a sharp pencil or a fine-tip pen to enhance the texture and fine lines on the banana’s skin. Add highlights to areas where light reflects off the surface, creating a glossy appearance. Additionally, you can experiment with colored pencils or watercolors to add a touch of vibrancy to your artwork. Remember, the key is to observe the banana closely and capture its unique characteristics in your drawing.
| Tools and Materials | Tips and Techniques |
|---|---|
| Pencil set (ranges from HB to 6B) | Start with a light hand when sketching to ensure easy erasing if needed |
| Sketchbook or drawing paper | Experiment with different shading techniques, such as cross-hatching or stippling, to add texture |
| Eraser | Use a kneaded eraser to create highlights and soften edges |
| Pencil sharpener | Don’t be afraid to make mistakes – they can often lead to unexpected artistic discoveries |
| Colored pencils or watercolors (optional) | Take breaks and step back to view your drawing from a distance for a fresh perspective |
Cherry Drawing Technique
When it comes to creating vibrant fruit artwork, mastering the cherry drawing technique is essential. Cherries are not only visually appealing with their deep red color, but they also have a distinctive shape that adds a touch of elegance to any still life composition. In this section, I will guide you through the process of sketching, shading, and adding the final touches to create stunning cherry drawings.
To begin, start by sketching the basic shape of the cherries using light, loose lines. Pay attention to their roundness and the stem that connects them. Use reference images or real cherries to observe the details and proportions accurately. Once you’re satisfied with the initial sketch, start adding shading to create depth and dimension. Cherries have a glossy surface, so focus on capturing the highlights and shadows to make them appear more realistic.
Next, consider the lighting in your composition. Whether it’s natural or artificial, the way light falls on the cherries will affect their appearance. Pay attention to the reflections and highlights caused by the light source and incorporate them into your drawing. This will make the cherries come alive and add a sense of realism.
Table: Cherry Drawing Technique
| Step | Technique |
|---|---|
| 1 | Sketch the basic shape of the cherries using light, loose lines. |
| 2 | Add shading to create depth and dimension, focusing on capturing highlights and shadows. |
| 3 | Consider the lighting in your composition and incorporate reflections and highlights caused by the light source. |
| 4 | Add final touches such as small details, highlights, and texture to enhance the realism of the cherries. |
Grape Drawing Technique

When it comes to creating colorful fruit illustrations, the grape drawing technique is an essential skill to master. Grapes are known for their small, circular shapes and vibrant colors, making them a visually appealing subject for artists. By following a few simple steps, you can capture the beauty of grapes and create a realistic bunch in your artwork.
To start, gather your drawing materials, including pencils, erasers, and paper. It’s essential to choose a paper with a suitable texture to add depth and detail to your grape drawing. Begin by sketching the basic outline of the grape bunch, using light, gentle strokes to create the rounded shapes. Pay attention to the direction in which the grapes are clustered, as this will add a sense of realism to your drawing.
Once you have the outline, it’s time to add shading and texture. Grapes have a smooth surface with highlights and shadows, so carefully observe the lighting in your reference image or real-life scene. Start by shading the areas where the grapes overlap or where shadows naturally occur. Use a combination of hatching and cross-hatching techniques to create depth and dimension.
“To make your grape drawing more realistic, focus on adding subtle highlights with a kneaded eraser. These highlights will give the grapes a glossy appearance and make them pop off the paper. Don’t be afraid to experiment with different shading techniques and colors to achieve the desired effect.”
Finally, add the finishing touches to your grape drawing. Pay attention to the small details, such as the stems and leaves, as they contribute to the overall realism of the artwork. Use a sharper pencil or a fine-tipped pen to sketch these details with precision. Take your time and step back occasionally to assess your progress and make adjustments if needed.
In conclusion, mastering the grape drawing technique allows you to create vibrant and realistic fruit illustrations. By paying attention to shape, shading, and texture, you can capture the beauty of grapes and add a colorful touch to your artwork.
Practicing and Improving Your Fruit Drawing Skills

When it comes to improving your fruit drawing skills, practice is key. The more you draw, the better you become at capturing the shape, texture, and unique characteristics of different fruits. Dedicate regular time to sketching and experimenting with different techniques to enhance your abilities.
One effective way to practice is by setting up a still life arrangement of fruits in a bowl or on a table. This allows you to observe the interplay of light and shadow, as well as the relationships between different objects. Start with simple compositions and gradually challenge yourself with more complex arrangements.
Another helpful practice technique is seeking feedback from fellow artists or joining a drawing group. Constructive criticism can provide valuable insights into areas for improvement and help you refine your style. Additionally, exploring different drawing tutorials or attending workshops can expose you to new techniques and approaches.
Remember to enjoy the process of practicing and experimenting. Don’t be too hard on yourself if a drawing doesn’t turn out as expected. Every stroke and every sketch is an opportunity to learn and grow as an artist. With dedication and a willingness to explore, your fruit drawing skills will continue to improve over time.
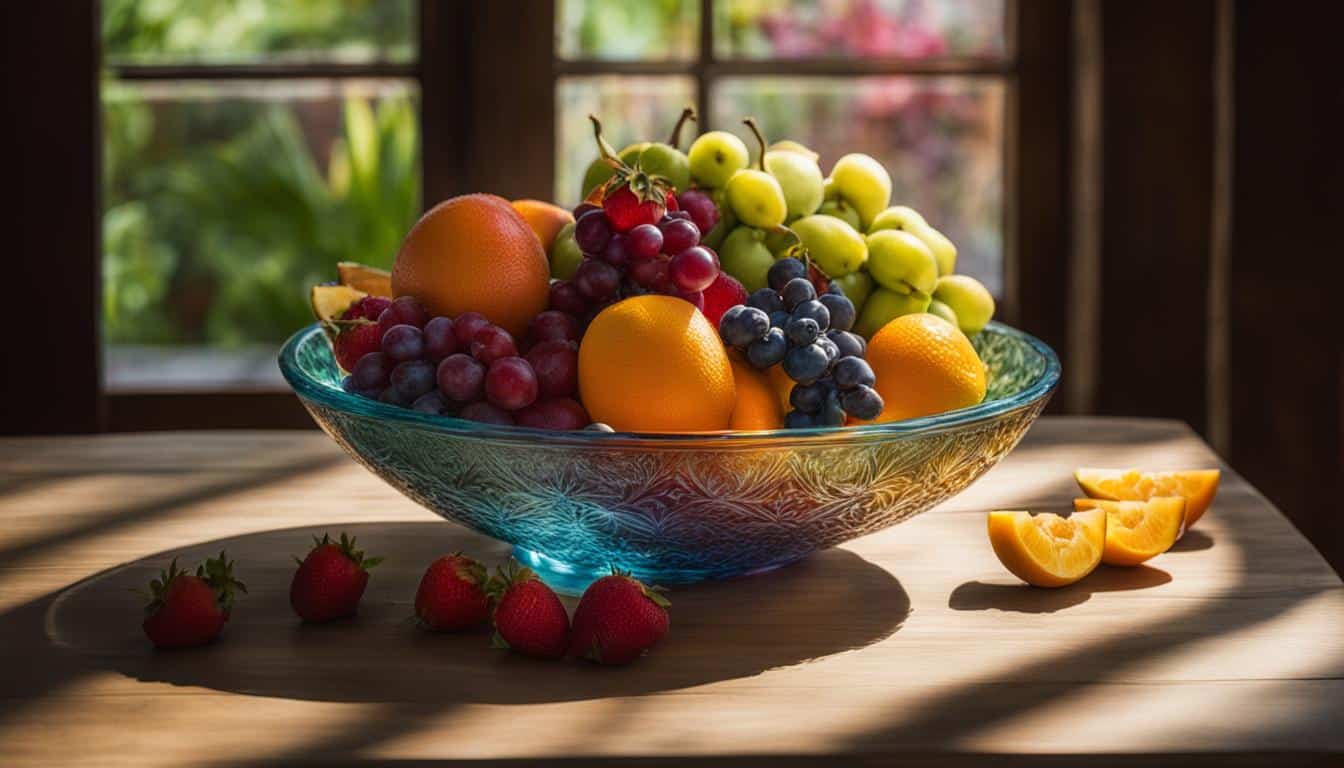
Still Life Arrangements: Fruit in a Bowl

In the world of art, still life arrangements have long been a captivating subject for artists. One particularly popular and visually striking composition is fruit in a bowl. This artistic representation of fresh fruits arranged in a bowl not only showcases the natural beauty of the fruits but also allows artists to explore color, texture, and composition.
The arrangement of fruit in a bowl offers endless possibilities for artistic expression. The contrasting colors, shapes, and sizes of different fruits create visual interest and provide an opportunity to experiment with composition. Whether it’s a simple arrangement of apples, bananas, and grapes or a more elaborate display with additional elements like flowers or utensils, the fruit in a bowl composition allows artists to showcase their creativity and bring life to their artwork.
When creating a fruit in a bowl still life, artists can play with lighting and shadows to enhance the three-dimensional effect and add depth to their artwork. By carefully observing the way light interacts with the fruits and the bowl, artists can create realistic and captivating compositions. The careful rendering of texture, whether it’s the rough skin of a pineapple or the smooth surface of an orange, further adds to the overall appeal of the artwork.
| Fruit | Color | Texture |
|---|---|---|
| Apple | Red, green, yellow | Smooth, glossy |
| Banana | Yellow | Soft, slightly bumpy |
| Grapes | Purple, green | Smooth, round |
Whether you’re a seasoned artist or just starting your artistic journey, exploring the still life arrangement of fruit in a bowl can be a rewarding and fulfilling experience. It allows you to not only capture the beauty of nature but also express your own unique artistic vision. So, grab your sketchbook, gather some fresh fruits, and let your creativity flow as you create your own stunning fruit in a bowl masterpiece.
Other Still Life Ideas
Looking to expand your still life drawing repertoire beyond fruit in a bowl? Here are some contemporary still life topics to spark your creativity:
Popcorn
A bowl of popcorn can make for an intriguing still life subject. Play with the contrast between the fluffy popcorn kernels and the shiny texture of the bowl. Experiment with lighting to create interesting shadows and reflections.
Crumpled Paper Bags
Don’t underestimate the artistic potential of crumpled paper bags. Their unique shapes and folds can add depth and texture to your still life composition. Focus on capturing the intricate details and play with different shading techniques to bring the crumpled paper to life.
Styrofoam Cups
Styrofoam cups can offer an interesting challenge for still life drawing. Their smooth surfaces and distinctive shapes present an opportunity to experiment with reflection and texture. Pay attention to the light and shadows as they interact with the cup’s surface.
Quotes:
“Everyday objects can become extraordinary subjects in still life drawing. Explore the beauty in the mundane and let your creativity soar!”
Famous Still Life Artists and their Work

In the world of art, there have been many renowned artists who have dedicated their talent and creativity to capturing the beauty of still life compositions. From delicate fruit arrangements to intricate table settings, these artists have transformed simple objects into breathtaking works of art. Let’s explore the masterpieces and techniques of some famous still life artists.
Giorgio Morandi
Giorgio Morandi, an Italian painter and printmaker, is known for his serene and poetic still life paintings. His compositions often feature simple objects such as bottles, vases, and jars arranged in harmonious settings. Morandi’s meticulous attention to detail and his subtle use of color and tone create a sense of quiet contemplation in his artworks. His work continues to inspire and influence artists around the world.
| Artwork | Description |
|---|---|
| “Still Life with Five Objects” (1956) Oil on canvas Dimensions: 35.8 x 40.3 cm A mesmerizing representation of Morandi’s style, showcasing his mastery of composition and delicate color palette. |
Roy Lichtenstein
Roy Lichtenstein, an American pop artist, is known for his bold and vibrant depictions of everyday objects, including still life compositions. He reimagined traditional still life subjects with his iconic comic book-inspired style, using bold lines and bright colors. Lichtenstein’s works are often larger-than-life, capturing the essence of popular culture and challenging the boundaries of traditional art.
| Artwork | Description |
|---|---|
| “Bananas and Grapefruit” (1972) Silkscreen on paper Dimensions: 58.4 x 73.7 cm A captivating example of Lichtenstein’s distinctive style, combining vivid colors and dynamic lines to create a modern take on still life. |
These famous still life artists have left an indelible mark on the art world with their unique perspectives and exceptional techniques. Whether it’s Morandi’s serene compositions or Lichtenstein’s bold reinterpretations, their works continue to inspire and captivate audiences around the world.
Still Life Drawing Tips and Techniques
When it comes to creating still life drawings, there are several tips and techniques that can help improve your observational skills and enhance the overall quality of your artwork. By paying attention to details and practicing these techniques, you can create more realistic and captivating still life compositions.
1. Focus on Lighting and Shadows
Lighting plays a crucial role in still life drawings as it brings out the form and depth of objects. Experiment with different light sources and observe how they cast shadows and create highlights. Pay attention to the direction and intensity of light, and use shading techniques to capture the subtle variations in tone.
2. Practice Contour Drawing
Contour drawing is a technique that involves outlining the edges of objects to create a sense of depth and form. By carefully observing the contours of your subjects and drawing them with fluid and confident lines, you can create more accurate and dynamic still life drawings.
3. Experiment with Composition
The arrangement of objects within your still life composition can greatly impact the visual appeal of your artwork. Experiment with different compositions, such as the rule of thirds or diagonal lines, to create a sense of balance and movement. Consider the relationship between objects and negative space, and aim for a visually engaging composition.
| Still Life Drawing Tips and Techniques | Keywords: |
|---|---|
| Focus on Lighting and Shadows | lighting, shadows, shading techniques |
| Practice Contour Drawing | contour drawing, depth, form |
| Experiment with Composition | still life composition, visuals, balance, movement |
By incorporating these still life drawing tips and techniques into your artistic practice, you can refine your observational skills and create more compelling and visually stunning artwork. Remember to experiment, practice regularly, and embrace your own unique style and creativity to truly bring your still life drawings to life.
Conclusion
Throughout this guide, I have shared with you the artistic journey of creating stunning fruit in a bowl drawings. By mastering the techniques and exploring your creativity, you can bring life to your artworks and create beautiful compositions.
Remember, practice is key to improving your skills. Set aside dedicated time to sketch and experiment with different fruits and arrangements. The more you draw, the more you will develop your observation skills and gain a deeper understanding of shape, texture, and shading.
When it comes to fruit in a bowl composition, don’t be afraid to think outside the box. Let your imagination guide you in creating unique and artistic arrangements. Experiment with different colors, textures, and lighting to add depth and interest to your drawings.
In conclusion, creating fruit in a bowl drawings is not just about replicating what you see, but about infusing your own artistic style and interpretation. So, grab your sketchbook, pick up a juicy fruit, and let your imagination run wild. I can’t wait to see the beautiful and artistic fruit compositions you create!
FAQ
What are some easy fruit drawing ideas?
You can start with simple fruits like apples, bananas, cherries, and grapes.
How can I improve my fruit drawing skills?
Practice regularly and seek feedback from others. Explore different techniques and styles to enhance your creativity.
What materials do I need for fruit drawing?
Basic materials include paper, pencils, erasers, and shading tools like graphite or charcoal.
How do I create a realistic fruit in a bowl drawing?
Focus on understanding shape, shading, and texture. Follow step-by-step instructions for each fruit and add final touches for a realistic outcome.
Can I create a fruit in a bowl drawing with colored pencils?
Yes, you can use colored pencils to add vibrant colors to your fruit in a bowl drawing.
What other objects can I draw in still life compositions?
You can explore ideas like popcorn, crumpled paper bags, styrofoam cups, and more.
Who are some famous still life artists?
Giorgio Morandi and Roy Lichtenstein are renowned for their still life artworks.
How can I create a visually interesting fruit in a bowl composition?
Play with different fruit shapes, colors, and sizes. Arrange them creatively within the bowl to create visual appeal.
What are some tips for improving observational skills in still life drawing?
Pay attention to perspective, use line drawing techniques, and observe how light and form interact with objects.

Leave a Reply