If you’re looking to add a versatile and delicious vegetable to your garden, butternut squash is an excellent choice. Not only does it have a dense, sweet orange flesh and thin skin, but it’s also low in carbohydrates and packed with vitamins. And here’s the best part: growing butternut squash from seeds is simpler than you might think.
Whether you have a spacious garden or a small balcony, you can enjoy the satisfaction of growing your own butternut squash. In this guide, I’ll walk you through everything you need to know about sowing, tending, and harvesting these delightful vegetables. From choosing the right growing conditions to exploring different varieties, you’ll discover how to make the most of your homegrown butternut squash.
So, let’s dive in and embark on the journey of growing butternut squash seeds together!
Key Takeaways:
- Butternut squash seeds are easy to grow and provide a bountiful harvest.
- Butternut squash has dense, sweet flesh and thin skin, making it a versatile and delicious vegetable.
- Growing butternut squash seeds is simpler than you might think, whether you have a spacious garden or a small balcony.
- In this guide, you’ll learn everything you need to know about sowing, tending, and harvesting butternut squash.
- Experiment with different varieties and cooking methods to make the most of your homegrown butternut squash.
Sowing Butternut Squash Seeds
https://www.youtube.com/watch?v=tClfUrGfGYo
When it comes to growing butternut squash, starting from seeds is a cost-effective and rewarding way to go. By sowing butternut squash seeds, you have the opportunity to nurture these delicious vegetables from the very beginning. Here’s a step-by-step guide on sowing butternut squash seeds for a successful harvest.
Gather Your Supplies
Before sowing butternut squash seeds, make sure you have the necessary supplies. You’ll need 7cm pots of peat-free, multi-purpose compost, organic butternut squash seeds, and a warm, well-lit area to start the seeds. Gathering all your supplies beforehand will help ensure a smooth sowing process.
The Sowing Process
1. Fill the 7cm pots with peat-free, multi-purpose compost. Moisten the compost slightly to provide the ideal environment for the seeds.
2. Place one or two organic butternut squash seeds in each pot, burying them about 2cm deep. This depth will protect the seeds and provide the necessary moisture for germination.
3. Cover the pots with a layer of compost and gently firm it down. Be sure not to compact the compost too much, as the seeds need air and moisture to germinate.
4. Place the pots in a warm, well-lit area, such as a greenhouse or windowsill. Maintain a temperature of around 20°C (68°F) to encourage germination.
5. Keep the compost moist but not waterlogged. Overwatering can hinder germination and lead to fungal diseases. Aim for a consistently moist but not soggy environment.
Transplanting and Outdoor Planting
Once the seedlings have developed true leaves and are approximately 10-15cm tall, they are ready for transplantation. Gently lift the seedlings from their pots, being careful not to damage the delicate roots.
Transfer each seedling to a larger pot filled with peat-free, multi-purpose compost. Allow the seedlings to grow in these pots for a few weeks, ensuring they receive adequate light and moisture. This period of growth will help strengthen the plants for outdoor conditions.
After the last frost has passed and the risk of cold weather has diminished, it’s time to plant your butternut squash seedlings outdoors. Choose a sunny location with well-prepared soil enriched with organic matter. Space the plants approximately 1.5m apart to allow for ample growth.
Alternatively, if you prefer to sow the seeds directly outdoors, wait until late May or early June when the soil has warmed sufficiently. Prepare the soil by removing any weeds and incorporating plenty of organic matter to improve its fertility and drainage.
A Helpful Tip
For optimal results, consider starting your butternut squash seeds indoors, as it allows for an early start and greater control over the growing conditions. This can result in stronger, healthier seedlings and a more productive harvest in the long run.
| Sowing Method | Advantages | Disadvantages |
|---|---|---|
| Sowing Indoors | – Early start for the growing season – Control over growing conditions – Stronger and healthier seedlings – Greater protection from pests and adverse weather |
– Requires space and equipment for indoor germination – Requires transplanting seedlings – More labor-intensive |
| Sowing Outdoors | – Directly sowing seeds in their final growing location – Less labor-intensive – No transplanting required |
– Relies on outdoor conditions – Greater vulnerability to pests and adverse weather |
Tending Butternut Squash Plants
When it comes to tending butternut squash plants, there are a few key factors to keep in mind in order to ensure a successful harvest. Here are some tips to help you care for your butternut squash plants:
Weeding and Watering
Keeping your butternut squash plants weed-free is essential for their healthy growth. Weeds can compete with the plants for nutrients, water, and sunlight, so regular weeding is necessary to give your squash plants the best chance to thrive. Additionally, butternut squash plants require consistent watering throughout their growing season. Aim to keep the soil evenly moist, but not waterlogged, to prevent the plants from drying out.
Feeding Your Plants
Butternut squash plants are known as “hungry” plants, meaning they benefit from regular feeding to support their growth and development. To provide the necessary nutrients, apply a balanced organic fertilizer according to the package instructions. This will help ensure that your plants have the fuel they need to produce healthy and abundant butternut squash.
Protecting Against Pests
In order to protect your young butternut squash plants from common pests such as slugs, snails, and aphids, it’s important to take proactive measures. You can create physical barriers around your plants using organic pest control methods like copper tape or crushed eggshells to deter slugs and snails. Introducing beneficial insects like ladybugs and lacewings can help control aphid populations. Regularly inspect your plants for any signs of infestation and take appropriate action.
Disease Resistance
As the season progresses, butternut squash plants may become susceptible to certain diseases such as powdery mildew and cucumber mosaic virus. To mitigate these risks, it’s advisable to choose varieties that have good disease resistance. This can significantly reduce the likelihood of your plants being affected by these common issues. Consult with your local nursery or seed supplier to find varieties that are known for their resistance to diseases.
Incorporating these practices into your routine will help ensure that your butternut squash plants receive the care they need to thrive. Remember, tending to your plants by weeding, watering, feeding, and protecting them against pests and diseases is crucial for a successful harvest of delicious and nutritious butternut squash.
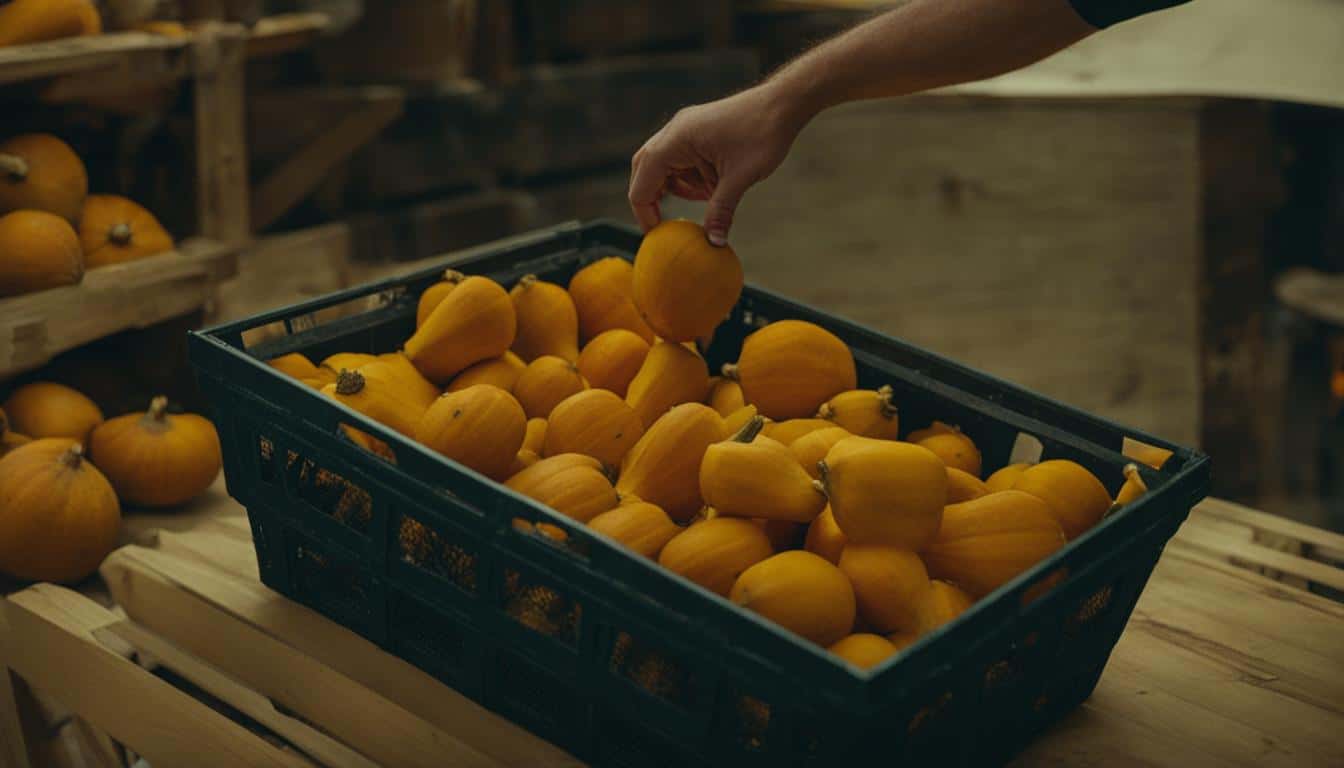
Harvesting and Storing Butternut Squash
When it comes to growing butternut squash, the true reward lies in the harvest. Harvesting your butternut squash at the right time ensures that you can enjoy its delicious flavor and creamy texture for months to come. Let’s take a look at the best practices for harvesting and storing butternut squash.
1. Perfect Timing: Harvesting Before the Frost
Butternut squash reaches its peak ripeness when the fruits turn fully tan in color and the skin becomes hard. It’s essential to harvest your butternut squash before the first frost arrives. The frost can damage the fruits and reduce their quality, making it important to keep a close eye on the weather forecast as you approach the end of the growing season.
2. Proper Techniques: Harvesting with Care
To harvest your butternut squash, use a sharp knife or pruning shears to cut the fruits from the vine, leaving about an inch of stem attached. Be careful not to damage the skin or stem, as any wounds can lead to decay during storage. Handle the fruits gently to avoid bruising.
Tip: Harvest your butternut squash on a dry day when the vines and fruits are completely dry. This helps prevent the spread of diseases and ensures better storage quality.
3. Storage Conditions: Creating the Ideal Environment
After harvesting, it’s important to store your butternut squash properly to maintain its freshness and flavor. Here are some key considerations:
- Cool and Dry: Find a cool, dry place with temperatures between 50-55°F (10-13°C). Avoid areas with high humidity, as it can cause the squash to spoil.
- Good Air Circulation: Provide good air circulation around the stored squash to prevent the accumulation of moisture and reduce the risk of rotting.
- Avoid Stacking: Do not stack the squash on top of each other, as it can lead to increased pressure and damage.
4. Storage Duration: Enjoy Butternut Squash for Months
When stored under optimal conditions, butternut squash can last up to three months. Regularly inspect your stored squash and remove any fruits that show signs of decay or damage. This will prevent the spread of spoilage and ensure that you can enjoy your homegrown butternut squash throughout the winter months.
Now that you know how to effectively harvest and store your butternut squash, you can savor its rich flavor and versatility long after the harvest season has ended.
| Harvesting Tips | Storage Tips |
|---|---|
| Harvest before the first frost | Store in a cool, dry place |
| Use a sharp knife or pruning shears | Ensure good air circulation |
| Leave an inch of stem attached | Avoid stacking the squash |
| Handle the fruits gently | Regularly inspect for decay or damage |
Butternut Squash Varieties to Try

When it comes to butternut squash, there are a variety of options to choose from. Here are some popular varieties that you might consider growing:
‘Winter Hercules’
This variety of butternut squash is known for its large size and sweet flavor. It produces robust yields and has good resistance to powdery mildew.
‘Winter Hunter’
‘Winter Hunter’ butternut squash is prized for its smooth, tan-colored skin and rich, nutty flavor. It has a high yield potential and is resistant to powdery mildew.
‘Waldo’
With its elongated shape and creamy orange flesh, ‘Waldo’ butternut squash is a popular choice for both cooking and decorative purposes. It has a good resistance to powdery mildew and offers excellent flavor.
‘Butterscotch’
If you’re looking for a unique twist on butternut squash, ‘Butterscotch’ is worth trying. It has a sweet, buttery flavor and a beautiful golden color. This variety has good disease resistance and is known for its consistent yields.
‘Barbara’
‘Barbara’ is a compact bush type butternut squash that thrives in containers or small garden spaces. It offers excellent flavor and a good resistance to powdery mildew.
To get started with these varieties, you can find butternut squash seeds at nurseries or online seed stores. Now, let’s take a closer look at the ideal growing conditions for butternut squash in the next section.
| Variety | Flavor | Yield | Resistance to Powdery Mildew |
|---|---|---|---|
| ‘Winter Hercules’ | Sweet | High | Good |
| ‘Winter Hunter’ | Nutty | High | Resistant |
| ‘Waldo’ | Creamy | High | Good |
| ‘Butterscotch’ | Buttery | Consistent | Good |
| ‘Barbara’ | Excellent | Good | Resistant |
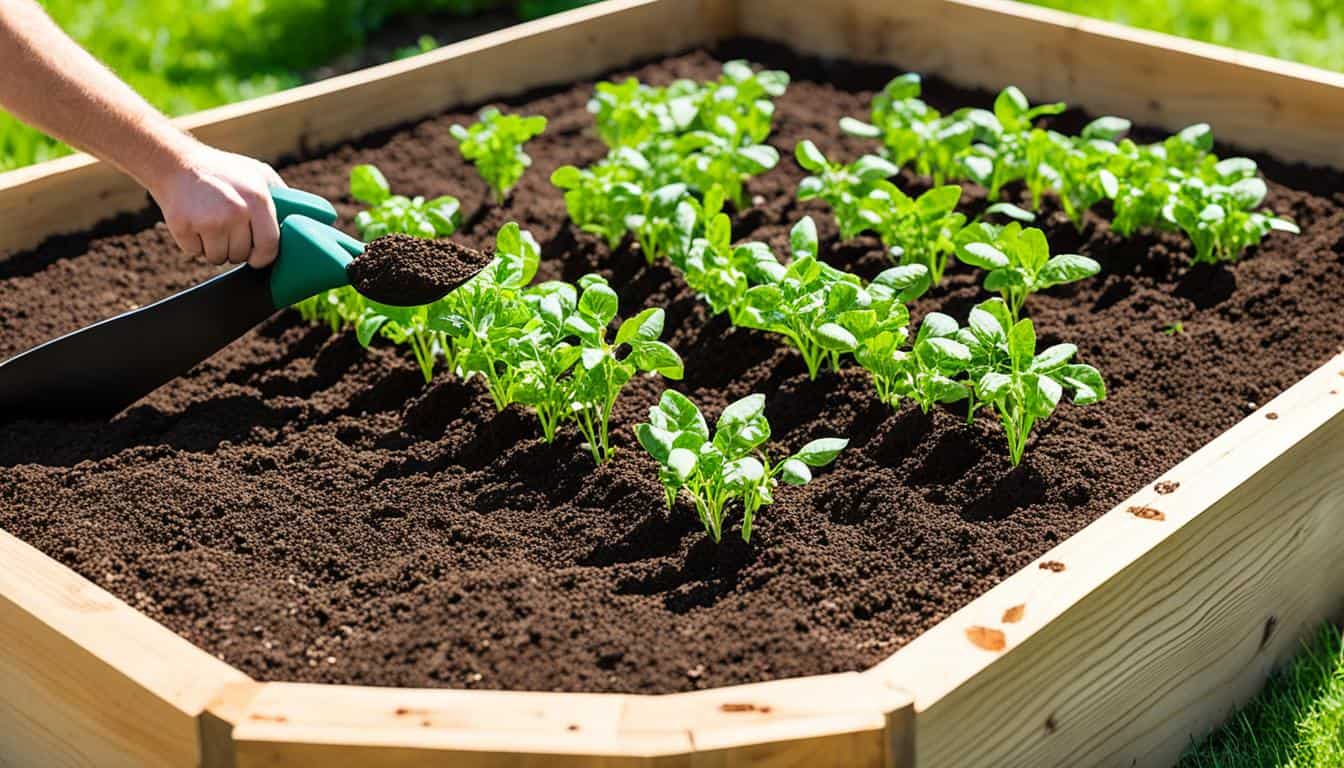
Choosing the Right Growing Conditions for Butternut Squash

When it comes to growing butternut squash, providing the right growing conditions is essential for a successful harvest. Butternut squash thrives in a sunny spot with rich, well-drained soil. To create the ideal environment for your squash plants, consider the following tips:
- Choose a Sunny Location: Butternut squash plants love sunshine, so select a spot in your garden that receives at least 6-8 hours of direct sunlight each day. This will help the plants to grow vigorously and produce abundant fruits.
- Ensure Well-Drained Soil: Butternut squash prefers soil that drains well and doesn’t become waterlogged. To improve drainage, add organic matter such as compost or well-rotted manure to the soil before planting. This will help create a loose and fertile growing medium.
- Create Individual Planting Pockets: If you don’t want to turn over your entire garden plot, you can create individual planting pockets for your butternut squash plants. Dig a hole that is about twice as wide and deep as the root ball of the plant. This will provide ample space for the roots to spread out and access nutrients efficiently.
By providing the right growing conditions, you can ensure that your butternut squash plants thrive and produce a bountiful harvest. Have a look at the image below for a visual reference:
| Sunlight | Well-Drained Soil |
|---|---|
| Butternut squash plants require at least 6-8 hours of direct sunlight each day for optimal growth. |
The soil should drain well and be enriched with organic matter to support healthy root development. |
Prepare your garden bed, choose a sunny location, improve the soil with organic matter, and create individual planting pockets if needed. These steps will set the stage for successful butternut squash cultivation. Remember, the right growing conditions are the foundation for a thriving and productive garden.
Sowing Butternut Squash Seeds Indoors and Outdoors

When it comes to growing your own butternut squash, you have two options for sowing the seeds: indoors or outdoors. Both methods have their advantages and can lead to a successful harvest.
Sowing Butternut Squash Seeds Indoors
If you want to get a head start on the growing season, sowing butternut squash seeds indoors is the way to go. This method allows you to control the environment and protect the young seedlings from any potential frost.
To sow your butternut squash seeds indoors, follow these steps:
- Fill seed trays or pots with a quality seed starting mix, ensuring good drainage.
- Place one to two seeds in each tray or pot, about 1 inch deep.
- Water the soil thoroughly, keeping it consistently moist but not waterlogged.
- Place the trays or pots in a warm location, such as a sunny windowsill or a heated greenhouse.
- After the seeds germinate and develop their first set of true leaves, thin them out to the strongest seedling in each container.
Once the last frost date has passed and the risk of cold weather has diminished, you can transplant the seedlings into your garden or allotment.
Sowing Butternut Squash Seeds Outdoors
For those who prefer a simpler approach or have limited indoor space, sowing butternut squash seeds directly outdoors is a viable option. This method relies on the natural conditions and timing of the growing season.
To sow your butternut squash seeds outdoors, follow these steps:
- Prepare the soil by removing any weeds and adding compost or organic matter to improve its fertility.
- Make 1-inch-deep furrows in the soil, spaced about 3 feet apart.
- Place one to two seeds in each furrow, spacing them evenly.
- Cover the seeds with soil and gently firm it down.
- Water the soil thoroughly, keeping it consistently moist until germination occurs.
As the seedlings grow, thin them out to leave the strongest plant in each group, ensuring adequate spacing between plants for proper growth and airflow.
Buying Butternut Squash Seeds
If you’re wondering where to buy butternut squash seeds, you can find them at local nurseries, garden centers, or online seed stores. Look for organic butternut squash seeds for a more sustainable gardening approach.
Remember, whether you choose to sow your butternut squash seeds indoors or outdoors, providing them with proper care, including regular watering, weeding, and protecting them from pests, will help ensure a successful and abundant harvest.
| Method | Advantages | Disadvantages |
|---|---|---|
| Sowing Indoors |
|
|
| Sowing Outdoors |
|
|
Both methods of sowing butternut squash seeds have their advantages and considerations. Choose the one that suits your gardening style and resources best. Whichever method you choose, be prepared to enjoy the delicious rewards of homegrown butternut squash!
Growing Butternut Squash in Pots

When it comes to growing butternut squash, you might be surprised to learn that you don’t need a big garden or a sprawling plot of land. Compact bush varieties like ‘Barbara’ are perfect for growing in pots, allowing you to enjoy the delicious taste of homegrown butternut squash even if you have limited space.
To successfully grow butternut squash in pots, there are a few key steps to follow:
- Choose a large pot: Select a pot with a minimum diameter of 45cm to provide enough space for the squash plants to grow and develop their extensive root systems.
- Ensure proper drainage: Make sure the pot has drainage holes at the bottom to prevent waterlogging. This will help prevent root rot and other moisture-related issues.
- Select high-quality potting soil: Use a well-draining potting mix specifically formulated for container gardening. This will ensure that the soil retains moisture while allowing excess water to escape.
- Planting and watering: Sow the butternut squash seeds in the pot according to the recommended spacing (refer to the seed packet for specific instructions). Water the pot regularly to keep the soil moist, but not waterlogged.
- Nutrients for healthy growth: To provide the necessary nutrients for robust plant growth, consider adding a balanced fertilizer like incredicrop® at planting time.
- Sun and temperature requirements: Place the pot in a sunny spot that receives at least 6-8 hours of direct sunlight each day. Butternut squash plants thrive in warm temperatures, so make sure the pot is in an area with temperatures above 70°F (21°C).
Growing butternut squash in pots requires diligent care and attention. Regularly monitor the moisture levels in the soil, especially during hot weather, as pot-grown plants can dry out quickly.
“Growing butternut squash in pots is a great option for urban gardeners or anyone with limited space. With proper care and attention, you can enjoy a bountiful harvest of this delicious and versatile vegetable.”
| Advantages of Growing Butternut Squash in Pots | Challenges of Growing Butternut Squash in Pots |
|---|---|
|
|
Useful Tips for Growing Butternut Squash

As butternut squash plants grow, it can be helpful to set a cane by each plant to mark the center for watering. This ensures that the water reaches the roots effectively and promotes healthy growth. Additionally, growing butternut squash around the base of sweetcorn plants can save space in your garden, as they both have similar requirements and can thrive together.
Butternut squash seeds not only produce delicious fruits but also make for a nutritious snack when roasted. Their health benefits include being a good source of fiber, vitamins A and C, potassium, and magnesium. These seeds are rich in antioxidants and can help support a healthy immune system.
If you’re looking for creative ways to incorporate butternut squash seeds into your diet, consider trying some delicious recipes. Roasted butternut squash seeds make a crunchy topping for salads, soups, and roasted vegetables. You can also blend them into a creamy pesto or use them as a base for homemade granola bars.
Here is a simple recipe to get you started:
Roasted Butternut Squash Seeds Recipe
- Preheat your oven to 300°F (150°C).
- Separate the seeds from the flesh of the butternut squash.
- Rinse the seeds and remove any remaining squash fibers.
- Spread the seeds in a single layer on a baking sheet.
- Sprinkle with your favorite seasonings, such as salt, garlic powder, or chili powder.
- Bake for 15-20 minutes or until the seeds are golden brown.
- Allow the seeds to cool before enjoying as a healthy and flavorful snack.
With these tips, you can enhance your butternut squash growing experience and make the most of this versatile vegetable. Whether you’re tending to your plants or exploring new recipes, butternut squash seeds and fruits offer a wide range of benefits for both your health and culinary endeavors.
Conclusion
Growing butternut squash seeds can be a rewarding experience. With the right conditions and care, you can enjoy a bountiful harvest of this versatile and delicious vegetable. Butternut squash is a low-carbohydrate option packed with vitamins, making it a healthy addition to your diet.
By experimenting with different butternut squash varieties and cooking methods, you can discover your favorite flavors and dishes. Roasting butternut squash seeds makes for a tasty and nutritious snack, while the flesh can be used in a wide range of recipes, including soups, risottos, and roasted vegetable medleys.
Remember to provide the proper growing conditions for your butternut squash, including a sunny spot with well-drained soil enriched with compost and organic matter. Regular watering, feeding, and protection from pests and diseases are essential to ensure a successful harvest.
Whether you choose to sow your butternut squash seeds indoors or outdoors, in pots or directly in the ground, the result can be a homegrown supply of butternut squash that lasts for months. So roll up your sleeves, grab your gardening gloves, and get ready to enjoy the fruits of your labor!

Leave a Reply