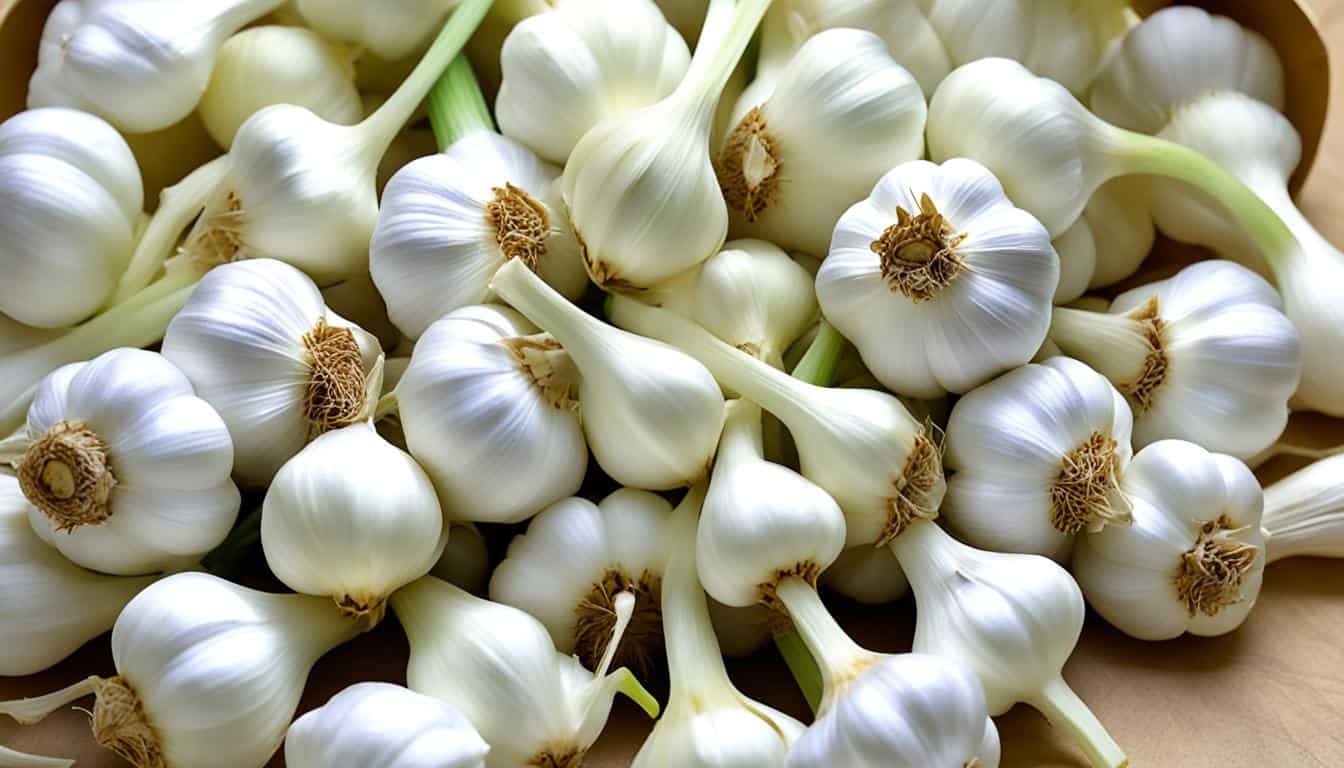
Did you know that spring planting of garlic is possible if you missed the fall planting window? That’s right! You can still enjoy the delicious flavors of fresh garlic by planting it in the spring. Whether you’re a seasoned gardener or just starting out, I’m here to provide you with all the tips and tricks you need to successfully grow fresh spring garlic in your own garden.
Key Takeaways:
- Spring planting of garlic is possible if you missed the fall planting window.
- Garlic cloves require vernalization, a cold treatment, before planting in the spring.
- There are two main types of garlic: hardneck and softneck.
- Spring-planted garlic bulbs will be slightly smaller than fall-planted ones.
- You can purchase spring garlic for planting online or at local garden centers.
Can You Plant Garlic in the Spring?
Yes, you can plant garlic in the spring. Although fall is the preferred time for planting garlic, spring planting is an option if you missed the fall window. However, there is an important step to ensure successful bulb development – vernalization. Vernalization is a cold treatment that garlic cloves need to go through before planting in the spring. This process mimics the cold winter conditions that garlic requires for proper growth.
When planting garlic in the spring, you have two options – growing green garlic or bulbs. Green garlic is harvested when the plants are tall and the garlic is still young. It has a milder, fresher flavor and can be used in a variety of dishes like soups, stir-fries, and salads. Planting garlic bulbs in the spring will result in slightly smaller bulbs compared to fall-planted garlic, but they will still be delicious and flavorful.
To give you a visual idea of the differences, here’s a table comparing fall-planted garlic and spring-planted garlic:
| Fall-Planted Garlic | Spring-Planted Garlic |
|---|---|
| Planted in fall | Planted in spring |
| Grows large bulbs | Produces slightly smaller bulbs |
| Harvested in late summer | Harvested in mid to late summer |
As you can see, there are some differences between fall-planted and spring-planted garlic, but both can be successful and delicious additions to your garden. Whether you choose to plant in the fall or spring, garlic is a versatile and flavorful crop that can enhance your culinary creations.
By understanding the vernalization process and the differences between fall and spring planting, you can confidently plant garlic in the spring and enjoy the rewards of your homegrown harvest.
Types of Garlic
In the world of garlic, there are two main varieties that every gardener should be familiar with: hardneck garlic and softneck garlic. Each type has its own unique characteristics and growing requirements. Let’s explore the differences between hardneck and softneck garlic.
Hardneck Garlic
Hardneck garlic, as the name suggests, has a firm central stem that grows up from the center of the bulb. This stem is also known as a scape. Hardneck garlic varieties are generally more cold-tolerant and typically produce larger cloves compared to softneck garlic.
One interesting characteristic of hardneck garlic is that it produces flower buds called bulbils at the top of the scape. To promote larger bulb growth, many gardeners snap off the scapes before they fully develop.
Softneck Garlic
On the other hand, softneck garlic does not have a central stem like hardneck garlic. It is typically grown in warmer regions, as it is not as cold-hardy as hardneck varieties. Softneck garlic is known for its ability to be braided for storage, thanks to its flexible stems.
Softneck garlic usually produces more cloves per bulb compared to hardneck garlic. It also has a longer storage life, making it a preferred choice for many gardeners.
Now that you know the differences between hardneck and softneck garlic, you can choose the variety that best suits your growing conditions and culinary needs.
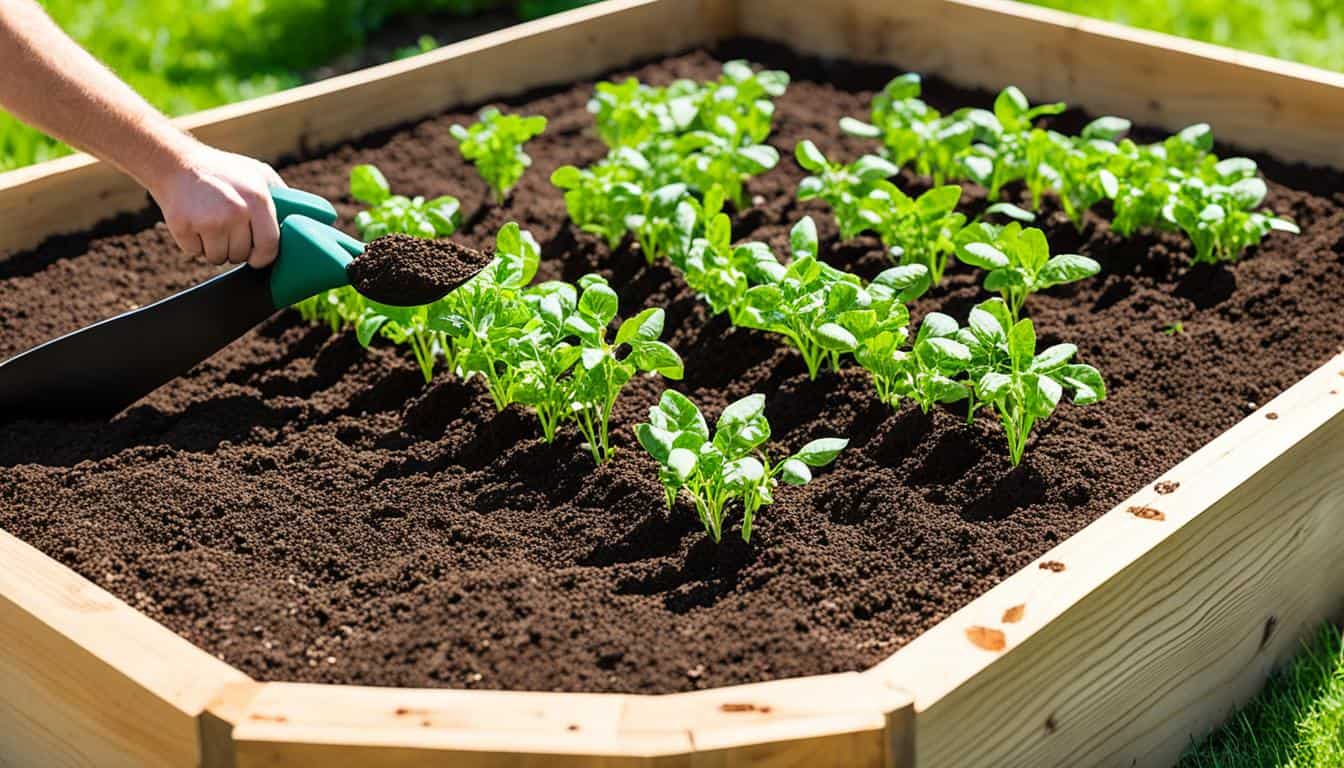
How to Plant Garlic in the Spring

In order to successfully plant garlic in the spring, it’s important to follow a few key steps. The first step is to ensure that the garlic cloves have gone through a process called vernalization, which is a cold treatment necessary for bulb development. There are two methods to vernalize garlic:
- Refrigerator Method: Place the garlic cloves in a refrigerator for a period of time to mimic the cold temperatures of winter. This can take anywhere from 4 to 8 weeks, depending on the variety of garlic.
- Natural Cold Method: Alternatively, you can plant the garlic cloves early in the season, taking advantage of the natural cold temperatures of the spring. This method requires planting the cloves about 4-6 weeks before the last frost date in your area.
Once the garlic cloves have been vernalized, it’s time to plant them in the garden. Spring-planted garlic cloves should be planted as early as possible in the spring to ensure optimum growth. Spacing is important, and cloves should be planted about 2 to 3 inches apart, with the pointed end facing upwards.
Preparing the soil is essential for successful garlic planting. Start by incorporating compost and organic fertilizer into the soil to provide the necessary nutrients. This will help the garlic bulbs grow and develop properly.
It’s important to note that planting garlic in the spring will result in slightly smaller bulbs compared to fall-planted garlic. However, with the right care and attention, you can still enjoy a bountiful harvest of fresh, flavorful garlic.
Where to Buy Spring Garlic for Planting

When it comes to buying spring garlic for planting, you have two convenient options: online and local garden centers. Both sources provide access to a variety of garlic bulbs suitable for spring planting.
If you prefer the convenience of online shopping, numerous websites offer a wide selection of spring garlic bulbs. Simply search for reputable online garden stores or seed companies that specialize in garlic varieties. Read customer reviews to ensure authenticity and quality before making a purchase. Ordering online allows you to conveniently browse through different cultivars and choose the ones that best suit your preferences and growing conditions.
If you enjoy a hands-on experience and prefer to see and feel the garlic bulbs before buying, visiting a local garden center is a great option. These centers typically stock a variety of garlic bulbs for spring planting. Look for well-established garden centers in your area that carry a diverse selection of gardening supplies. Pay attention to their reputation and customer ratings to ensure quality products. Visiting a garden center not only allows you to inspect the bulbs thoroughly but also provides an opportunity to seek expert advice from knowledgeable staff.
Regardless of where you choose to purchase your spring garlic bulbs, it’s essential to buy them as early as possible. By doing so, you allow ample time for vernalization, the crucial cold treatment that promotes bulb development. It is wise to check with local retailers or online sources for availability in advance, as popular varieties tend to sell out quickly.
Softneck garlic varieties are typically more readily available in the spring and require less vernalization than hardneck varieties. Consider this when making your selection, keeping in mind your growing conditions and desired flavor profiles.
Remember, whether you opt for online shopping or a visit to your local garden center, buying spring garlic for planting is the first step toward a successful and rewarding garlic-growing experience.
| Pros of Buying Spring Garlic Online | Pros of Buying Spring Garlic at Local Garden Centers |
|---|---|
|
|
Best Practices for Planting Garlic in the Spring

When it comes to planting garlic in the spring, following some best practices can ensure a successful harvest. Here are some tips for planting garlic in the spring to help you get started:
- Choose an ideal site: Select a location that receives at least eight hours of sunlight each day. Garlic thrives in full sun, which helps promote healthy growth and bulb development.
- Prepare the soil: Before planting, enrich the soil with nitrogen-rich organic matter such as compost. This will provide the necessary nutrients for the garlic plants to thrive.
- Plant at the right depth and spacing: Garlic cloves should be planted two to three inches deep and spaced about six inches apart. Planting in a grid formation maximizes space utilization and allows each bulb to grow to its full potential.
- Mulch for moisture retention: After planting, mulch the garlic bed with shredded leaves or straw. This helps retain moisture in the soil and suppresses weed growth, ensuring optimal conditions for garlic growth.
- Water deeply and consistently: Garlic requires consistent moisture for proper growth. Water the garlic bed deeply, ensuring that the soil is evenly moist. Avoid overwatering, as garlic bulbs can rot in excessively wet conditions.
By following these best practices, you can increase the chances of a successful garlic harvest in the spring. Remember to monitor the soil moisture levels, weed regularly, and provide adequate care throughout the growing season.
For a visual representation of these best practices, refer to the table below:
| Best Practices for Planting Garlic in the Spring |
|---|
| Choose an ideal site with at least eight hours of sun each day |
| Prepare the soil with nitrogen-rich organic matter |
| Plant garlic cloves two to three inches deep and six inches apart |
| Mulch the bed with shredded leaves or straw |
| Water the garlic bed deeply and consistently |
“Proper soil preparation, spacing, and consistent watering are key to successful spring garlic planting.”
Growing Garlic in Containers

Did you know that you can grow garlic in containers? It’s a convenient and space-saving way to cultivate this flavorful herb right on your patio or balcony. Whether you have limited garden space or simply prefer the versatility of container gardening, growing garlic in pots is a rewarding experience.
When it comes to choosing the right container, size matters. The size of the pot will depend on the amount of garlic you want to grow. A pot with a minimum depth of eight inches allows for adequate root growth and ensures that the garlic bulbs have enough space to mature.
For optimal growth, use a growing medium that consists of a well-draining potting mix mixed with compost. This combination provides the garlic plants with the necessary nutrients and promotes healthy growth.
Tip: Adding a handful of organic fertilizer to the potting mix can further enhance the growth of your container-grown garlic.
When planting garlic in containers, space the cloves two to three inches deep and three to four inches apart. This ensures that each garlic plant has enough room to grow and develop without overcrowding. Placing the containers in a sunny location, preferably receiving at least six to eight hours of sunlight a day, is crucial for optimum growth and bulb development.
Regular watering is essential for the successful cultivation of garlic in containers. The soil should be kept consistently moist but not waterlogged. To provide additional nutrients, consider using a liquid organic fertilizer every two to three weeks throughout the growing season. This helps ensure that your garlic plants receive a balanced diet and promotes robust growth.
With proper care and the right growing conditions, your container-grown garlic will thrive and provide you with an abundant harvest. Just imagine stepping outside and plucking fresh garlic from your own container garden to use in your favorite recipes!
Caring for Spring-Planted Garlic

When it comes to caring for spring-planted garlic, consistent moisture is key, especially during hot and dry weather. Adequate watering will ensure that the garlic plants thrive and produce healthy bulbs. Additionally, regular weeding is essential to prevent competition for nutrients and water.
Another important aspect of caring for spring-planted garlic is providing the right nutrients to promote healthy leaf growth and bulb development. This can be achieved by regularly feeding the soil with compost and organic fertilizers. These natural amendments will enrich the soil and provide the necessary nutrients for the garlic plants to flourish.
“Consistent moisture, regular weeding, and proper feeding are crucial for the optimal growth and bulb size of spring-planted garlic.”
Fortunately, garlic is not prone to major pest and disease problems, making it relatively easy to maintain. However, it is still important to keep an eye out for any signs of trouble. If any pests or diseases do appear, prompt action should be taken to prevent the issue from spreading.
By following these maintenance tips for spring garlic, including regular watering, weeding, and feeding, you can ensure that your garlic plants receive the care they need to thrive. With proper maintenance, your spring-planted garlic will reward you with flavorful bulbs that can be enjoyed in a variety of culinary creations.
Maintenance Tips for Spring Garlic:
- Consistently water the garlic plants, especially during hot and dry weather.
- Regularly weed the garlic bed to prevent competition for nutrients and water.
- Feed the soil with compost and organic fertilizers to promote healthy leaf growth and bulb development.
- Keep an eye out for any pests or diseases and take prompt action if necessary.
By following these maintenance tips, you can ensure the optimal growth and bulb size of your spring-planted garlic.
Harvesting and Curing Garlic
After patiently nurturing your spring-planted garlic for several months, the time has come to reap the rewards. Harvesting garlic is an exciting and satisfying experience that marks the culmination of your hard work. Let me guide you through the process of harvesting and curing your spring garlic to ensure its long-lasting flavor and quality.
Knowing When to Harvest
Garlic takes about 100 days to mature fully, or approximately 80 days after the last frost. To determine if your garlic is ready for harvest, look for subtle changes in the lower leaves. When the leaves start to turn yellow or brown and the outer wrappers covering the bulbs have dried and become papery, it’s a clear sign that your garlic is ripe and ready to be picked.
“Harvest your garlic when the leaves start to change color and the bulbs have formed.”
It’s crucial to avoid leaving garlic in the ground for too long as overripe bulbs may split, reducing their storage life. On the other hand, harvesting too early may result in immature bulbs with underdeveloped flavor.
The Harvesting Process
Gently loosen the soil around the garlic bulbs using a garden fork or trowel, taking care not to damage them. Gradually lift the bulbs from the soil, ensuring that the entire bulb is intact and free from any cuts or bruises. Trim the roots and necks, leaving about an inch attached to each bulb.
Curing and Storing Garlic
Curing is an essential step in preparing your garlic for long-term storage. It helps enhance flavor, extend shelf life, and improve the bulbs’ texture and aroma. To cure garlic, find a warm, dry, and well-ventilated area, such as a cool basement or a shaded porch.
Spread the harvested garlic bulbs in a single layer on a clean and dry surface, like a wire rack or a mesh tray. Ensure that the bulbs are not touching each other to allow proper airflow. Let them cure for two to three weeks, turning them occasionally to promote even drying.
During the curing process, it’s crucial to keep moisture away from the garlic cloves. Excessive moisture may lead to mold or rot, compromising the quality of your harvest. Be patient and resist the temptation to use fresh garlic right away. The curing period is vital for developing the full flavor and storage capacity of your garlic.
Well-cured garlic can last up to six months or even longer when stored properly. Once the curing process is complete, remove any remaining outer wrappers and store the bulbs in mesh bags or baskets. These containers provide good airflow, preventing moisture buildup that can cause spoilage. Place the garlic in a cool, dark, and dry location, like a pantry or cellar, ensuring the temperature stays between 55-65°F (13-18°C).
“Properly cured and stored garlic can retain its flavor and quality for months.”
By following these simple steps, you can savor the delicious taste of your homegrown garlic all year round. Harvesting at the right time and allowing for proper curing and storage ensures that your garlic maintains its remarkable flavor and aroma. Enjoy the fruits of your labor and elevate your culinary creations with the rich and bold flavors of freshly harvested garlic.
Conclusion
Growing spring garlic is an exciting and rewarding experience that allows you to enjoy the freshness and flavor of homegrown garlic in your favorite dishes. By following the tips and tricks provided in this comprehensive spring garlic gardening guide, you can confidently embark on your garlic growing journey.
First and foremost, ensure that your garlic cloves undergo vernalization before planting in the spring. This cold treatment is essential for bulb development and will result in healthy, robust garlic plants. Additionally, choose the right garlic varieties for your region and desired flavor profile. Hardneck and softneck garlic offer different characteristics, so select accordingly.
Proper soil preparation is vital for the success of your spring garlic. Incorporate compost and organic fertilizer to provide the necessary nutrients and moisture retention capabilities. During the growing season, take care of your garlic plants by watering deeply, weeding regularly, and feeding with organic fertilizers. These practices will maximize growth and bulb development.
Finally, when it’s time to harvest your spring garlic, pay attention to the signs of maturity and ensure proper curing. Harvest when the lower leaves start to change color and the bulbs have fully formed. Clean and trim the garlic, removing roots and necks, and allow it to cure in a well-ventilated space. With proper curing and storage, your homegrown spring garlic can last for months.

Leave a Reply