Have you ever wondered, “How do you make slime with 2 ingredients without glue?” Well, I have the answer for you! In this article, I’ll show you two easy and fun recipes for making slime using just two ingredients. And the best part? You won’t need any glue at all!
Key Takeaways
- Making slime with 2 ingredients is simple and fun.
- Recipe 1 uses hand lotion and soft clay, while recipe 2 uses conditioner and cornstarch.
- Follow the step-by-step instructions for each recipe to achieve the desired slime consistency.
- Experiment with different variations and add-ins to customize your slime creations.
- Remember to follow safety precautions when making and playing with slime.
Understanding the Ingredients
Before we dive into the slime-making process, let’s get acquainted with the two key ingredients: hand lotion and soft clay (or conditioner and cornstarch). These ingredients are the secret to creating slime without using glue, providing a smooth and stretchy texture.
Hand lotion: Hand lotion is an essential component of the first slime recipe. It helps to bind the soft clay together and give the slime its desired consistency. Look for a hand lotion that is fragrance and dye-free to avoid any potential color transfer to the slime.
Soft clay: Soft clay is another crucial ingredient in the glue-free slime recipe. It adds elasticity and pliability to the slime and can be easily molded and stretched. Ensure that you choose a soft clay that is non-toxic and suitable for crafting purposes.

Conditioner: In the second slime recipe, conditioner serves as a replacement for glue. It helps to bind the cornstarch together and create a dough-like consistency. Opt for a conditioner that is free from silicones or other heavy ingredients, as these can affect the texture of the slime.
Cornstarch: Cornstarch is the main ingredient in the second slime recipe, providing a smooth and silky texture. It helps to thicken the mixture and create a moldable slime. Use a high-quality cornstarch for the best results.
Recipe 1: Hand Lotion and Soft Clay Slime
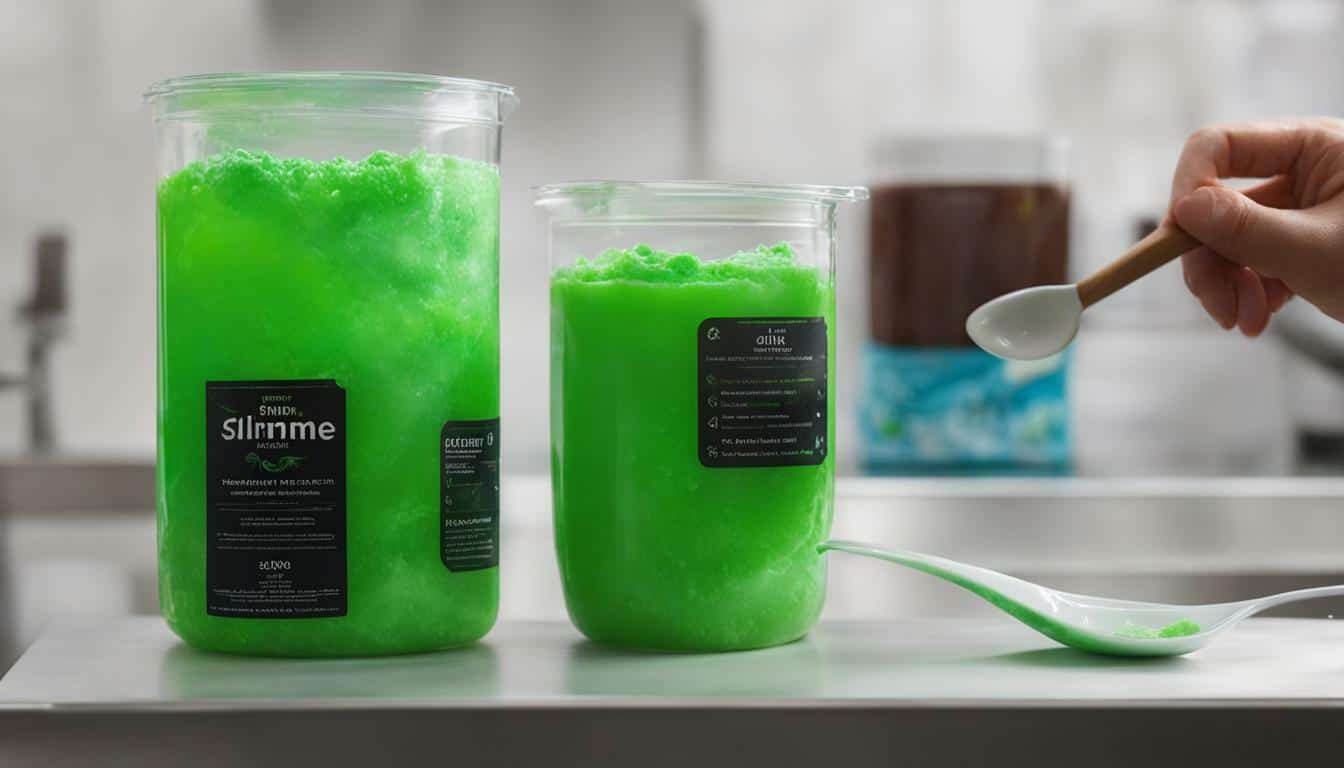
Ready to get your hands dirty? Let me guide you through the first recipe, which combines hand lotion and soft clay to create a gooey delight! To start, gather your ingredients. You will need a bottle of hand lotion and a block of soft clay. Choose a hand lotion with a thick consistency for best results. As for the soft clay, any brand will do as long as it is moldable and pliable. First, take a handful of soft clay and start working it in your hands. The warmth of your hands will help soften the clay, making it easier to mix with the lotion. Once the clay is soft and moldable, create a small well in the center. Next, squeeze a generous amount of hand lotion into the well you created. Start with a small amount and add more as needed to achieve the desired slime consistency. The lotion will act as a binding agent, turning the clay into a slimy texture. Now comes the fun part – kneading! Begin kneading the clay and lotion together, ensuring that they are thoroughly combined. You may notice the mixture becoming stickier at first, but continue kneading until it forms a smooth slime that doesn’t stick to your hands. And there you have it! Your very own slime made with just hand lotion and soft clay. This recipe offers a unique twist on traditional slime-making, providing a smooth and stretchy texture that’s a delight to play with. Experiment with different colors and add-ins to customize your slime and let your creativity flow!
Once you’re done playing with your slime, make sure to store it in an airtight container to keep it fresh. With proper care, your homemade slime can last for weeks of endless fun. So go ahead and enjoy the sensory satisfaction of making your own slime, no glue required!
And there you have it! Your very own slime made with just hand lotion and soft clay. This recipe offers a unique twist on traditional slime-making, providing a smooth and stretchy texture that’s a delight to play with. Experiment with different colors and add-ins to customize your slime and let your creativity flow!
Once you’re done playing with your slime, make sure to store it in an airtight container to keep it fresh. With proper care, your homemade slime can last for weeks of endless fun. So go ahead and enjoy the sensory satisfaction of making your own slime, no glue required!
If you prefer a slightly different twist, try this second recipe that uses conditioner and cornstarch to achieve a fluffy and texture-rich slime. It’s a fun and easy way to create your own DIY slime without using glue. Here’s how to make it:
- Start by gathering your ingredients:
- 1 cup of conditioner (any brand will do)
- A few drops of food coloring (optional)
- 2 cups of cornstarch

This conditioner and cornstarch slime recipe is a great alternative to traditional glue-based slime. It offers a different sensory experience, with a fluffy and moldable texture that’s sure to entertain kids and adults alike. Get creative by adding glitter, beads, or other add-ins to make your slime even more unique. Enjoy the process of making your own slime and let your imagination run wild!
Disclaimer: Adult supervision is recommended when making and playing with slime. Ensure that all ingredients used are non-toxic and safe for the intended users. Do not consume the slime, and keep it away from young children or pets.
Troubleshooting Tips:
If your slime is too sticky, try adding more cornstarch and kneading it in until it is no longer sticky. If it’s too dry, add a small amount of conditioner and work it into the slime. Remember, slime can be a bit finicky, so don’t be afraid to experiment and adjust the ingredients as needed.
| Pros | Cons |
|---|---|
| Made with commonly available ingredients | Requires kneading and mixing for desired consistency |
| Fluffy and moldable texture | Potential for messiness during the mixing process |
| Customizable with various colors and add-ins | May not have the same stretchiness as glue-based slime |
Comparing the Recipes
Now that you know both recipes, let’s compare them side by side to see which one suits your slime-making preferences the best! The hand lotion and soft clay slime recipe offers a smooth and stretchy texture, thanks to the combination of lotion and clay. It’s easy to work with and provides a satisfying sensory experience. On the other hand, the conditioner and cornstarch slime recipe results in a slightly firmer slime that has a more dough-like consistency. This recipe is great for those who prefer a thicker slime that holds its shape well.
Hand lotion and soft clay slime recipe:
- Texture: Smooth and stretchy
- Easy to work with
- Sensory experience: Soft and pliable
Conditioner and cornstarch slime recipe:
- Texture: Firmer and more dough-like
- Thicker consistency
- Shape retention: Holds its form well
Both recipes have their own unique qualities and it ultimately comes down to personal preference. If you enjoy a slime that’s more malleable and offers a sensory delight, the hand lotion and soft clay slime recipe is for you. On the other hand, if you prefer a slime that’s slightly thicker and holds its shape better, the conditioner and cornstarch slime recipe is the way to go.
Now that you have all the information, why not give both recipes a try and see which one becomes your go-to homemade slime? Get creative, experiment with different colors, and add fun add-ins like glitter or beads to make your slime truly unique. Both recipes are simple, fun, and perfect for slime-making enthusiasts of all ages.

| Hand Lotion and Soft Clay Slime | Conditioner and Cornstarch Slime | |
|---|---|---|
| Texture | Smooth and stretchy | Firmer and more dough-like |
| Consistency | Easy to work with | Thicker |
| Sensory Experience | Soft and pliable | Shape retention: Holds its form well |
Tips and Tricks for Perfect Slime
Want to take your slime-making skills to the next level? Check out these tips and tricks that will help you achieve the perfect slime every time!
1. Experiment with Ingredients
Don’t be afraid to try different combinations of ingredients to customize your slime. For the hand lotion and soft clay recipe, you can experiment with different types of clay to achieve different textures. Similarly, for the conditioner and cornstarch recipe, you can try using different types of conditioner to see how it affects the slime’s consistency. Have fun exploring and finding the perfect combination for your taste!
2. Add Color and Texture
Enhance the visual appeal of your slime by adding color and texture. You can mix in food coloring or liquid watercolors to create vibrant slime in any shade you desire. Additionally, you can incorporate fun textures like foam balls, glitter, or beads to give your slime a unique look and feel. The possibilities are endless, so get creative!
3. Adjust the Consistency
If your slime is too sticky, add a little bit more of the main ingredient (hand lotion or conditioner) and continue kneading until it reaches the desired consistency. If your slime is too stiff, try adding a small amount of water or lotion to soften it up. Remember, slime-making is all about experimentation, so don’t be afraid to make adjustments to achieve the perfect slime texture.

Follow these tips and tricks, and you’ll be well on your way to creating amazing slime without glue. Enjoy the sensory experience and have fun exploring the endless possibilities of homemade slime!
| Tips and Tricks for Perfect Slime | |
|---|---|
| Experiment with Ingredients | Try different combinations of ingredients to customize your slime. |
| Add Color and Texture | Mix in food coloring or incorporate fun textures to enhance the visual appeal of your slime. |
| Adjust the Consistency | Make adjustments to achieve the perfect slime texture by adding more of the main ingredient or softening it up with water or lotion. |
Exploring Variations and Add-Ins
Ready to unleash your creativity? Let’s explore the exciting world of slime variations and add-ins that will take your homemade slime to the next level! Whether you’re looking to add a touch of sparkle, create a unique texture, or experiment with fun scents, there are endless possibilities to customize your slime.
One popular variation is glitter slime. Simply add a sprinkle of glitter to your slime mixture and watch it sparkle and shine. You can use different colors of glitter to create a dazzling effect or mix different types of glitter for a multi-dimensional look. The possibilities are endless!
If you’re looking to add some crunch to your slime, consider incorporating beads or foam balls. These add-ins create a satisfying texture and provide a fun sensory experience. You can choose from a variety of colors and sizes to suit your personal preference.
For those who enjoy experimenting with scents, try adding a few drops of essential oils or scented extracts to your slime mixture. From calming lavender to sweet vanilla, the aroma will enhance your slime-making experience and leave your slime smelling delightful.

| Variation/Add-In | Description |
|---|---|
| Glitter | Adds sparkle and shine to your slime. Choose from a variety of colors for a dazzling effect. |
| Beads/Foam Balls | Provides a satisfying crunch and texture to your slime. Available in different colors and sizes. |
| Essential Oils/Scented Extracts | Adds a delightful aroma to your slime. Choose from a wide range of scents to suit your preference. |
These are just a few examples of the many variations and add-ins you can explore with your homemade slime. Get creative and have fun experimenting with different combinations to create your own unique slime creations. The possibilities are truly endless!
Cleaning Up and Storing Your Slime
Slime-making can be messy, but fear not! Here are some helpful tips on cleaning up and storing your homemade slime for long-lasting fun.
When it comes to cleaning up after a slime-making session, prevention is key. Before you start, lay down a plastic tablecloth or use a washable surface to avoid getting slime on furniture or carpets. Keep wet wipes or a damp cloth nearby to quickly wipe away any excess slime that may come in contact with surfaces.
Once you’re done playing with slime, gather the remaining slime into a ball and place it in a sealable container. This will prevent it from drying out or collecting dust. Make sure to choose a container that is properly sealed to maintain the slime’s texture and prevent it from sticking to the lid.
| Cleaning Tips | Storing Tips |
|---|---|
|
|
By following these cleaning and storing tips, you can ensure that your homemade slime stays in perfect condition for future playtime. So go ahead, get creative, and enjoy the endless possibilities of DIY slime-making!

Safety comes first when it comes to slime-making! Let’s go over some important precautions to ensure a safe and enjoyable slime experience.
1. Adult Supervision
When making slime, it’s important to have adult supervision, especially if young children are involved. While slime-making can be a fun activity, certain ingredients and techniques may require caution. Having an adult present can help to prevent accidents and ensure that the slime-making process is carried out safely.
2. Non-Toxic Ingredients
When selecting ingredients for homemade slime, be sure to choose non-toxic options. This includes the hand lotion, soft clay, conditioner, and cornstarch used in the glue-free slime recipes. Check the labels of these products to ensure they are safe to use, especially if there are any known allergies or sensitivities.
3. Keep Away from Young Children and Pets
While slime-making can be a fun activity for kids, it’s important to keep the slime away from young children and pets. Slime may look enticing to young children, but it’s not meant to be ingested. Pets may also be curious and try to play with or consume the slime, which can be harmful to them. Keeping slime out of reach of young children and pets ensures their safety.

4. Clean Up Properly
After a slime-making session, it’s essential to clean up properly. Slime can stick to surfaces and fabrics, so it’s important to wipe or wash them immediately. Avoid letting slime dry on furniture or clothing, as it can be difficult to remove. Additionally, remember to wash hands thoroughly after handling slime to prevent any potential irritation or transfer of ingredients.
5. Properly Store Homemade Slime
To ensure the longevity of homemade slime, it’s important to store it properly. Place the slime in an airtight container to prevent it from drying out. Keep the container away from heat and direct sunlight, as these can affect the texture and consistency of the slime. With proper storage, homemade slime can be enjoyed for an extended period.
By following these safety precautions, you can enjoy the fun and creativity of making homemade slime without any worries. Have a great time experimenting with different recipes and customizing your own unique slime creations!
The Joy of Slime-Making
Making slime isn’t just about the end result – it’s about the journey! Discover the joy and therapeutic effects of slime-making in this section. There’s something incredibly satisfying about mixing together ingredients and watching them transform into a stretchy, gooey masterpiece. Whether you’re a kid or a kid-at-heart, slime-making provides endless hours of entertainment and sensory exploration.
Not only is slime-making fun, but it can also be incredibly therapeutic. The act of kneading and stretching the slime can help relieve stress and anxiety. The soft, squishy texture provides a tactile experience that is calming and soothing. It’s a chance to let your creativity flow and create something unique with your own hands.
One of the best things about slime-making is that it’s incredibly easy. With just a few simple ingredients, you can create your own slime masterpiece in no time. The recipes in this section require just two ingredients each, making them perfect for beginners or anyone looking for a quick and easy slime-making experience. So grab your ingredients, roll up your sleeves, and let’s get slime-making!

- The Joy of Slime-Making
- The Therapeutic Effects of Slime-Making
- Simple and Easy Slime Recipes
- Get Started with Slime-Making Today!
Now that you’ve learned about the joy and therapeutic effects of slime-making, it’s time to dive into the fun and creative world of slime. Whether you prefer the hand lotion and soft clay recipe or the conditioner and cornstarch recipe, you can customize your slime to suit your preferences. Experiment with different colors, add glitter or beads for extra sparkle, and enjoy the sensory experience that slime-making offers. So gather your ingredients, get your mixing bowls ready, and let your imagination run wild!
| Slime Recipe | Ingredients | Difficulty Level |
|---|---|---|
| Hand Lotion and Soft Clay Slime | Hand lotion, soft clay | Easy |
| Conditioner and Cornstarch Slime | Conditioner, cornstarch | Easy |
Conclusion
In conclusion, making slime with 2 ingredients without glue opens up a whole new world of creativity and enjoyment, offering a simple yet exciting alternative to traditional slime recipes. With just a few household items, you can create slimy concoctions that are just as fun and satisfying as their glue-based counterparts.
The first recipe using hand lotion and soft clay provides a smooth and stretchy slime experience. By kneading the lotion into the clay, you can achieve a consistency that is both pliable and moldable. This recipe is perfect for those who prefer a more tactile and sensory slime-making adventure.
The second recipe involving conditioner and cornstarch offers a different texture and feel to the slime. Mixing in food coloring and kneading the slime until it reaches a soft, dough-like consistency allows for endless creative possibilities. This recipe is a great choice for those who enjoy a slightly firmer and more moldable slime.
Whether you choose the hand lotion and soft clay or the conditioner and cornstarch recipe, both options are simple and easy to follow. The beauty of these glue-free slime recipes is that you can experiment with different variations and add-ins to customize your slime creations. From glitter and beads to scents and colors, the possibilities are endless!
So, grab your ingredients, get creative, and start making your very own glue-free slime! Discover the joy of squishing, stretching, and molding your own slimy creations. It’s a fantastic way to unwind, engage your senses, and have a whole lot of fun!
FAQ
Q: Can I really make slime without using glue?
A: Yes, absolutely! These recipes use alternative ingredients to create slime without the need for glue.
Q: What are the two ingredients used in each recipe?
A: The first recipe uses hand lotion and soft clay, while the second recipe uses conditioner and cornstarch.
Q: How do I make slime using hand lotion and soft clay?
A: Start by working the clay until it is soft. Then, add hand lotion to the center of the clay and knead it until the desired slime consistency is reached.
Q: What are the steps for making slime with conditioner and cornstarch?
A: Begin by adding conditioner and food coloring to a bowl and stirring to mix in the color. Then, add cornstarch and knead the slime until it becomes soft and dough-like.
Q: Are these slime recipes easy to make?
A: Yes, these recipes are simple and beginner-friendly. They are a great alternative to traditional glue-based slime recipes.
Q: Can I customize the slime with different colors or add-ins?
A: Absolutely! Feel free to experiment with different food coloring or add glitter, beads, or scents to personalize your slime creations.
Q: How should I store my homemade slime?
A: To ensure the longevity of your slime, store it in a sealed container and keep it away from heat and direct sunlight.
Q: Are there any safety precautions I should be aware of?
A: Yes, it’s important to have adult supervision, choose non-toxic ingredients, and keep slime away from young children or pets.
Q: What are the benefits of slime-making?
A: Slime-making can provide sensory benefits and stress relief. Plus, it’s a fun and creative activity that allows you to make something with your own hands.
What are the 2 ingredients needed to make slime without glue?
To make slime without glue, you can create a simple recipe using just two ingredients. One option is to combine cornstarch and dish soap, which will result in a gooey and stretchy slime. Another alternative is to mix together shampoo and salt, producing a slimy texture perfect for sensory play. Try these easy methods to make slime with 2 ingredients.
Safety comes first when it comes to slime-making! Let’s go over some important precautions to ensure a safe and enjoyable slime experience.
1. Adult Supervision
When making slime, it’s important to have adult supervision, especially if young children are involved. While slime-making can be a fun activity, certain ingredients and techniques may require caution. Having an adult present can help to prevent accidents and ensure that the slime-making process is carried out safely.
2. Non-Toxic Ingredients
When selecting ingredients for homemade slime, be sure to choose non-toxic options. This includes the hand lotion, soft clay, conditioner, and cornstarch used in the glue-free slime recipes. Check the labels of these products to ensure they are safe to use, especially if there are any known allergies or sensitivities.
3. Keep Away from Young Children and Pets
While slime-making can be a fun activity for kids, it’s important to keep the slime away from young children and pets. Slime may look enticing to young children, but it’s not meant to be ingested. Pets may also be curious and try to play with or consume the slime, which can be harmful to them. Keeping slime out of reach of young children and pets ensures their safety.
4. Clean Up Properly
After a slime-making session, it’s essential to clean up properly. Slime can stick to surfaces and fabrics, so it’s important to wipe or wash them immediately. Avoid letting slime dry on furniture or clothing, as it can be difficult to remove. Additionally, remember to wash hands thoroughly after handling slime to prevent any potential irritation or transfer of ingredients.
5. Properly Store Homemade Slime
To ensure the longevity of homemade slime, it’s important to store it properly. Place the slime in an airtight container to prevent it from drying out. Keep the container away from heat and direct sunlight, as these can affect the texture and consistency of the slime. With proper storage, homemade slime can be enjoyed for an extended period.
By following these safety precautions, you can enjoy the fun and creativity of making homemade slime without any worries. Have a great time experimenting with different recipes and customizing your own unique slime creations!
The Joy of Slime-Making
Making slime isn’t just about the end result – it’s about the journey! Discover the joy and therapeutic effects of slime-making in this section. There’s something incredibly satisfying about mixing together ingredients and watching them transform into a stretchy, gooey masterpiece. Whether you’re a kid or a kid-at-heart, slime-making provides endless hours of entertainment and sensory exploration.
Not only is slime-making fun, but it can also be incredibly therapeutic. The act of kneading and stretching the slime can help relieve stress and anxiety. The soft, squishy texture provides a tactile experience that is calming and soothing. It’s a chance to let your creativity flow and create something unique with your own hands.
One of the best things about slime-making is that it’s incredibly easy. With just a few simple ingredients, you can create your own slime masterpiece in no time. The recipes in this section require just two ingredients each, making them perfect for beginners or anyone looking for a quick and easy slime-making experience. So grab your ingredients, roll up your sleeves, and let’s get slime-making!
- The Joy of Slime-Making
- The Therapeutic Effects of Slime-Making
- Simple and Easy Slime Recipes
- Get Started with Slime-Making Today!
Now that you’ve learned about the joy and therapeutic effects of slime-making, it’s time to dive into the fun and creative world of slime. Whether you prefer the hand lotion and soft clay recipe or the conditioner and cornstarch recipe, you can customize your slime to suit your preferences. Experiment with different colors, add glitter or beads for extra sparkle, and enjoy the sensory experience that slime-making offers. So gather your ingredients, get your mixing bowls ready, and let your imagination run wild!
| Slime Recipe | Ingredients | Difficulty Level |
|---|---|---|
| Hand Lotion and Soft Clay Slime | Hand lotion, soft clay | Easy |
| Conditioner and Cornstarch Slime | Conditioner, cornstarch | Easy |
Conclusion
In conclusion, making slime with 2 ingredients without glue opens up a whole new world of creativity and enjoyment, offering a simple yet exciting alternative to traditional slime recipes. With just a few household items, you can create slimy concoctions that are just as fun and satisfying as their glue-based counterparts.
The first recipe using hand lotion and soft clay provides a smooth and stretchy slime experience. By kneading the lotion into the clay, you can achieve a consistency that is both pliable and moldable. This recipe is perfect for those who prefer a more tactile and sensory slime-making adventure.
The second recipe involving conditioner and cornstarch offers a different texture and feel to the slime. Mixing in food coloring and kneading the slime until it reaches a soft, dough-like consistency allows for endless creative possibilities. This recipe is a great choice for those who enjoy a slightly firmer and more moldable slime.
Whether you choose the hand lotion and soft clay or the conditioner and cornstarch recipe, both options are simple and easy to follow. The beauty of these glue-free slime recipes is that you can experiment with different variations and add-ins to customize your slime creations. From glitter and beads to scents and colors, the possibilities are endless!
So, grab your ingredients, get creative, and start making your very own glue-free slime! Discover the joy of squishing, stretching, and molding your own slimy creations. It’s a fantastic way to unwind, engage your senses, and have a whole lot of fun!
FAQ
Q: Can I really make slime without using glue?
A: Yes, absolutely! These recipes use alternative ingredients to create slime without the need for glue.
Q: What are the two ingredients used in each recipe?
A: The first recipe uses hand lotion and soft clay, while the second recipe uses conditioner and cornstarch.
Q: How do I make slime using hand lotion and soft clay?
A: Start by working the clay until it is soft. Then, add hand lotion to the center of the clay and knead it until the desired slime consistency is reached.
Q: What are the steps for making slime with conditioner and cornstarch?
A: Begin by adding conditioner and food coloring to a bowl and stirring to mix in the color. Then, add cornstarch and knead the slime until it becomes soft and dough-like.
Q: Are these slime recipes easy to make?
A: Yes, these recipes are simple and beginner-friendly. They are a great alternative to traditional glue-based slime recipes.
Q: Can I customize the slime with different colors or add-ins?
A: Absolutely! Feel free to experiment with different food coloring or add glitter, beads, or scents to personalize your slime creations.
Q: How should I store my homemade slime?
A: To ensure the longevity of your slime, store it in a sealed container and keep it away from heat and direct sunlight.
Q: Are there any safety precautions I should be aware of?
A: Yes, it’s important to have adult supervision, choose non-toxic ingredients, and keep slime away from young children or pets.
Q: What are the benefits of slime-making?
A: Slime-making can provide sensory benefits and stress relief. Plus, it’s a fun and creative activity that allows you to make something with your own hands.


Leave a Reply