Are you ready to take your home cooking to the next level? Join me as we discover the step-by-step process of making cauliflower flour right in your own kitchen!
- Making cauliflower flour at home is a simple and healthy alternative to regular flour.
- Steaming the cauliflower and processing it in a food processor is the key to achieving the desired texture.
- Removing excess moisture from the cauliflower is essential for optimal results.
- Adding additional ingredients like an egg and cheese enhances the flavor and texture of the cauliflower flour.
- Baking the cauliflower mixture until dry and golden creates a versatile crust that can be used in various recipes.
Why Use Cauliflower Flour as a Substitute?
Before we dive into the nitty-gritty of making cauliflower flour, let’s explore why it’s a fantastic substitute for traditional flour. Cauliflower flour offers a range of benefits that make it a popular choice for those seeking a healthier alternative in their cooking and baking.
Health Benefits
Cauliflower flour is a nutritious option that is low in calories and carbohydrates. It is also gluten-free, making it suitable for individuals with gluten sensitivities or those following a gluten-free diet. Additionally, cauliflower flour is rich in vitamins, minerals, and fiber, promoting digestive health and providing essential nutrients for overall wellbeing.
Taste and Versatility
One of the great things about cauliflower flour is that it has a mild taste that blends well with other ingredients. It can be used in a variety of dishes, from pizza crusts and bread to pancakes and cookies. Cauliflower flour can add a nutritious twist to your favorite recipes without compromising on flavor.
Easy to Make
Making cauliflower flour at home is a straightforward process that requires minimal ingredients and equipment. By steaming fresh cauliflower and processing it in a food processor, you can create your own homemade cauliflower flour in no time. It’s a convenient and cost-effective way to enjoy the benefits of this versatile ingredient.
So, if you’re looking to incorporate a healthy and gluten-free alternative into your cooking and baking, cauliflower flour is definitely worth considering. With its numerous benefits, mild taste, and ease of preparation, it’s no wonder that cauliflower flour has become a favorite among health-conscious individuals and culinary enthusiasts alike.

Before we get started, let’s gather all the necessary ingredients and equipment to prepare our homemade cauliflower flour. Here’s what you’ll need:
- 1 large head of cauliflower
- Food processor
- Nut milk bag or clean dish towel
- Baking sheet
- Parchment paper
That’s it! These simple items will help you transform cauliflower into a versatile and healthy flour substitute.
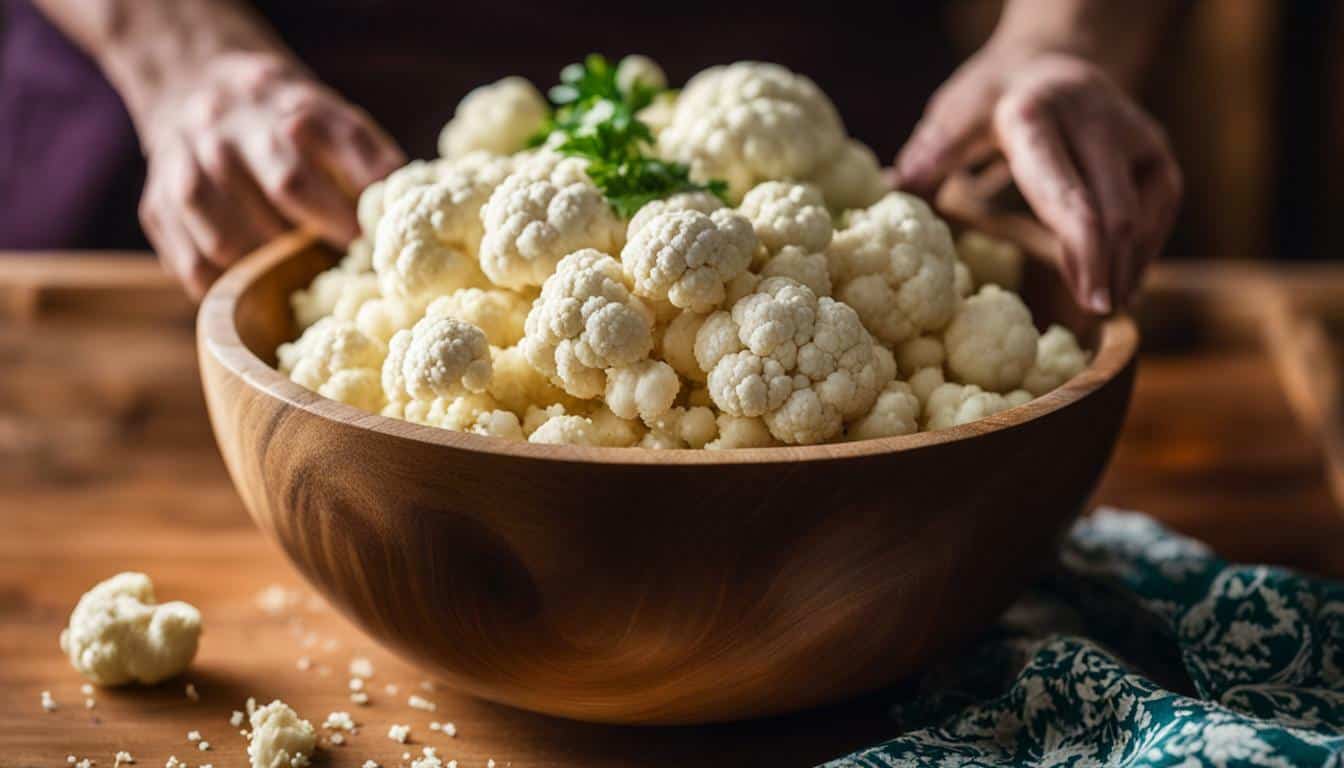
Now, let’s talk about the cauliflower itself. Choose a large head of cauliflower that is firm and free from brown spots or blemishes. Organic cauliflower is always a good choice if available.

With the ingredients and equipment in hand, we’re ready to embark on the journey of making our very own cauliflower flour. Let’s get started!
Steaming the Cauliflower
The first step in making cauliflower flour is to steam fresh cauliflower until it’s tender and easily mashed. Steaming the cauliflower helps to retain its nutrients and ensures a soft texture for easy processing. Here’s how you can steam cauliflower:
- Start by removing the leaves and stem from the cauliflower head.
- Place the cauliflower florets in a steamer basket or a colander set over a pot of boiling water.
- Cover the pot and steam the cauliflower for about 10-15 minutes, or until it becomes tender when pierced with a fork.
- Once steamed, remove the cauliflower from the heat and let it cool slightly.
Steaming the cauliflower ensures that it’s cooked evenly and retains its natural flavor. This step lays the foundation for creating cauliflower flour, as the steamed cauliflower will be processed further to achieve the desired texture.
Now that the cauliflower is steamed and ready, it’s time to move on to the next step: processing the steamed cauliflower into a fine, rice-like texture.
Processing the Steamed Cauliflower
After steaming the cauliflower, it’s time to transform it into a rice-like texture. This is an essential step in making cauliflower flour and it’s relatively simple to do. Follow these steps to process the steamed cauliflower:
- Transfer the steamed cauliflower to a food processor. Make sure the florets are evenly distributed inside the bowl.
- Pulse the cauliflower in short bursts until it resembles rice. Be careful not to overprocess it, as it can turn into a puree.
- If you don’t have a food processor, you can use a blender or grate the cauliflower with a box grater. These methods may require more effort, but they can still yield good results.
Processing the steamed cauliflower into a rice-like texture is essential for creating cauliflower flour. This texture ensures that the cauliflower can be easily transformed into a flour-like consistency during the subsequent steps of the process.
| Steaming the Cauliflower | Processing the Steamed Cauliflower |
|---|---|
| Retains nutrients | Transforms into a rice-like texture |
| Soft and tender | Prepares cauliflower for flour consistency |
With the steamed cauliflower processed into a rice-like texture, it’s time to move on to the next step and remove the excess moisture from the cauliflower.
Processing the Steamed Cauliflower
Once the steamed cauliflower has cooled down, it’s time to process it in a food processor until it reaches a rice-like consistency. This step is crucial in creating cauliflower flour, as it helps achieve the desired texture for your homemade alternative to regular flour.
To process the cauliflower, simply add the steamed florets to the food processor and pulse until they break down into small, rice-like grains. Make sure not to over-process it, as you don’t want it to turn into a puree. The texture should resemble rice or couscous, with small, uniform pieces.
Processing the cauliflower in batches may be necessary, depending on the size of your food processor. Be sure to scrape down the sides of the processor bowl in between pulses to ensure even processing. Once all the cauliflower has been processed, you’re ready to move on to the next step in making your cauliflower flour.
Processing the Steamed Cauliflower:
- Allow the steamed cauliflower to cool before processing it in a food processor.
- Add the cooled cauliflower florets to the food processor and pulse until it resembles rice.
- Process the cauliflower in batches, if needed, ensuring that the texture is uniform.
- Scrape down the sides of the food processor bowl in between pulses to ensure even processing.
Processing the cauliflower is a crucial step in transforming it into cauliflower flour. The rice-like consistency of the processed cauliflower will make it easier to incorporate into various recipes where regular flour is traditionally used.
Now that you have achieved the desired texture, it’s time to move on to the next step of removing the excess moisture from the cauliflower. This will help ensure that your cauliflower flour has a light and fluffy texture, perfect for all your baking needs.

To transform the cauliflower into flour, we need to remove as much moisture as possible. Let me show you a couple of techniques to do that.
The first method is to use a nut milk bag. Place the processed cauliflower into the bag and twist the top to seal it. Then, squeeze the bag firmly to release any excess moisture. You’ll be amazed at how much liquid comes out! This technique is simple and effective, leaving you with a dry cauliflower mixture that’s perfect for making flour.
If you don’t have a nut milk bag, don’t worry. You can also use a clean dish towel to remove the moisture. Simply place the cauliflower on the center of the towel, gather the corners together, and twist it tightly. Again, apply pressure to squeeze out the moisture. This method may require a bit more effort, but it gets the job done just as well.

Once you’ve successfully removed the moisture from the cauliflower, you’ll be left with a dry and crumbly mixture. It’s important to note that the texture of the cauliflower flour will impact the final outcome of your recipes. For a finer texture, you can continue to process the cauliflower in a food processor until it resembles a fine powder. However, if you prefer a slightly coarser texture, you can leave the cauliflower a bit more grainy. The choice is yours!
Table: Techniques for Removing Moisture from Cauliflower
| Technique | Pros | Cons |
|---|---|---|
| Nut Milk Bag | Easy to use and effective | Requires a specific kitchen tool |
| Clean Dish Towel | Accessible and doesn’t require extra equipment | May require more effort |
Now that you’ve successfully removed the moisture from the cauliflower, you’re ready to move on to the next step in making your own cauliflower flour. Stay tuned for the upcoming sections, where we’ll guide you through the process of mixing the cauliflower with additional ingredients and baking it to perfection!
Mixing the Cauliflower with Additional Ingredients
For added flavor and texture, we can mix the dry cauliflower with a few additional ingredients. Let’s explore some delicious options!
One popular choice is to incorporate an egg into the cauliflower mixture. This helps to bind the ingredients together and gives the crust a more dough-like consistency. If you’re looking for a creamier crust, try adding some soft goat cheese or another type of cheese of your choice. The cheese will not only add richness but also enhance the overall flavor of the crust.
For those who love Italian flavors, adding some Italian seasonings to the cauliflower mixture can take your crust to the next level. Think of aromatic herbs like oregano, basil, and garlic powder, which will infuse the crust with a delicious Italian essence.
| Ingredients: | Quantity: |
|---|---|
| Dry cauliflower rice | 2 cups |
| Egg | 1 |
| Soft goat cheese | 1/4 cup |
| Italian seasonings (oregano, basil, garlic powder) | 1 teaspoon each |
Once you have mixed the cauliflower with your chosen additional ingredients, you can shape the mixture into crusts and place them onto a baking sheet lined with parchment paper. This will prevent the crusts from sticking to the baking sheet and make for easy cleanup.
Bake the cauliflower crusts in a preheated oven at 425°F (220°C) for about 25-30 minutes or until they are dry and golden. For a crispier crust, you can flip them over halfway through baking and continue until both sides are dry. Once the crusts are cooked, you can add your favorite pizza toppings and bake again until the cheese is melted and bubbly. Enjoy!

- To enhance the crunchiness of the cauliflower crust, you can sprinkle a little grated Parmesan cheese on top before baking.
- If you prefer a thinner crust, you can spread the cauliflower mixture into a thinner layer on the baking sheet.
- Feel free to experiment with different seasonings and spices to create unique flavors that suit your taste preferences.
- If you’re making multiple crusts, you can freeze the extras for later use. Simply wrap them tightly in plastic wrap and store in the freezer for up to 3 months.
With these additional ingredients, you can transform your homemade cauliflower flour into a flavorful and versatile crust that will satisfy your pizza cravings while keeping your meal healthy and nutritious.
Baking the Cauliflower Flour Mixture
Once the cauliflower mixture is nicely combined, it’s time to shape it into a crust and bake it to perfection. Preheat your oven to 425°F (220°C) and line a baking sheet with parchment paper.
- Place the cauliflower mixture onto the prepared baking sheet and use your hands to press it into a thin, even layer. Make sure to leave some space around the edges for the crust to rise.
- Bake the crust in the preheated oven for about 15-20 minutes, or until it becomes golden and firm to the touch.
- Remove the crust from the oven and carefully flip it over using a spatula. Return it to the oven and bake for an additional 10-15 minutes, or until the other side is dry and crisp.
- Once the crust is cooked, it’s ready to be topped with your favorite ingredients. Add sauce, cheese, and any other toppings you desire, then return the pizza to the oven and bake for another 8-10 minutes, or until the cheese is melted and bubbly.
Enjoy your homemade cauliflower flour pizza crust hot and fresh out of the oven, or freeze the crusts for future use. They make a convenient and healthy alternative to traditional pizza crusts, packed with flavor and nutrients.
An Example of a Tasty Cauliflower Pizza Topping Combination:
- Spread a thin layer of tomato sauce or pesto on top of the crust.
- Add a generous amount of shredded mozzarella cheese or your favorite cheese blend.
- Top it off with sliced tomatoes, fresh basil leaves, and a sprinkle of dried oregano.
Get creative and experiment with different toppings to suit your taste preferences. Cauliflower flour pizza crust opens up a world of possibilities for delicious and guilt-free pizza creations.
| Topping | Description |
|---|---|
| Pepperoni | A classic pizza topping that adds a savory, spicy kick. |
| Mushrooms | Sliced mushrooms add an earthy flavor and unique texture to your pizza. |
| Olives | Pitted olives bring a briny and tangy taste to the table. |
| Spinach | Leafy greens like spinach add freshness and a healthy dose of vitamins. |
| Red Onions | Thinly sliced red onions provide a sweet and slightly pungent flavor. |
With a homemade cauliflower flour crust and your favorite toppings, you can savor every bite of pizza without any guilt. It’s a tasty way to incorporate more vegetables into your diet and enjoy a healthier version of a beloved comfort food.

Congratulations! You’ve successfully made your own cauliflower flour. Now, let’s discover the various ways you can incorporate it into your favorite recipes.
Cauliflower flour is a versatile ingredient that can be used in a variety of dishes. One popular way to use it is as a substitute for regular flour in baking. You can use cauliflower flour to make gluten-free pizza crusts, bread, muffins, and even pancakes. Simply replace the regular flour with an equal amount of cauliflower flour in your favorite recipes for a healthy twist.
Another way to use cauliflower flour is as a thickening agent in soups, sauces, and gravies. It adds a subtle flavor and helps to create a smooth and creamy texture. You can also use it as a coating for meats and vegetables before frying or baking. It adds a crispy and flavorful crust without the need for breadcrumbs or traditional flour.
When it comes to storing cauliflower flour, it’s important to keep it in an airtight container in a cool, dry place. This will help to preserve its freshness and flavor. You can also store it in the refrigerator or freezer for extended shelf life. Just make sure to label the container with the date to keep track of its expiration.
| Benefits of Using Cauliflower Flour | Recipes |
|---|---|
| Gluten-free | Cauliflower Pizza Crust |
| Low-carb | Cauliflower Bread |
| Rich in nutrients | Cauliflower Muffins |
| Versatile | Cauliflower Pancakes |

“I love using cauliflower flour in my baking. It adds a unique flavor and texture to my favorite recipes, and it’s a great way to sneak in some extra vegetables.” – Jane, avid home cook
So, why not get creative in the kitchen and start experimenting with cauliflower flour? The possibilities are endless, and you’ll be amazed at how this simple ingredient can transform your dishes into healthy and delicious creations.
Are You Ready to Try Cauliflower Flour?
- Replace regular flour with cauliflower flour in your favorite baking recipes.
- Use it as a thickening agent in soups, sauces, and gravies.
- Coat meats and vegetables with cauliflower flour for a crispy crust.
- Store cauliflower flour in an airtight container in a cool, dry place.
- Get creative and enjoy the benefits of this versatile ingredient!
Remember, cauliflower flour is not only a healthy alternative but also a delicious addition to your culinary repertoire. Start incorporating it into your favorite recipes and discover a whole new world of flavors and textures!
Understanding the Nutrition of Cauliflower Flour
Before we delve deeper into the culinary possibilities of cauliflower flour, let’s take a moment to understand its nutritional profile and how it stacks up against traditional flour. Cauliflower flour is a low-calorie and low-carb alternative to regular flour, making it a popular choice for those following a gluten-free or low-carbohydrate lifestyle. It contains fewer calories and carbohydrates than traditional flour, making it a suitable option for individuals looking to manage their weight or blood sugar levels.
Cauliflower flour is rich in essential vitamins and minerals, including vitamin C, vitamin K, and folate. Vitamin C is a powerful antioxidant that supports the immune system and promotes healthy skin. Vitamin K is essential for blood clotting and bone health, while folate is important for cell growth and development.
Compared to regular flour, cauliflower flour is also a good source of dietary fiber. Fiber is beneficial for digestion and helps regulate blood sugar levels. It can also contribute to feelings of fullness, potentially aiding in weight management. Additionally, cauliflower flour is naturally gluten-free, making it a suitable option for individuals with gluten sensitivities or celiac disease.
| Nutrient | Cauliflower Flour (per 100g) | All-Purpose Flour (per 100g) |
|---|---|---|
| Calories | 25 | 364 |
| Carbohydrates | 5g | 76g |
| Dietary Fiber | 3g | 3g |
| Vitamin C | 46mg | 0.5mg |
| Vitamin K | 16mcg | 0.3mcg |
| Folate | 57mcg | 8mcg |
These nutritional differences highlight the potential health benefits of incorporating cauliflower flour into your diet. Whether you’re looking to reduce your carbohydrate intake, increase your fiber consumption, or try a gluten-free alternative, cauliflower flour provides a nutritious and versatile option for various culinary creations.

While cauliflower flour is an excellent choice, there are other alternatives available for those looking to venture beyond its unique flavor and texture. Exploring these alternatives can add variety to your recipes and cater to different dietary needs or preferences. Here are a few options to consider:
- Almond Flour: Made from ground almonds, almond flour is a popular gluten-free alternative. It has a slightly sweet and nutty flavor, making it a great choice for baked goods like cookies and cakes.
- Coconut Flour: Derived from dried coconut meat, coconut flour is another gluten-free option. It adds a subtle coconut flavor to recipes and is high in fiber. However, it absorbs more liquid than other flours, so it’s essential to adjust the quantity in your recipes.
- Oat Flour: Made from ground oats, oat flour is a versatile and nutritious alternative. It has a mild flavor and works well in a variety of recipes, including pancakes, bread, and muffins.
- Buckwheat Flour: Despite its name, buckwheat is not related to wheat and is gluten-free. Buckwheat flour has a distinct, earthy flavor and is commonly used in pancakes, noodles, and bread.
These alternatives offer unique flavors and textures, allowing you to experiment and discover new culinary possibilities. Don’t be afraid to mix and match different flours to create your own custom blend that suits your taste and dietary needs.
Table: A Comparison of Cauliflower Flour Alternatives
| Flour | Taste | Texture | Gluten-free | Nutritional Benefits |
|---|---|---|---|---|
| Cauliflower Flour | Mild, slightly nutty | Light, fine | Yes | High in fiber and vitamins C and K |
| Almond Flour | Sweet, nutty | Moist, dense | Yes | High in healthy fats, vitamin E, and magnesium |
| Coconut Flour | Mild, coconutty | Dense, crumbly | Yes | High in fiber and medium-chain triglycerides |
| Oat Flour | Mild, slightly sweet | Soft, moist | Yes (if certified gluten-free) | High in fiber and contains beta-glucans that support heart health |
| Buckwheat Flour | Earthy, nutty | Dense, hearty | Yes | Rich in essential amino acids and antioxidants |
“Variety is the spice of life, and that certainly applies to flour alternatives. Embrace the diversity of flavors and textures these options offer, and let your culinary creativity soar!”
By exploring cauliflower flour alternatives, you can widen your culinary repertoire and cater to various dietary needs and preferences. Whether you opt for almond flour’s sweet and nutty flavor, coconut flour’s tropical touch, oat flour’s versatility, or buckwheat flour’s earthy notes, these alternatives provide a range of tastes and textures to enhance your cooking and baking adventures.

Congratulations on completing your journey to learn how to make cauliflower flour at home! Now, armed with this knowledge, it’s time to take your culinary skills to new heights with this wholesome and delicious alternative.
Making cauliflower flour at home is not only simple but also allows you to have full control over the quality of your ingredients. By steaming fresh cauliflower until tender and pulsing it in a food processor, you can create a fine flour-like texture that can be used in a variety of recipes.
Once you have your cauliflower flour, the possibilities are endless. Use it as a substitute for regular flour in baked goods like cakes, cookies, and bread. You can also use it to thicken sauces, make pizza crusts, or create gluten-free pancakes. The versatility of cauliflower flour makes it a fantastic option for those with dietary restrictions or anyone looking to incorporate more vegetables into their diet.
Not only is cauliflower flour a great gluten-free alternative, but it’s also packed with nutritional benefits. It’s low in carbs, making it suitable for those following a low-carb or keto diet. It’s also rich in vitamins and minerals, including vitamin C, vitamin K, and potassium. By using cauliflower flour in your recipes, you can add an extra dose of nutrients to your meals.
FAQ
Q: How do I make cauliflower flour at home?
A: To make cauliflower flour at home, start by steaming fresh cauliflower until tender. Then, pulse it in a food processor until it resembles rice. Next, squeeze out the moisture from the cauliflower using a nut milk bag or a clean dish towel. Mix the dry cauliflower with an egg, soft goat cheese or other cheese of your choice, and Italian seasonings. Spread the mixture onto a baking sheet lined with parchment paper and bake until dry and golden. Flip the crust over and bake again until the other side is dry. Once the crust is cooked, add your favorite pizza toppings and bake until the cheese is melted and bubbly. You can also freeze the crusts for future use.
Q: Why should I use cauliflower flour as a substitute?
A: Cauliflower flour is a great substitute for regular flour due to its health benefits, taste, and versatility in cooking and baking. It is low in carbohydrates and gluten-free, making it suitable for those with dietary restrictions. Cauliflower flour also adds a subtle nutty flavor and a light texture to dishes, enhancing their overall taste. It can be used in various recipes, from pizza crusts to pancakes, giving you a healthier alternative to traditional flour.
Q: What ingredients and equipment do I need to make cauliflower flour?
A: To make cauliflower flour at home, you will need fresh cauliflower, an egg, soft goat cheese or other cheese of your choice, Italian seasonings, a food processor, a nut milk bag or a clean dish towel, a baking sheet, and parchment paper. These are the basic ingredients and equipment required, but you can also experiment with additional flavorings and toppings for your cauliflower flour creations.
Q: How do I steam the cauliflower for making cauliflower flour?
A: To steam the cauliflower, first, cut it into florets. Then, place the florets in a steamer basket over a pot of boiling water. Cover the pot with a lid and steam the cauliflower for about 8-10 minutes or until it becomes tender. Test the tenderness by piercing the florets with a fork. Once the cauliflower is tender, remove it from the steamer and proceed with the next steps of making cauliflower flour.
Q: How do I process the steamed cauliflower to make cauliflower flour?
A: After steaming the cauliflower, transfer the florets to a food processor. Pulse the cauliflower until it resembles rice or small granules. Be careful not to over-process it, as it may turn into a puree. The goal is to achieve a rice-like texture that can be further processed into cauliflower flour.
Q: How do I remove the moisture from the cauliflower for making cauliflower flour?
A: To remove the moisture from the processed cauliflower, you can use a nut milk bag or a clean dish towel. Place the cauliflower rice in the bag or wrap it in the towel, then squeeze out the excess moisture. This step is essential for ensuring a dry cauliflower flour that will hold its shape during baking.
Q: Can I add additional ingredients to the cauliflower for making cauliflower flour?
A: Yes, you can enhance the flavor and texture of the cauliflower flour by adding additional ingredients. Some recommended options include mixing the dry cauliflower with an egg, soft goat cheese, or other cheese of your choice, as well as Italian seasonings. These additions will provide a richer taste and help bind the cauliflower flour together.
Q: How do I bake the cauliflower flour mixture?
A: Once you have mixed the cauliflower flour with the additional ingredients, spread the mixture onto a baking sheet lined with parchment paper. Shape it into a thin crust or desired shape. Bake the crust in a preheated oven at 400°F (200°C) for about 20-25 minutes or until it becomes dry and golden. Flip the crust over and bake for another 10-15 minutes until the other side is dry. Once the crust is cooked, you can add your favorite pizza toppings and bake until the cheese is melted and bubbly.
Q: Can I freeze the cauliflower flour crusts for future use?
A: Yes, you can freeze the cauliflower flour crusts for future use. After baking and cooling the crusts, wrap them tightly in plastic wrap or store them in airtight containers before placing them in the freezer. When you’re ready to use them, simply thaw the crusts in the refrigerator and proceed with adding your favorite toppings and baking as usual.
Q: How can I use cauliflower flour in cooking and baking?
A: Cauliflower flour can be used as a substitute for regular flour in various recipes. You can use it to make pizza crusts, bread, muffins, pancakes, and more. It provides a healthier alternative while maintaining the desired texture and taste. Experiment with different recipes and enjoy the benefits of cauliflower flour in your cooking and baking endeavors.
Q: What is the nutritional value of cauliflower flour compared to regular flour?
A: Cauliflower flour is low in carbohydrates and gluten-free, making it a suitable option for those following low-carb or gluten-free diets. It is also rich in fiber, vitamins, and minerals. Compared to regular flour, cauliflower flour has fewer calories and a lower glycemic index, making it a healthier choice for those watching their calorie intake or managing blood sugar levels.
Q: Are there alternative flours that can be used instead of cauliflower flour?
A: Yes, there are alternative flours available for those who prefer different options. Some popular alternatives to cauliflower flour include almond flour, coconut flour, and chickpea flour. These flours have their own unique characteristics and can be used in various recipes as substitutes for regular flour. Experiment with different flours to find the one that best suits your taste and dietary needs.
What is the Shelf Life of Homemade Cauliflower Flour?
The flour expiration date guide is particularly relevant when considering the shelf life of homemade cauliflower flour. Properly stored in an airtight container, cauliflower flour can last up to six months in the freezer and around three months in the refrigerator. However, factors such as moisture and exposure to air can shorten its lifespan, so it’s essential to keep an eye on the expiration date to ensure the flour’s quality and taste.

Leave a Reply